
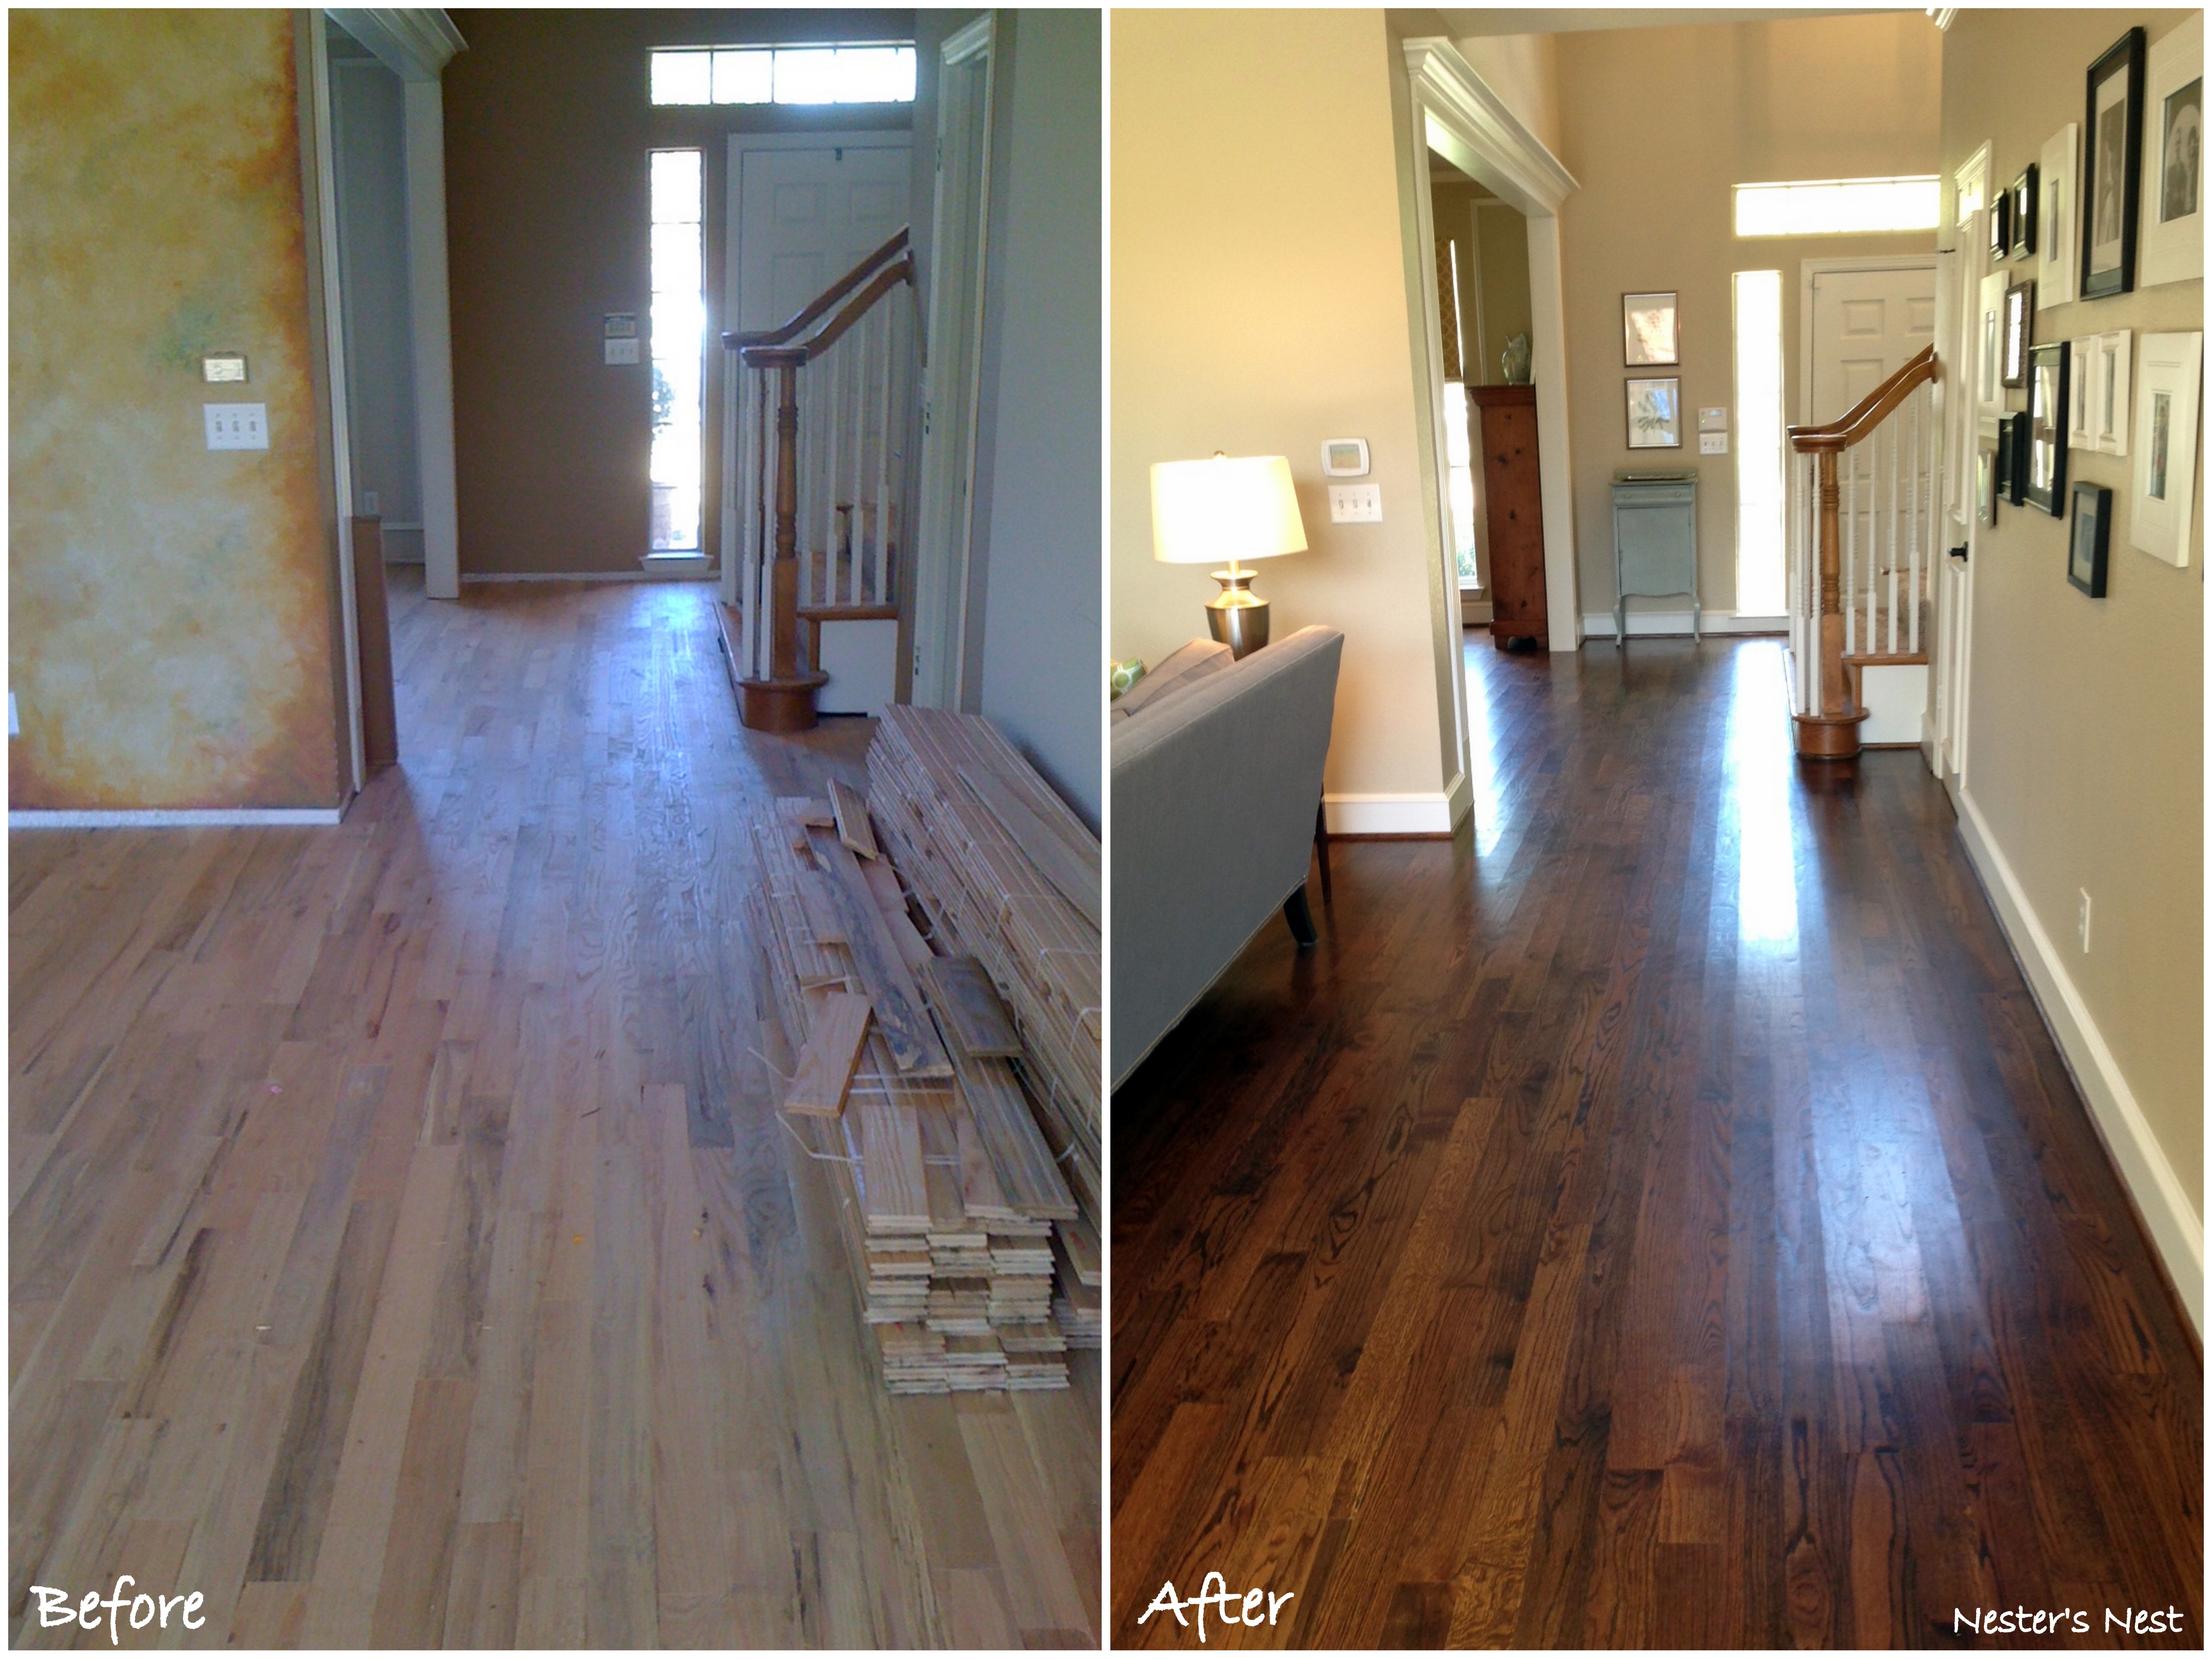
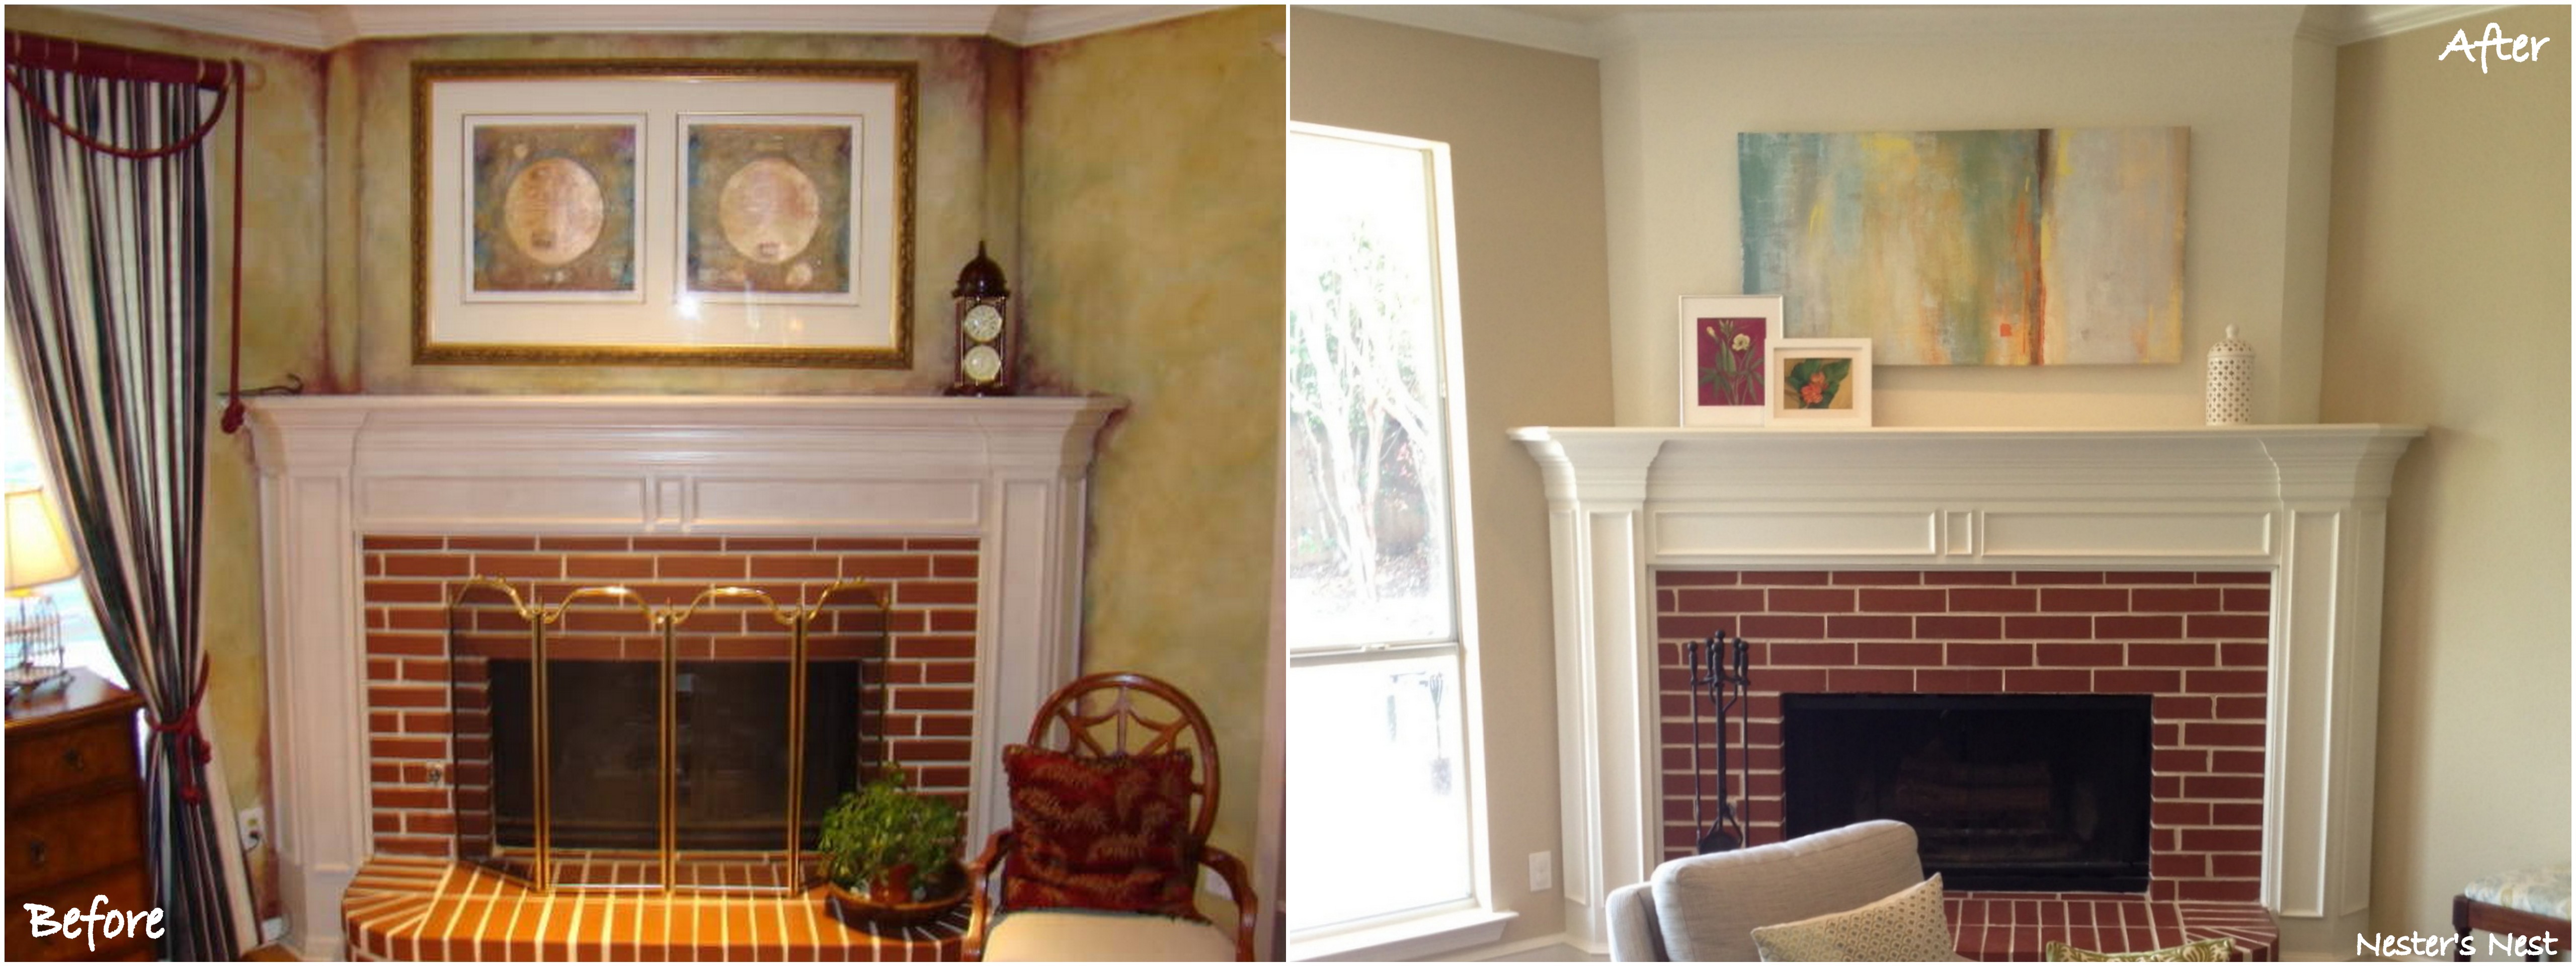
The time has come for me to finally share the before and after photos of my family room. Of all the rooms in our house, our family room took the greatest amount of patience. Here’s why…

Are you confused? I, too, was confused and even a bit speechless when I first saw it. That is how my walls were painted when we first purchased our house. Let’s take a closer look.

What you are seeing is not even a corner. It’s a “faux” corner/seam painted on a flat wall. Here is how all that faux insanity looked in its entirety.
*Note: Unfortunately, most of my before photos are shots with the previous owner’s furnishings. I wasn’t blogging when we first purchased the home so I wasn’t diligent with my ” before” photo taking.
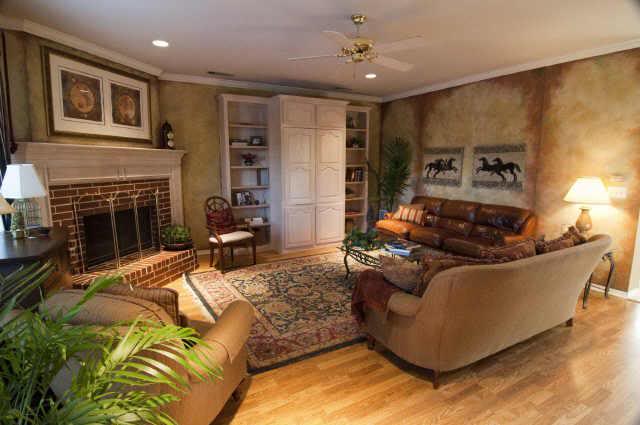
Honestly, the previous owner really had some lovely furnishings. Sadly, those crazy walls just kind of absorbed their nice things and sucked all the life out of the room.
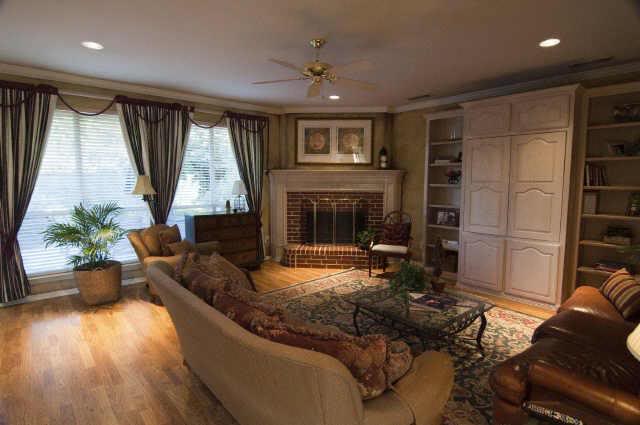
Luckily, the faux is long gone. Meet my new and improved family room:


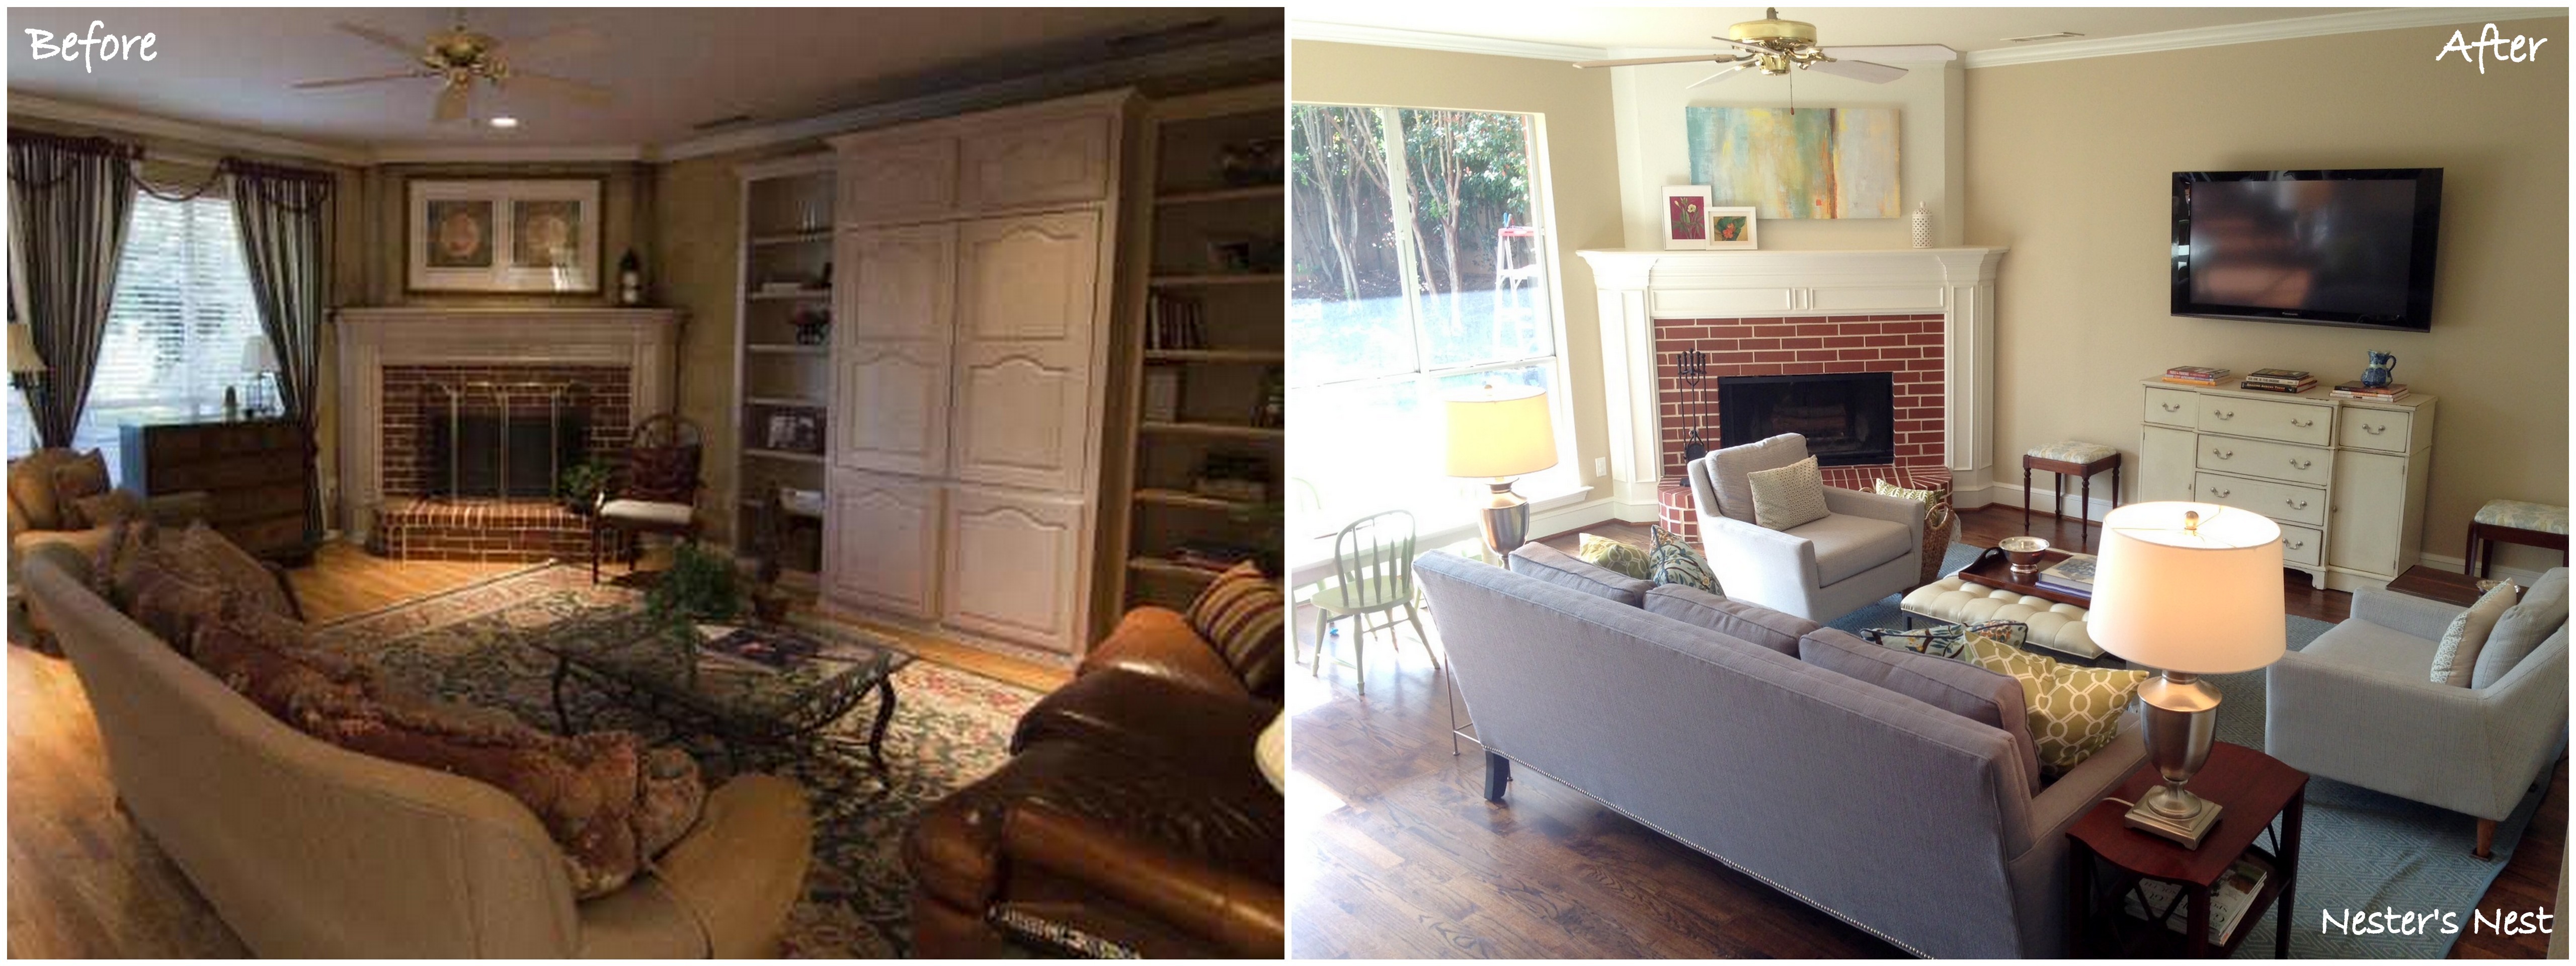
When I created the side by side comparisons, I was amazed by how much brighter the space now looks.
*Click on the images to enlarge the photos.

Now, I know what some of you are thinking. So, a few things.
1. Yes, the brass ceiling fan needs to go. We’ll get around to that one of these days.
2. Yes, in some of the photos you can spot my 3 year old snuggled up on the sofa watching a riveting episode of Team Umizoomi.
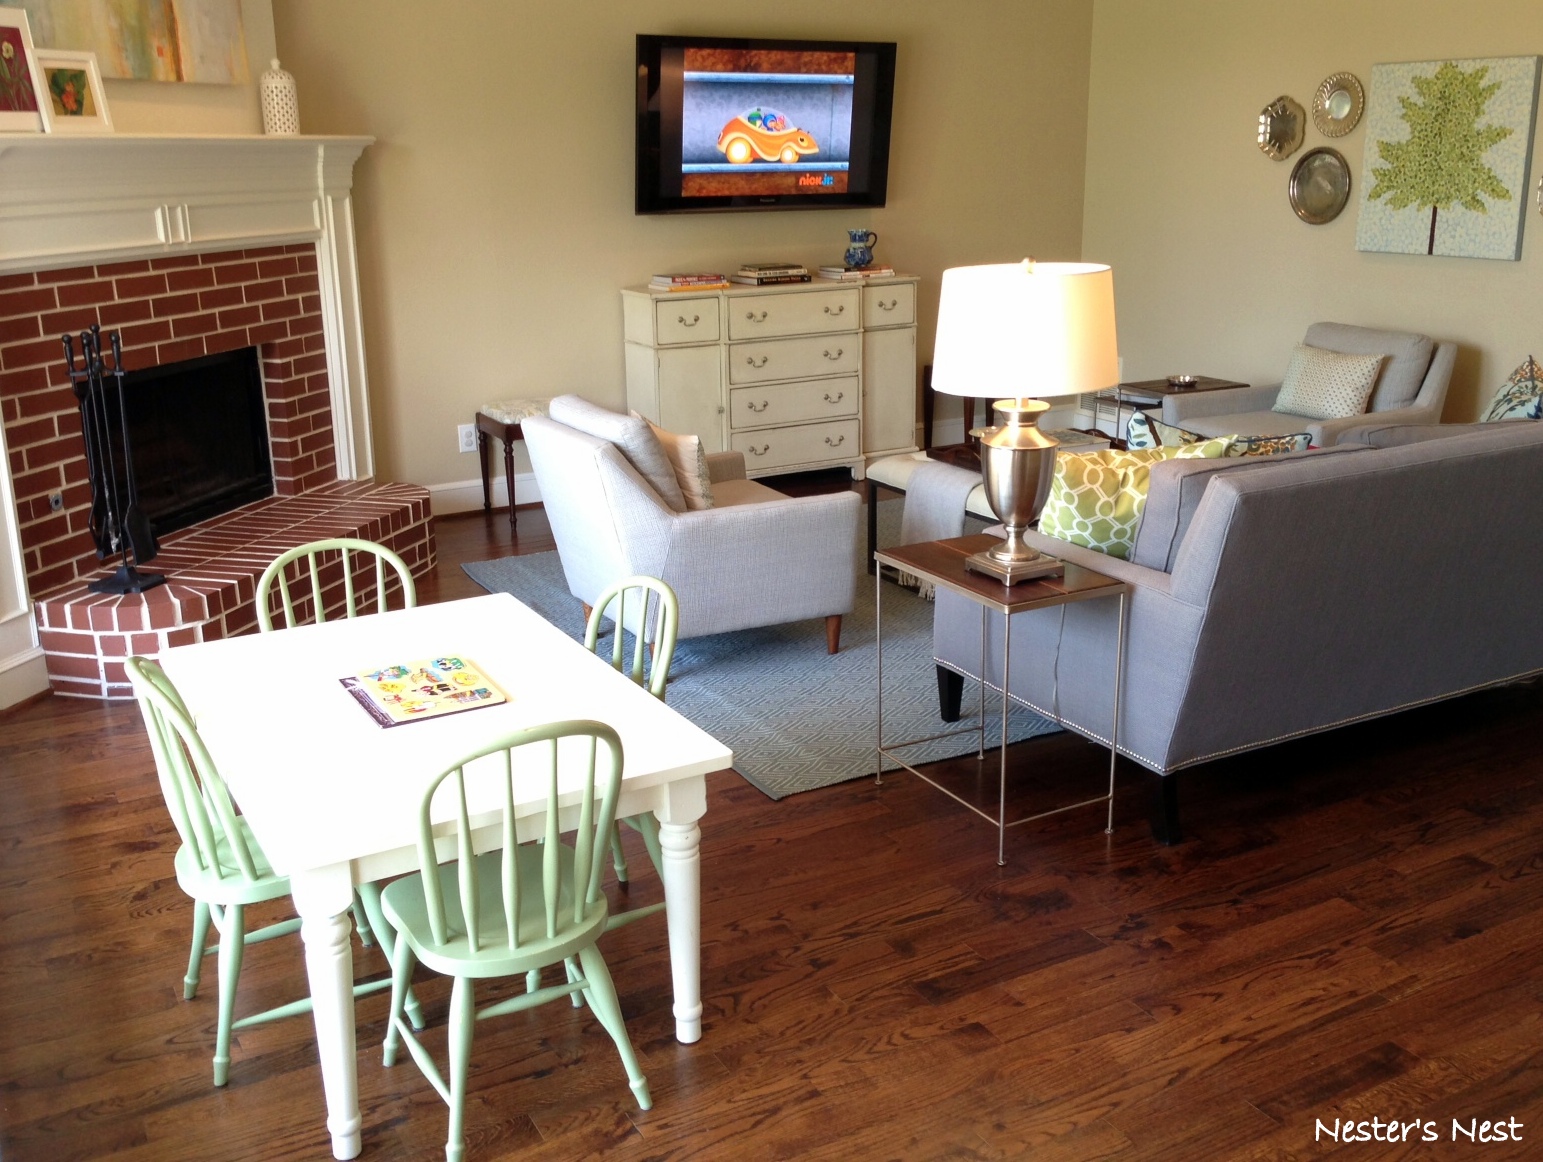
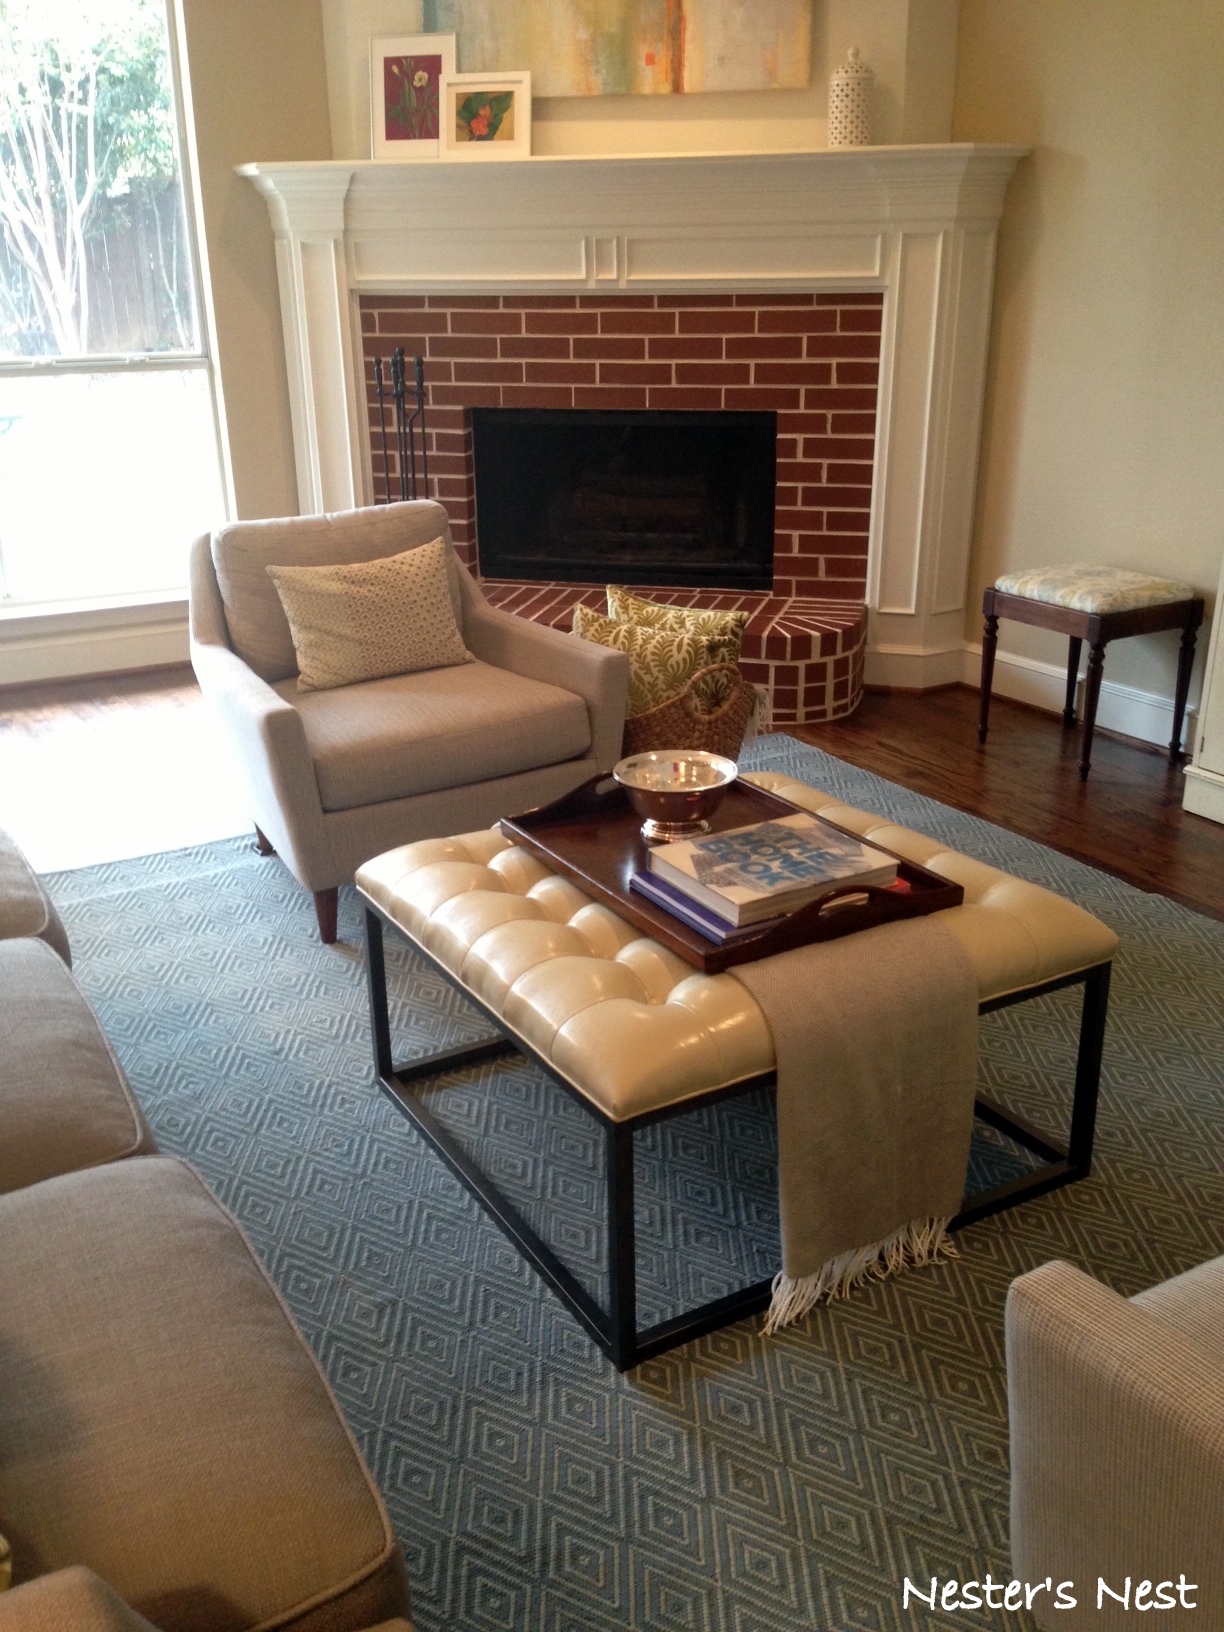
3. Yes, I desperately want to paint over the brick on my fireplace, but my husband would probably have a heart attack. He loves that red brick. Me? Not so much. After 9 years of marriage I have learned to pick my battles, so the red brick will stay….for now.
All those tidbits aside, we have accomplished so much! I’m especially pleased with the family-friendly aspects of the room.
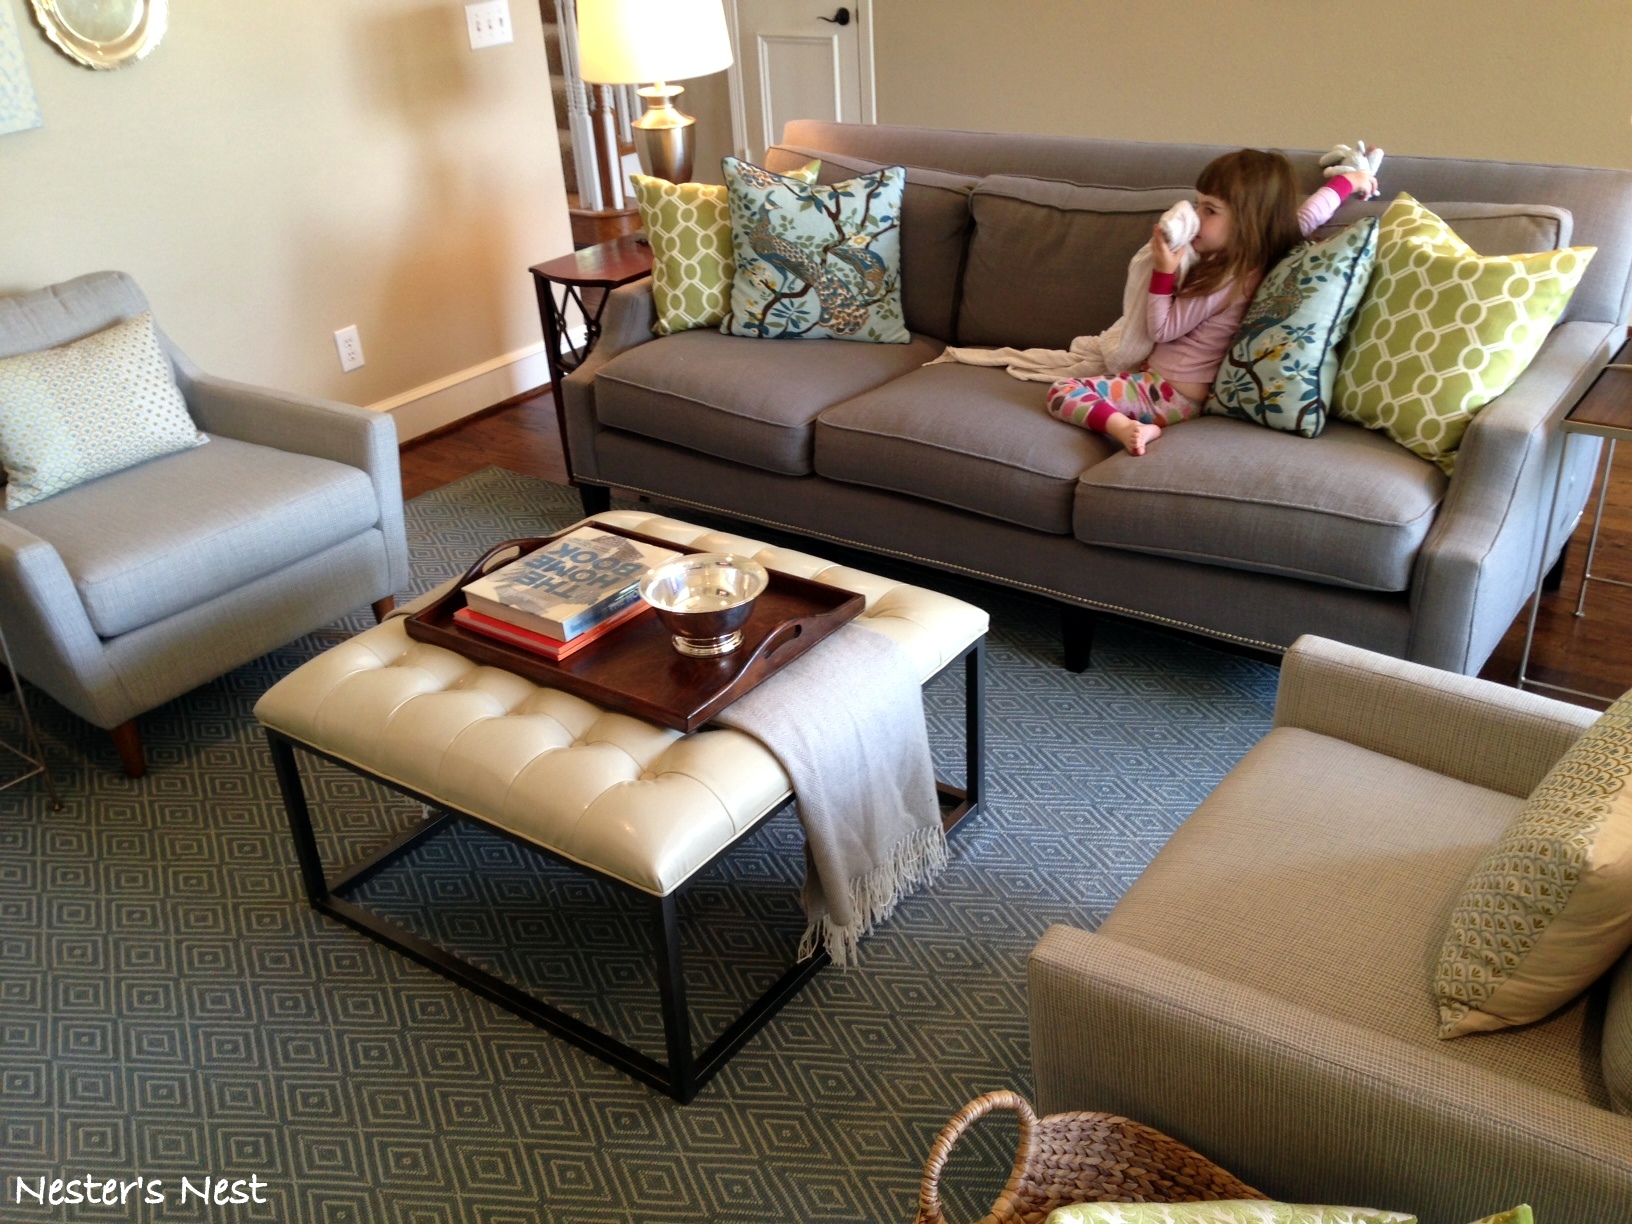 The indoor/outdoor rug, leather ottoman and gray toned fabrics hide all sorts of spills and muddy fingerprints. I actually stalked that sofa for almost two years before I finally purchased it. I lurked around the store and eyed the sofa so much that I’m pretty sure I made the employees nervous.

I’ve decided the rug is magical. It has survived everything from a red wine spill to muddy paw prints to ground-in play-doh. Amazingly, the rug doesn’t have a single stain and everything has been removed with only water. Incredible!
The kids table is also one of the smartest additions. My girls use it daily for eating, arts/crafts, playing games and completing puzzles. My girls also like that it is a space of their own.
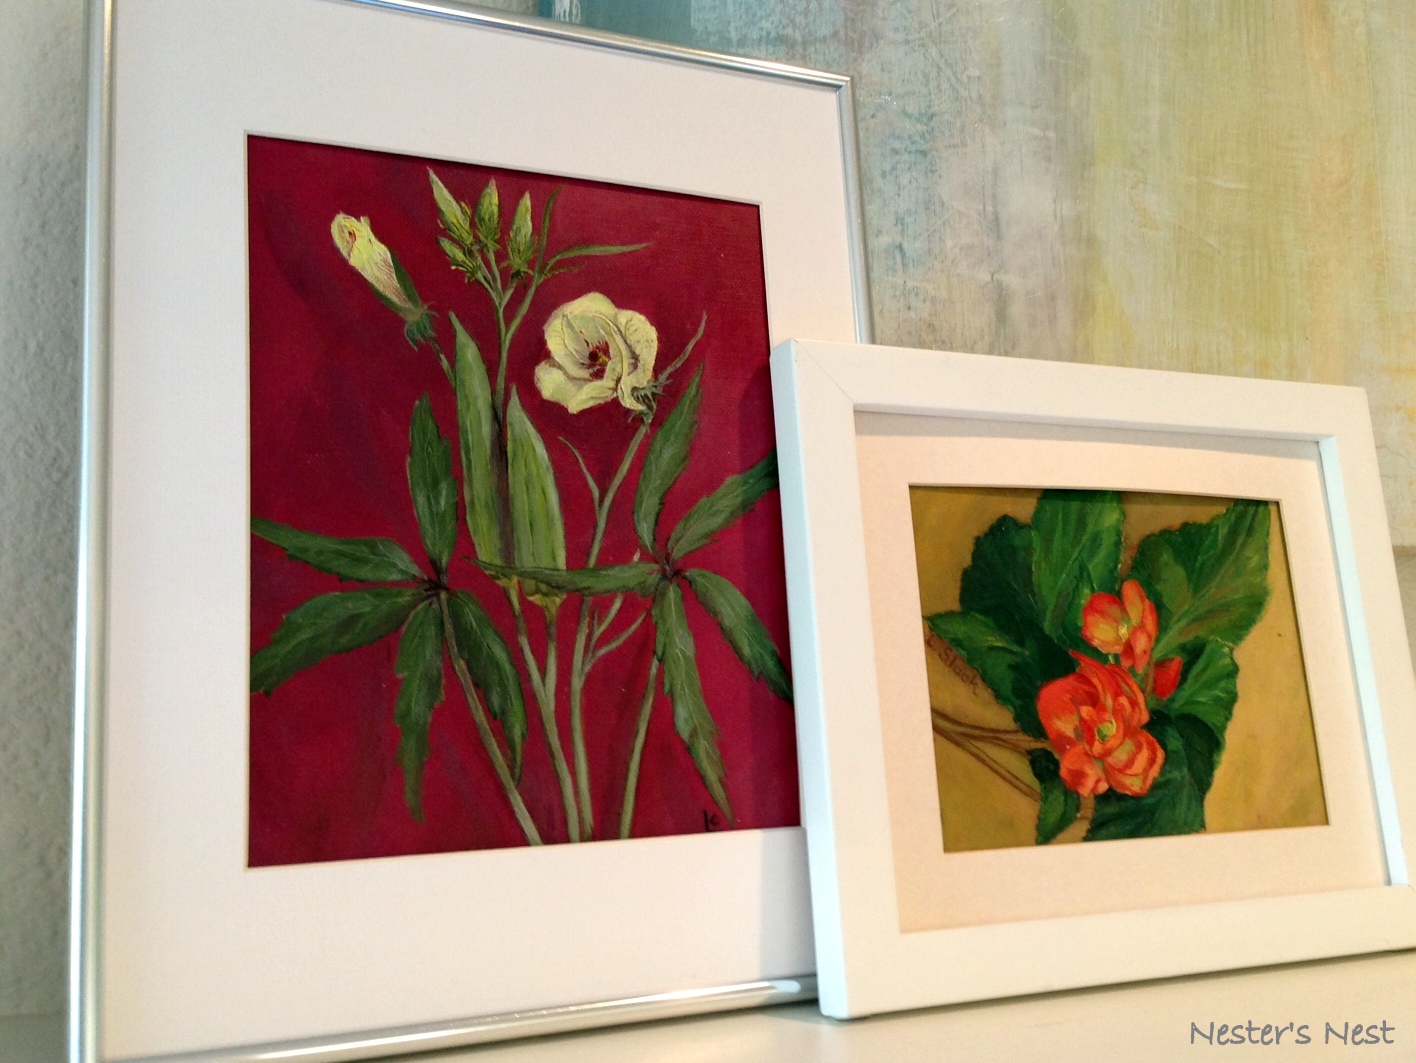
I’m also pleased I was able to balance out the newer furnishings of the room by adding a few older pieces with history. Every day I look at my mantle and smile at the botanicals my grandmother painted.
West Elm Everett Chair Crossweave, Steel/Ivory
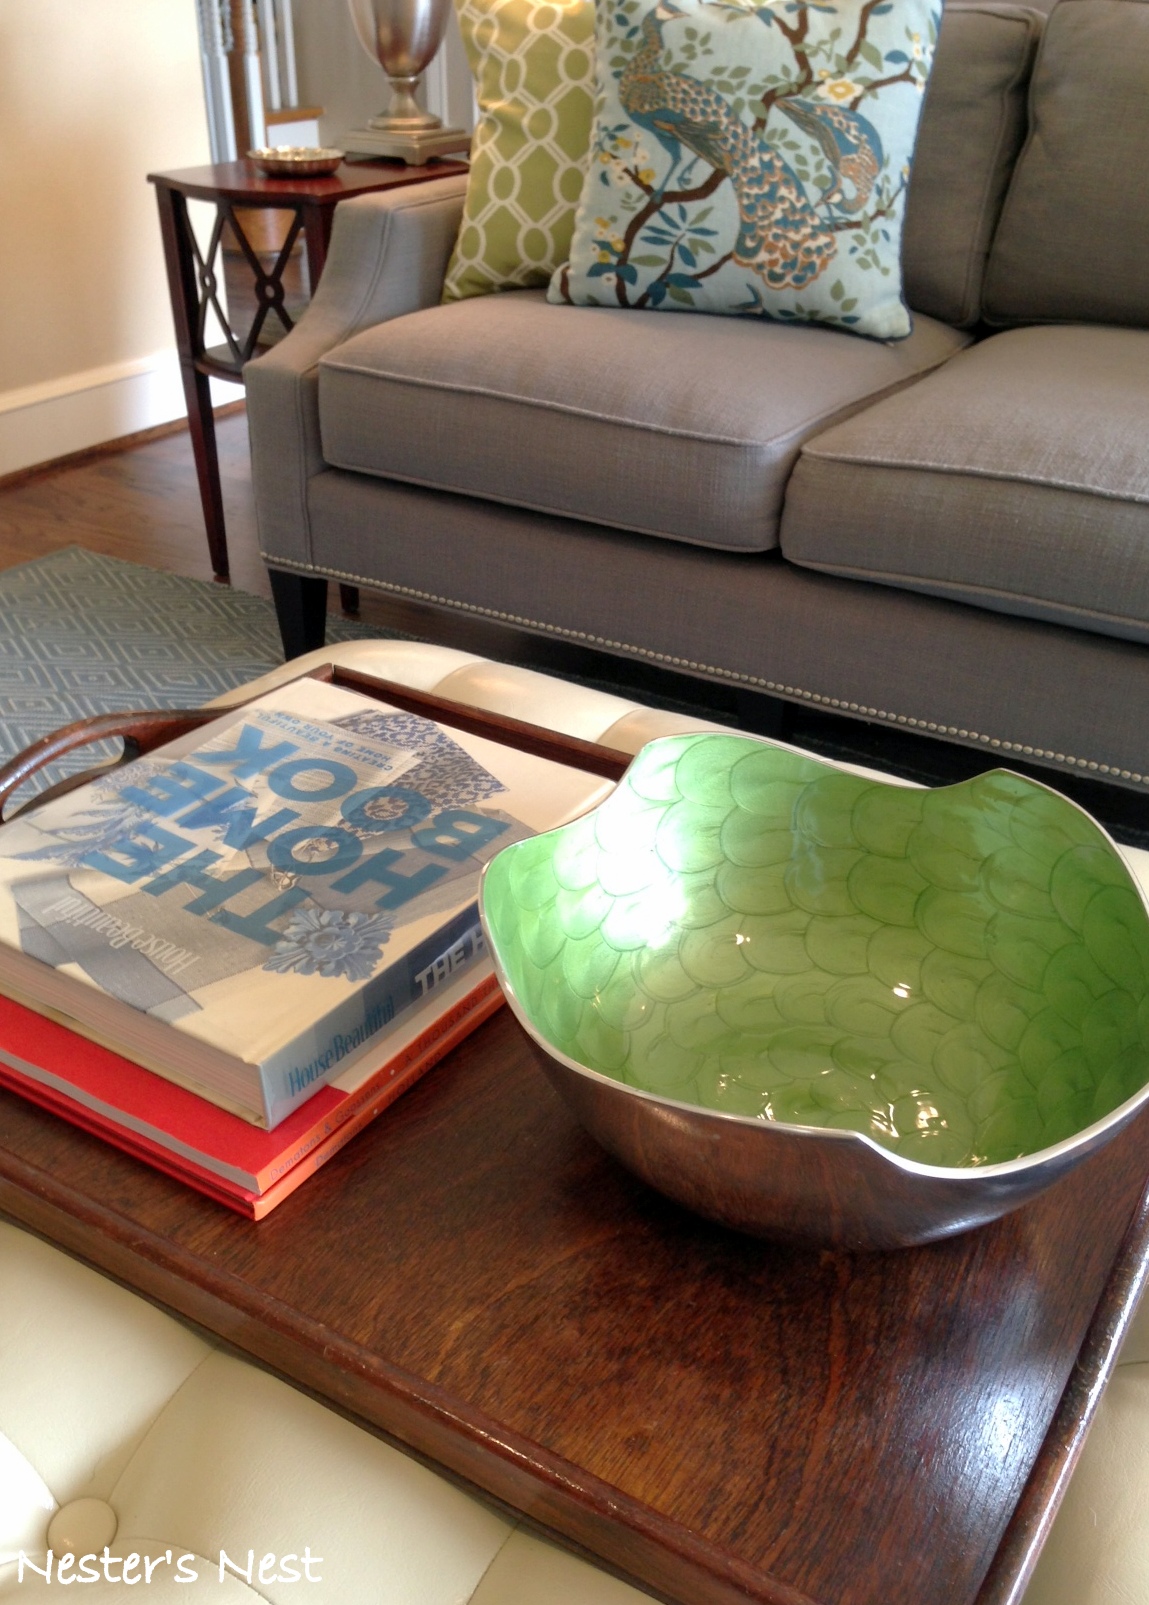
The antique tray on the ottoman was a wedding gift.
And some of you may recognize this vintage table I found on Craigslist.
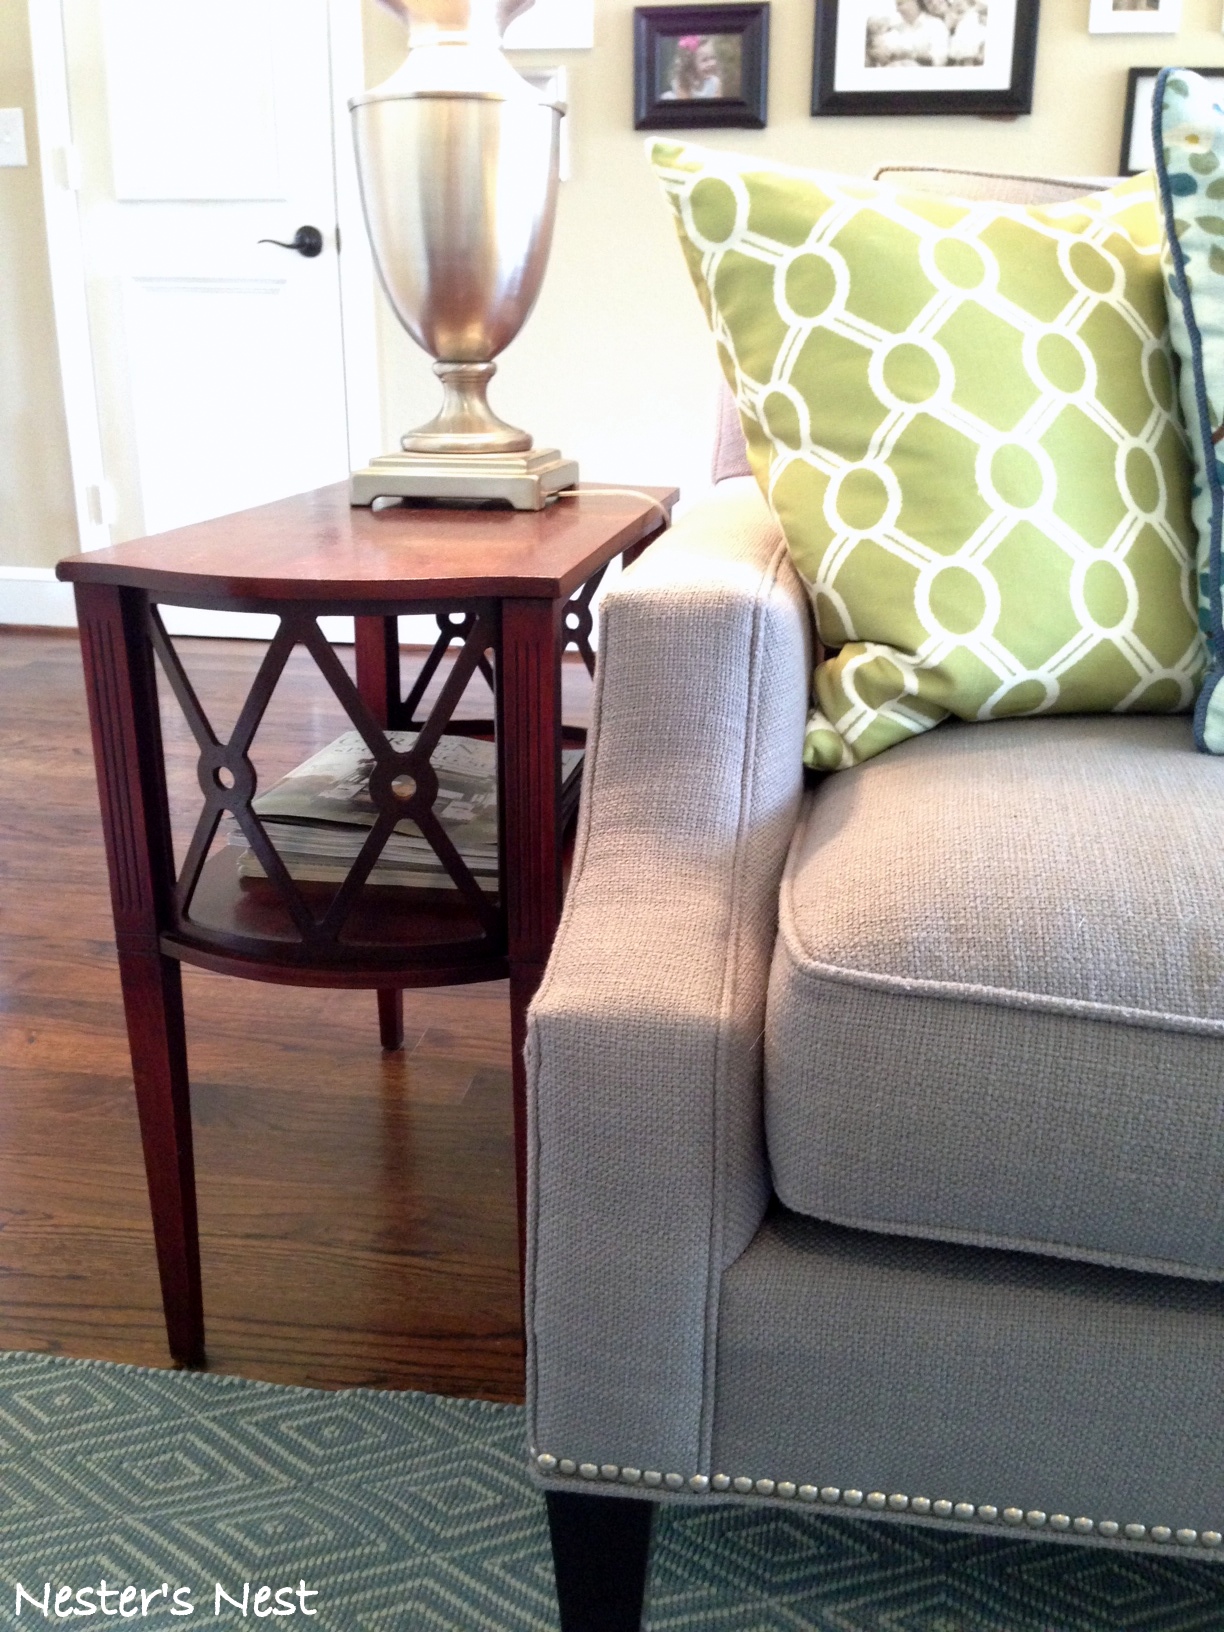
(How lucky was I to find those matching green pillows at Homegoods?)
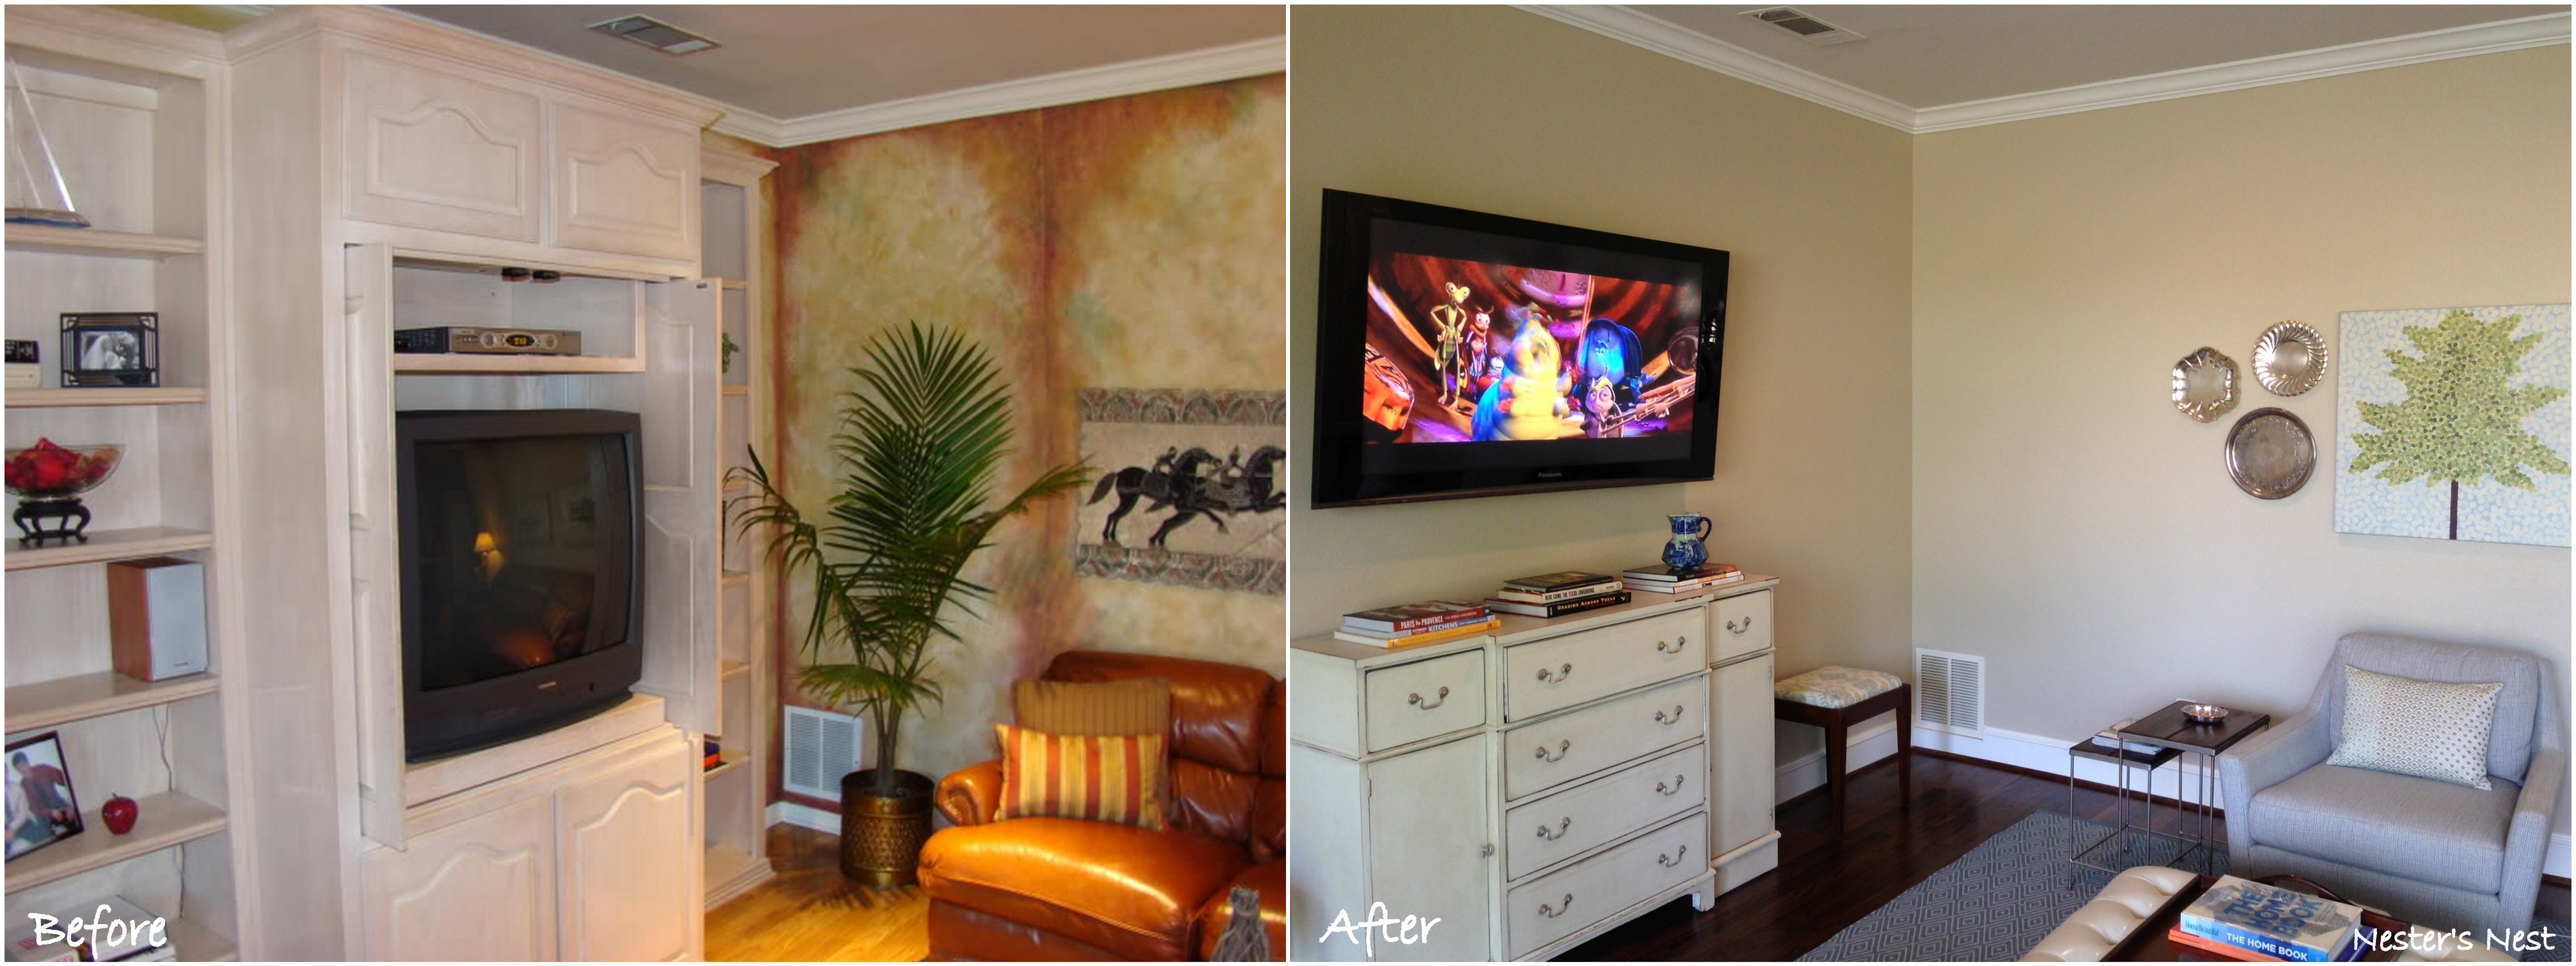
Also, did you notice the vintage sewing benches on either side of my media cabinet?
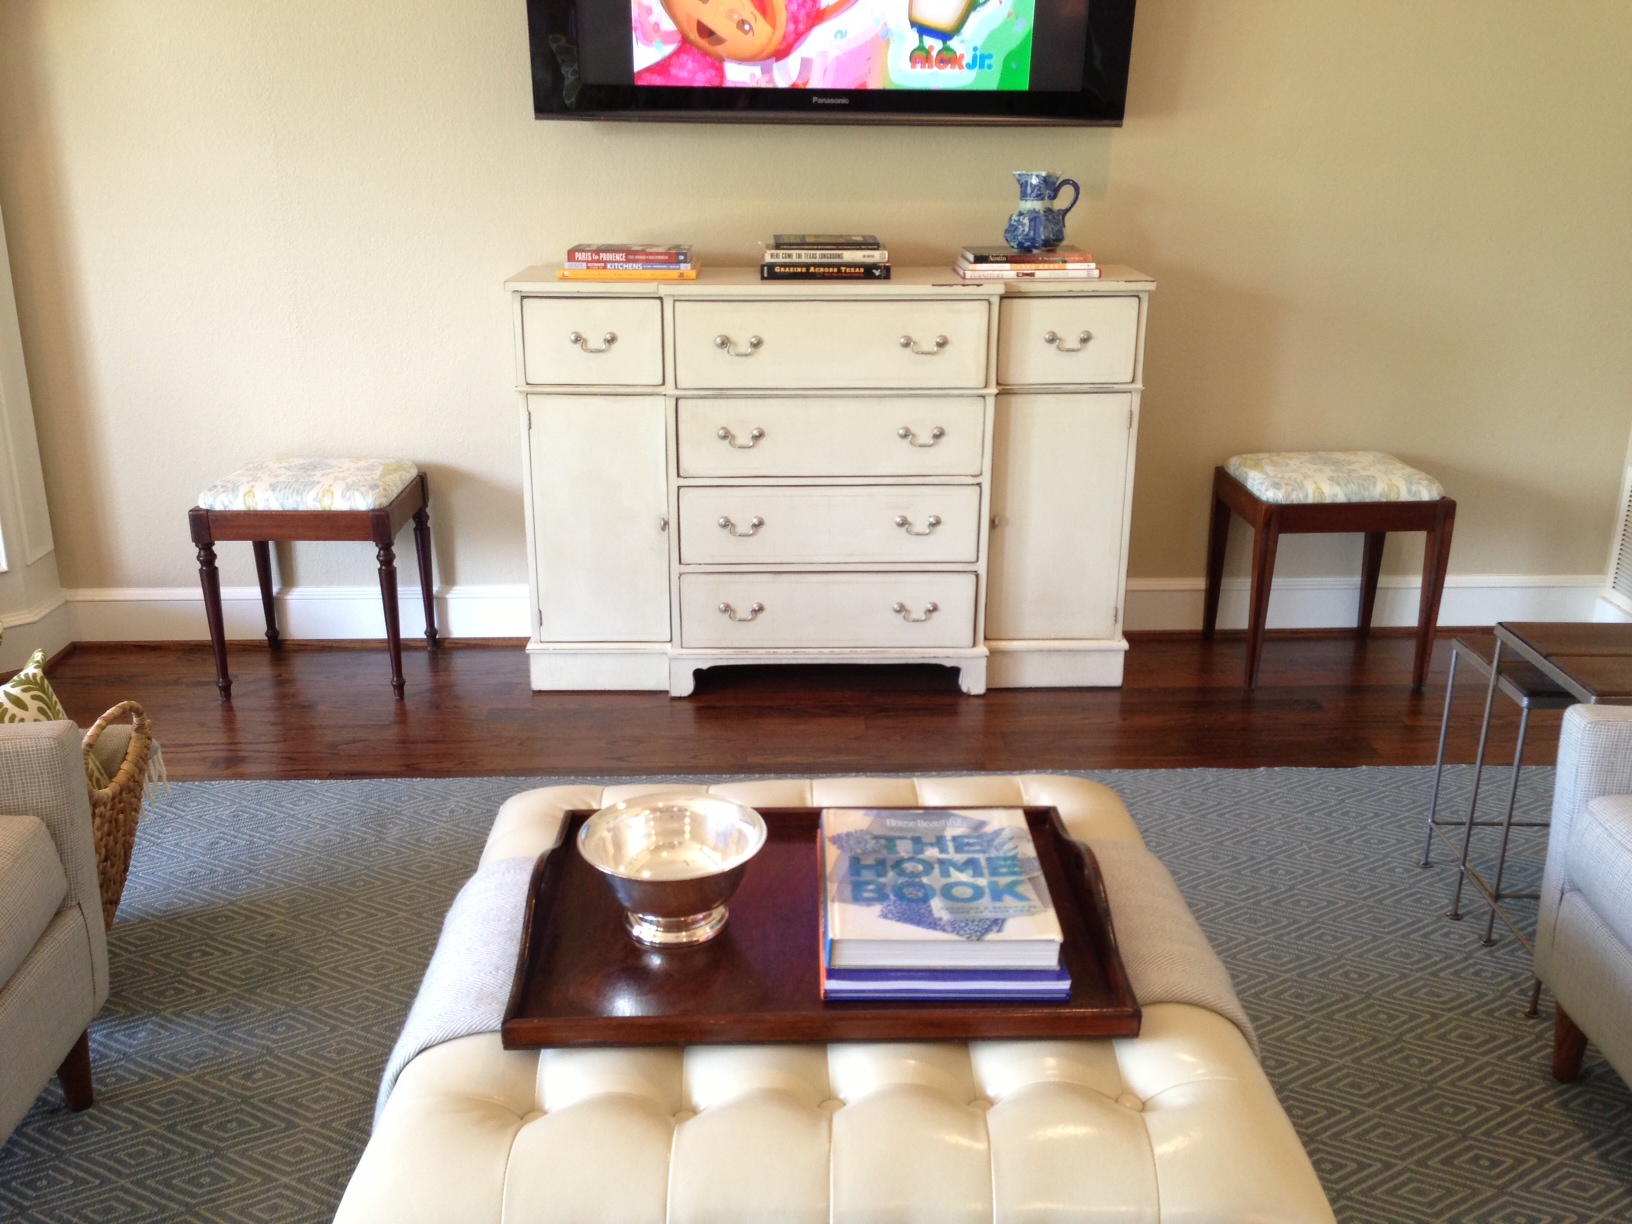

The last personal touch I added was my collection of vintage silver trays surrounding my tree painting.
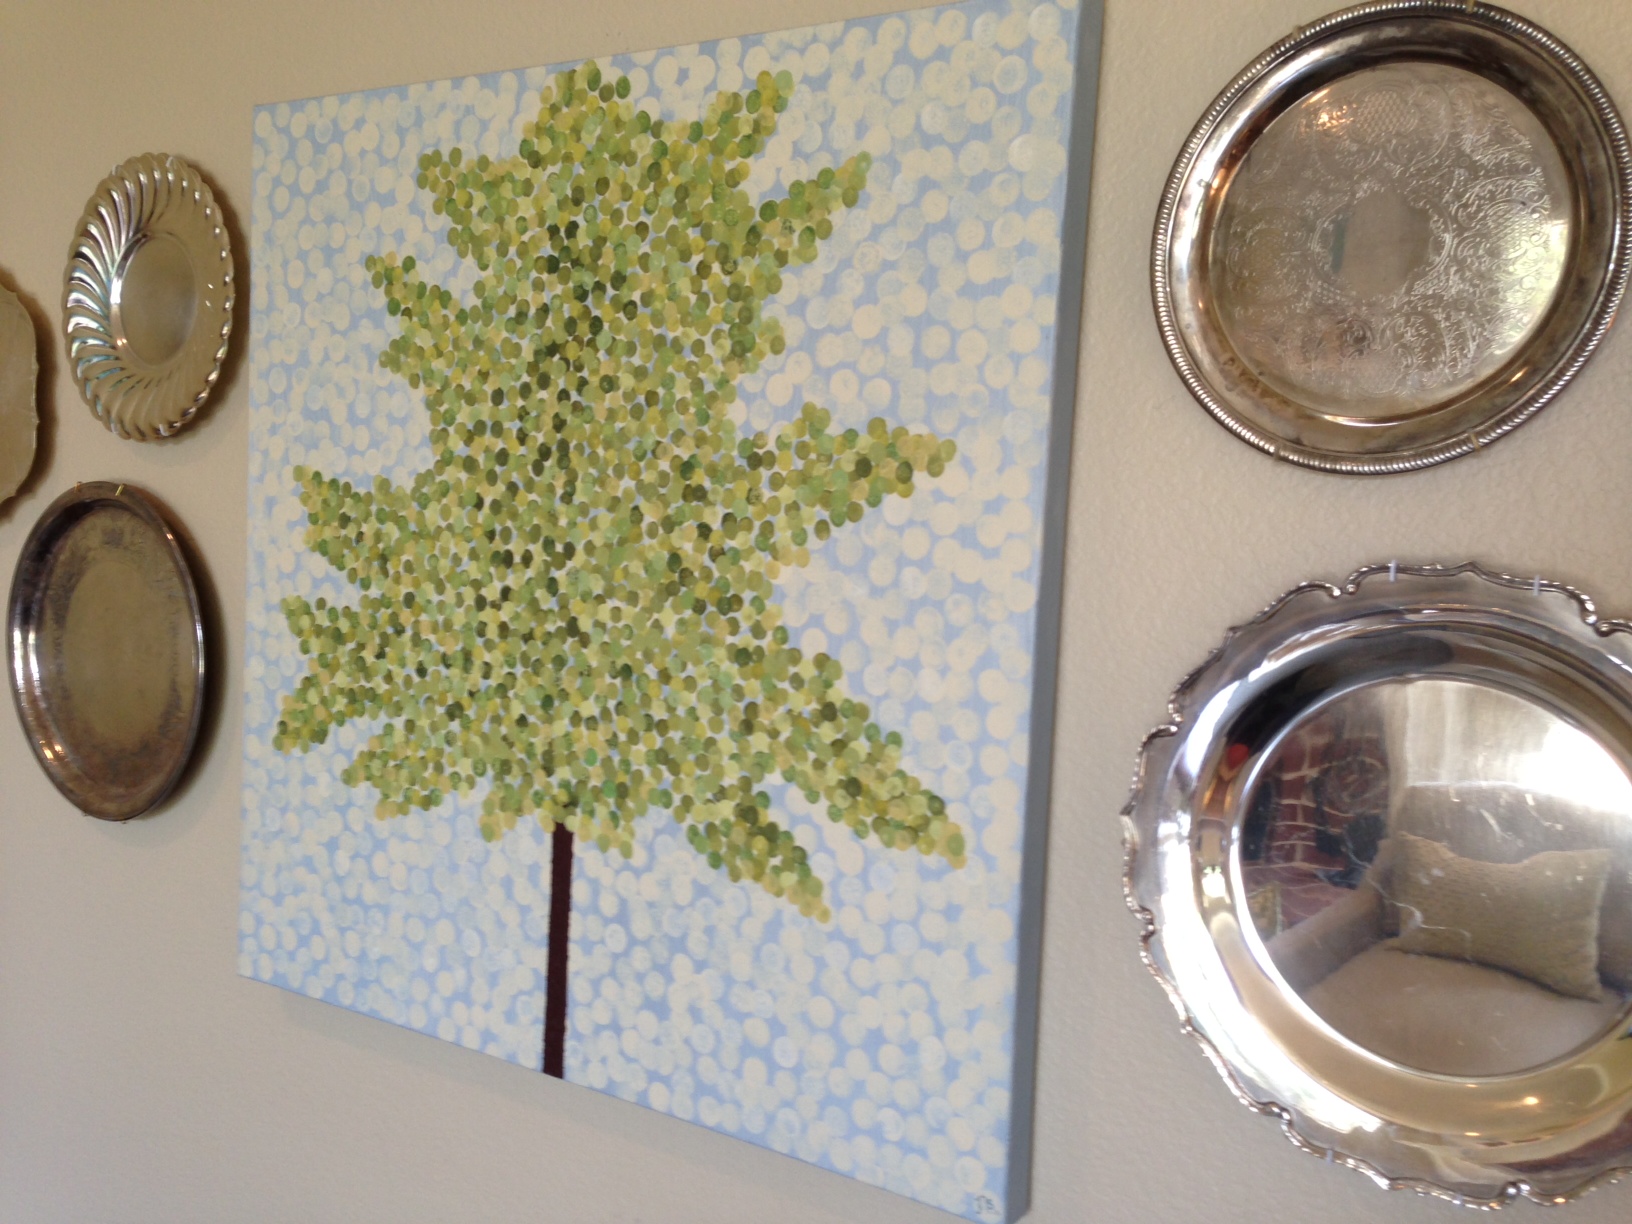 I needed something with reflective qualities in the room, but mirrors weren’t an option. A mirror on that same wall only reflects our monstrosity of a TV and makes my family room look like a sports bar. The trays were a perfect solution.
So, there you have it! This space now rivals my dining room as my favorite room in the house. My goal was to make the room functional, but current and budget friendly. I think I accomplished just that.
Details of the space:
1. Wall Color: Gobi Desert by Behr
2. Wall Color over fireplace: Alabaster by Sherwin Williams
4. Sofa: Weir’s Furniture
5. Accent Chairs: West Elm Everett Chair
6. Ottoman: Healy Cream Leather Ottoman purchased at Overstock.com
7. Rug: Diamond Slate Indoor/Outdoor rug by Dash & Albert
8. Green Pillows: Homegoods
9. Peacock Pillows: Custom made with Vintage Plumes in Jade by DwellStudio
10. Media Cabinet: Purchased at Round Top Antique Fair
11. Vintage Side Table: Craigslist
12: Metal and Wood Side Tables: Old Pottery Barn tables given new life with Rub-N-Buff.
13: Sewing Benches: One was purchased at Round Top and the other was a gift
14. Stainless Steel Urn Lamps: Homegoods (I love them because they won’t shatter if they get knocked over).
15. Floor: Oak Hardwoods stained in Antique Brown.


VERY cool. So did you remove the built in cabinets? How did you do that?
Yes, we removed the built-ins by just unscrewing them from the wall. They were way too big for the room and took up valuable space. We sold them on Craigslist for about $1,000. Major score!
I’ll be anxious to hear your reply comments! Good before and after! Lots of hard work! Well done!
Mom
Sent from my iPad
>
Everything just looks so pretty! That faux finish was HORRIBLE, it looked like mold was growing on the walls in one of the photos! Take pride in what you’ve accomplished not worry about what you have left to do 😉
Thank you, Susan! There will always be more to do, but I guess that’s part of the fun, right? And yes, I can’t tell you how bad that paint was in person. I edited my opinions on the matter significantly. 🙂
I have a faux finish on the basement walls, still need to tackle that myself.. As a homeowner we’re never done!
So lovely! It is so much brighter! And I love your furniture!
Thank you so much! I’ve really enjoyed slowly but surely pulling it all together.