
Meet the most time consuming, yet rewarding project I have done to date. Isn’t it pretty?

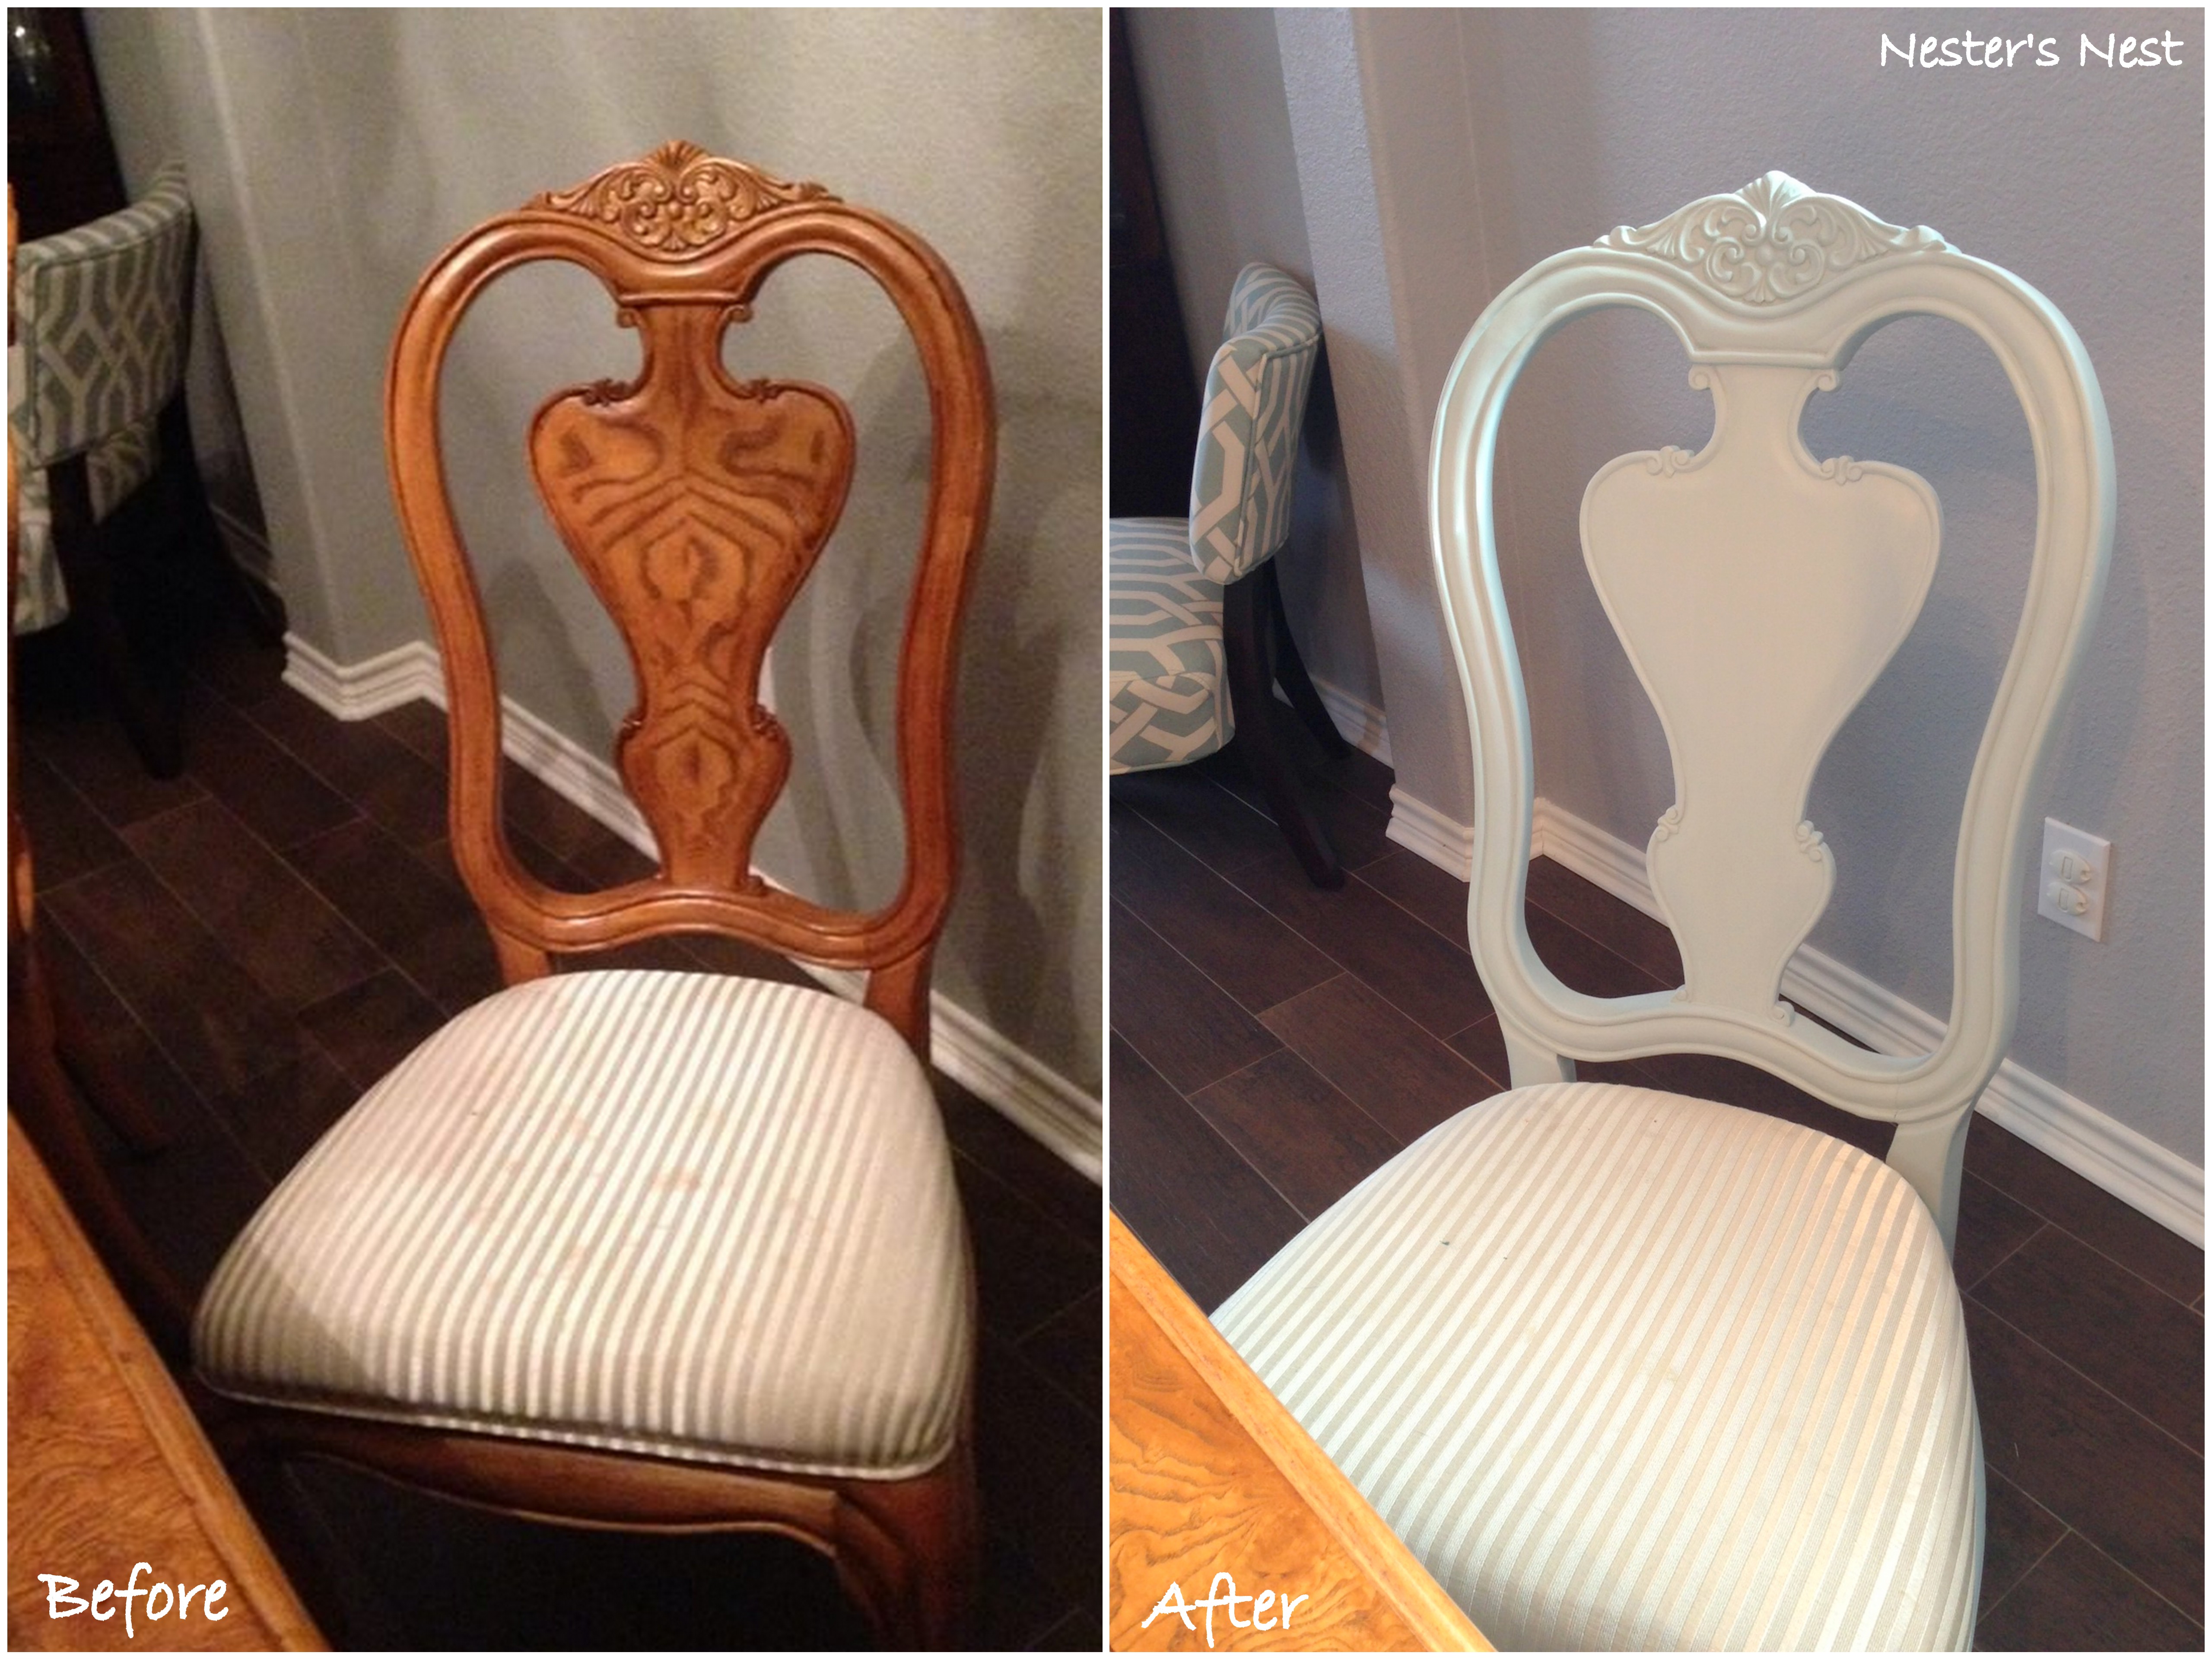
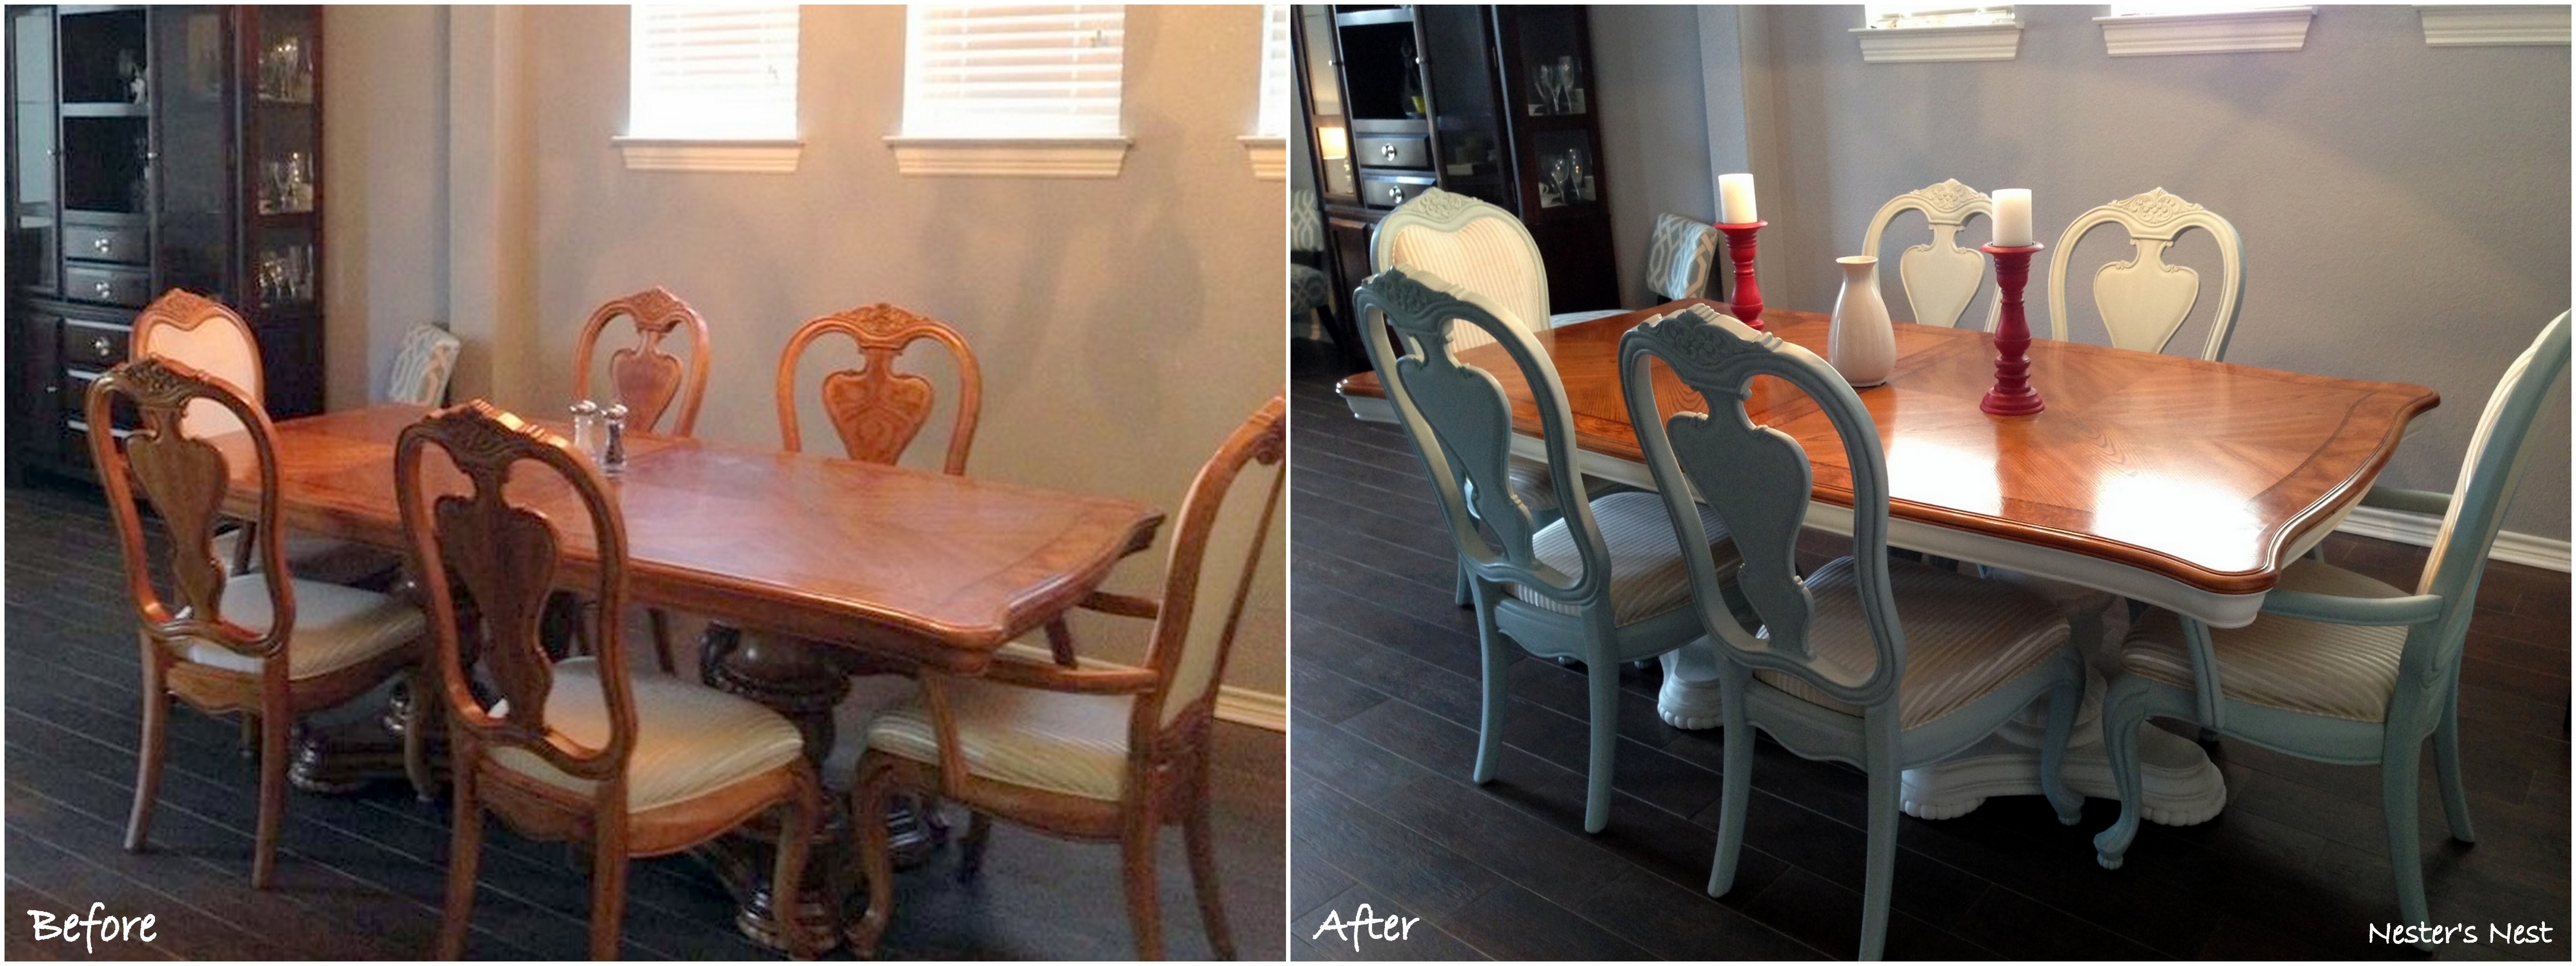
It didn’t always look like that, though. It used to look like this…

This dining set took hours of patience, elbow grease, a steady hand and a few questionable words, but I’m so glad I had the opportunity to work on it. Not only did I have the honor of painting it for one of my favorite families, but the end result was incredibly satisfying.
When I got it to my workshop (read: garage), this is how it looked.

While tackling this project I faced 2 main challenges:
1. My client wanted to paint the wood, but keep the existing fabric on the chairs. Unfortunately, the cushions could not be removed from the chairs (they are glued down). This meant I had to find a way to paint the chair frames without getting paint on the fabric.
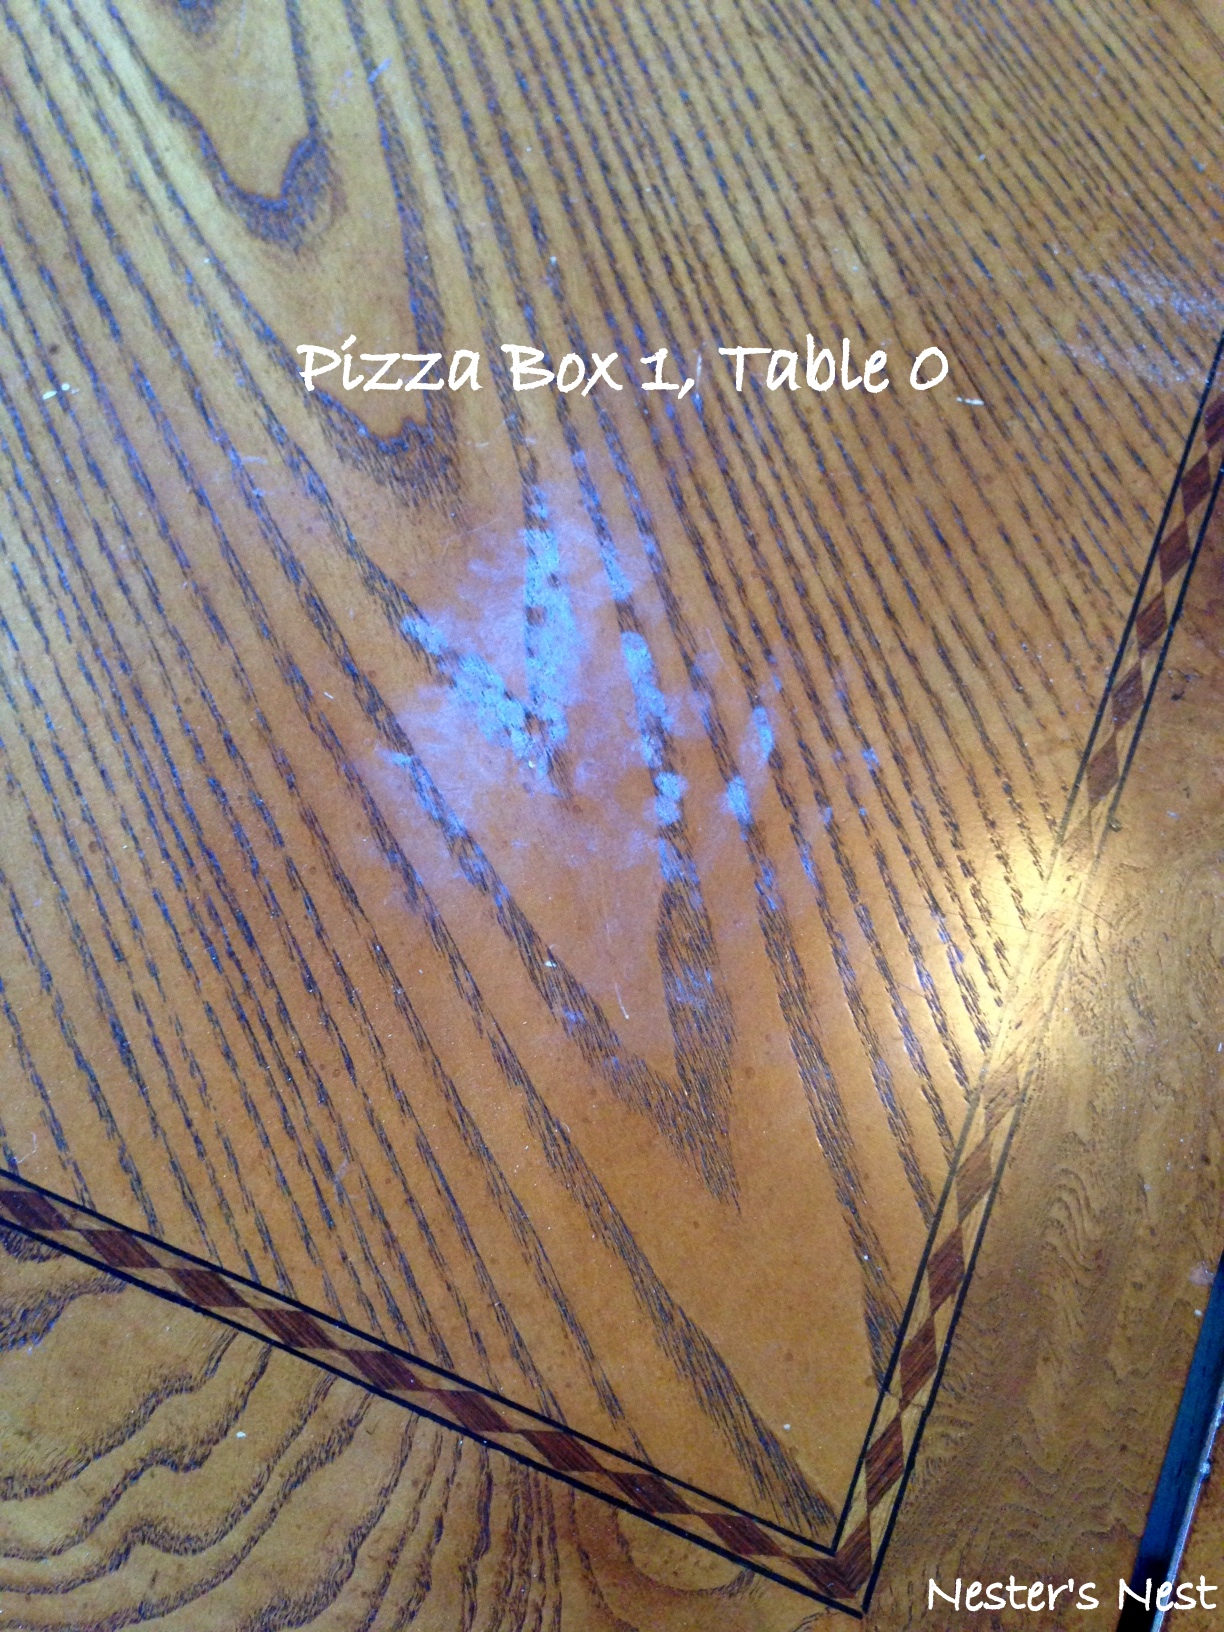
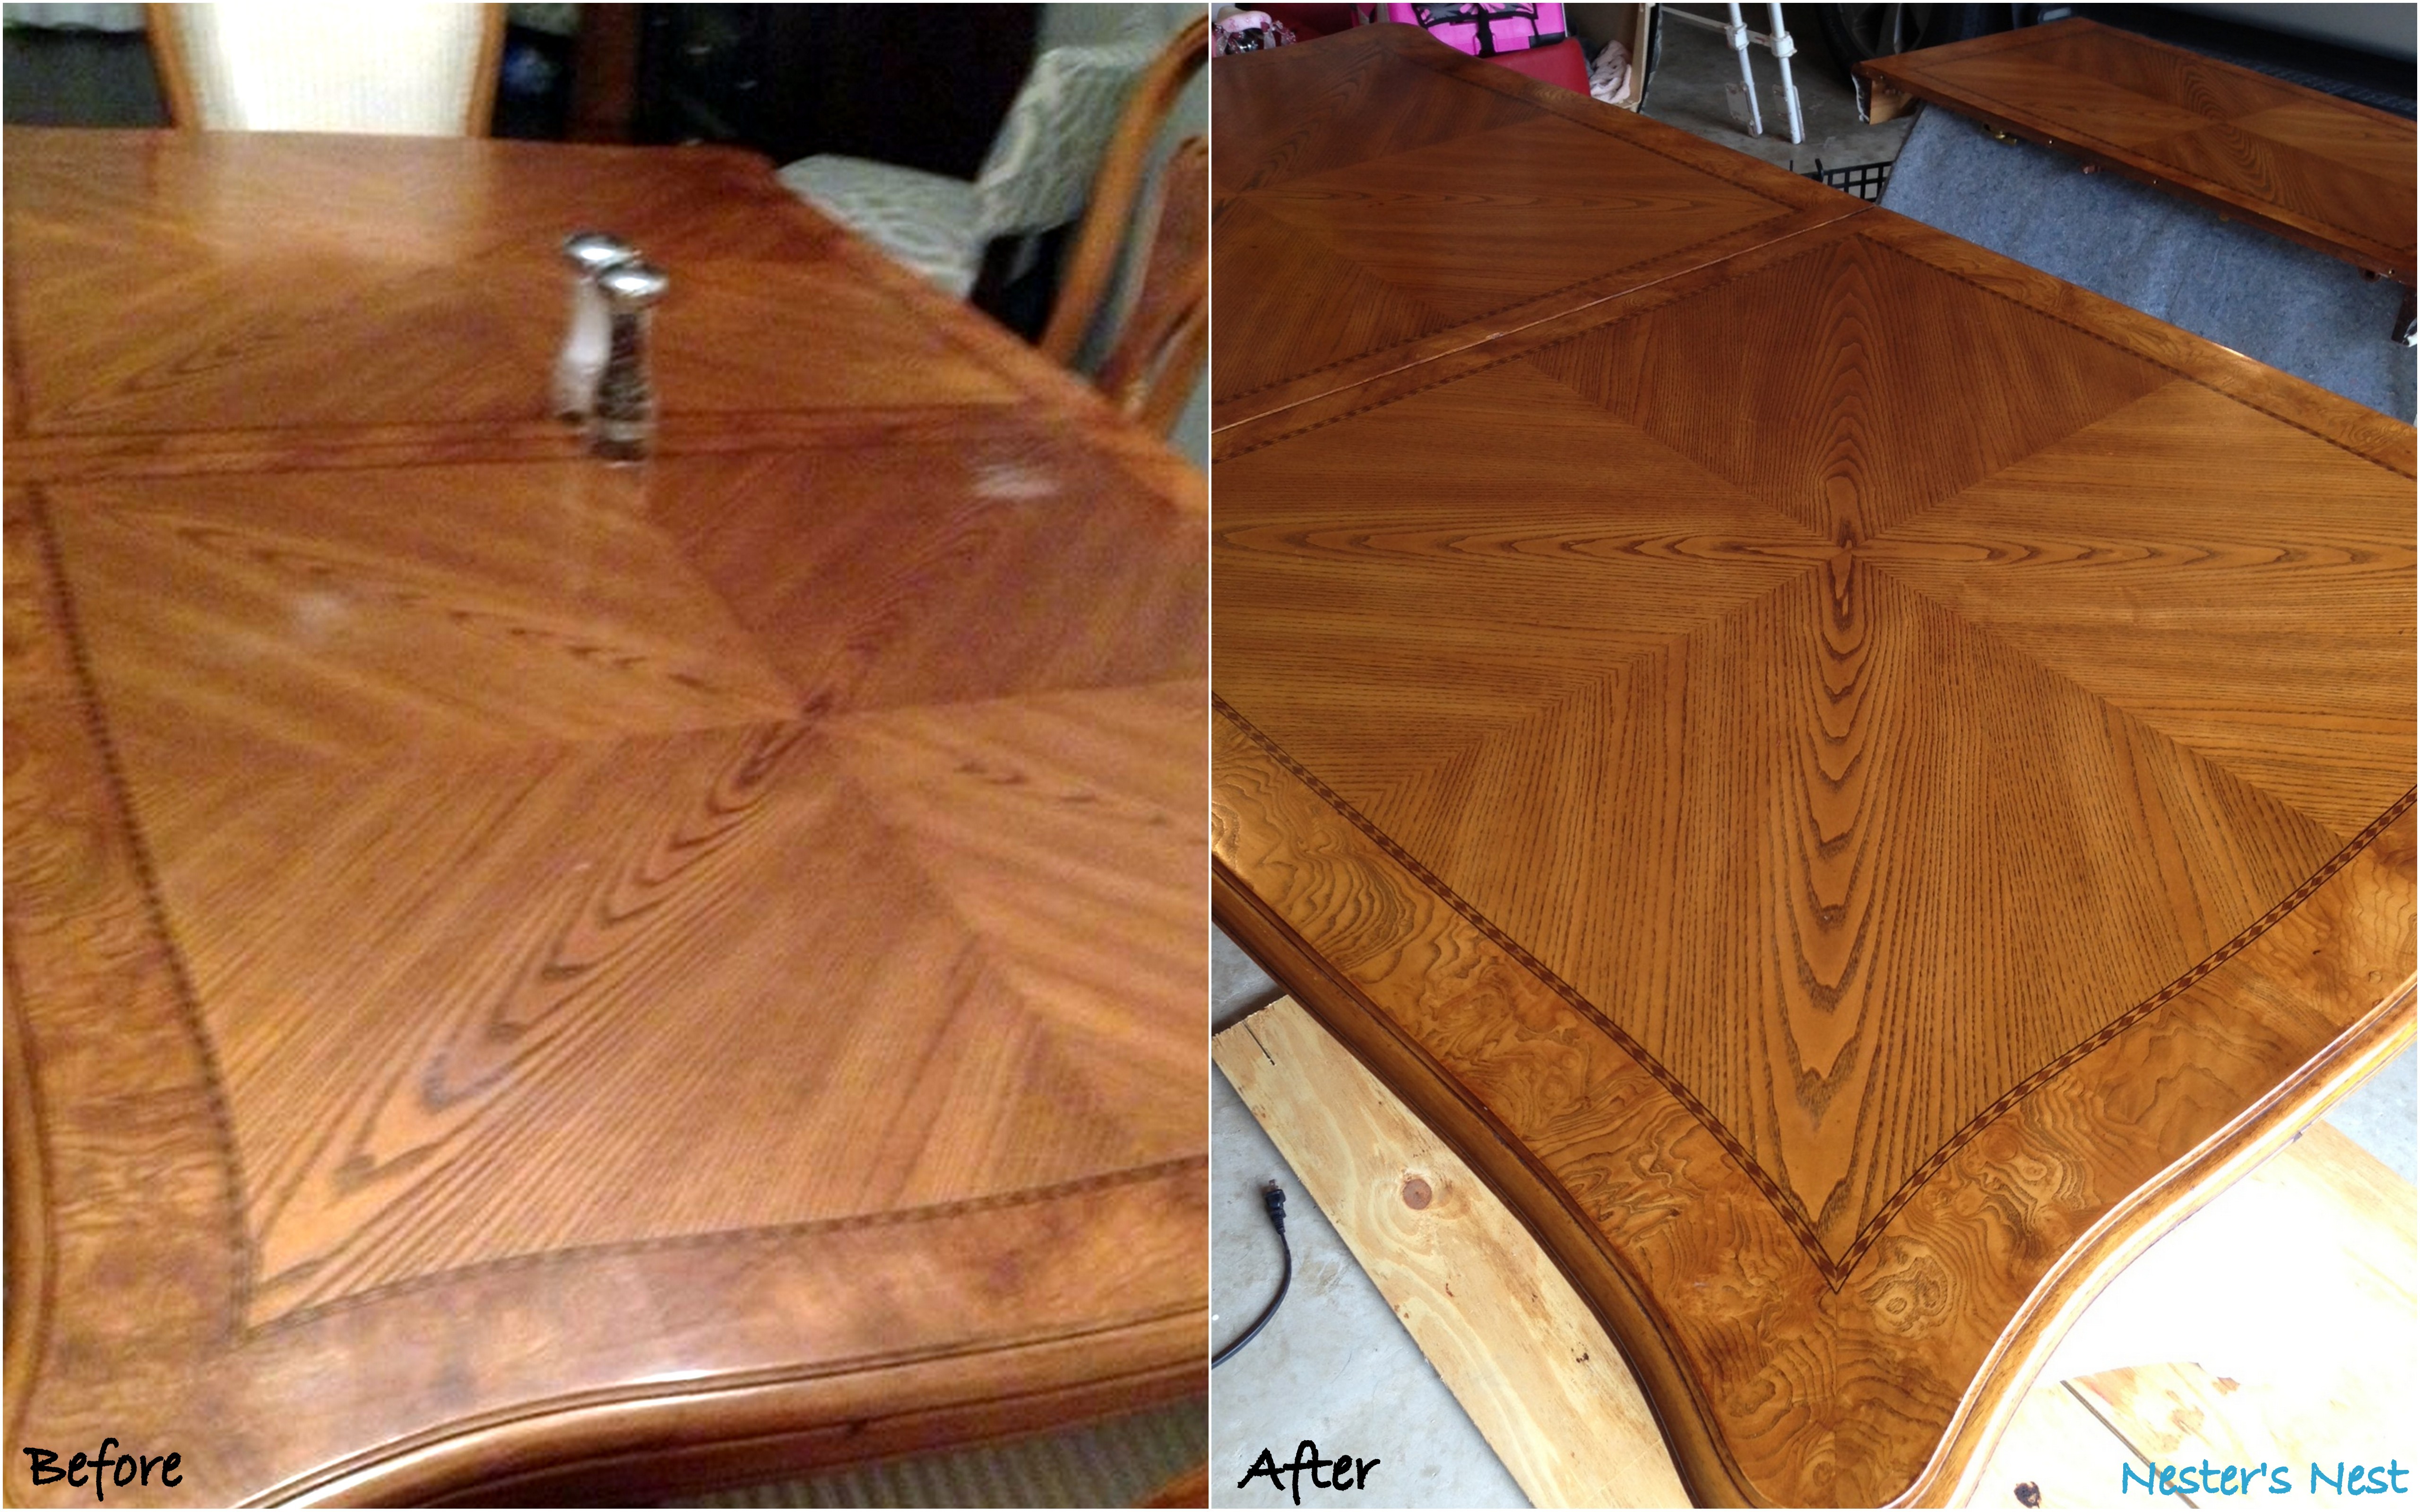
2. The table top had a run-in with some hot pizza boxes and the pizza boxes won. My job was to figure out how to salvage the table top without stripping the original finish.
So, yes, challenges. The chairs actually mocked me for a while, but I tackled them head on and prevailed!
First, the chairs:
I wanted a smooth finish but needed easy clean up in case anything got on the fabric, so I decided to use chalk paint. To get a more professional look, I determined it was best to take the chairs apart to paint. Imagine chair parts to 6 different chairs spread out on a tarp in my formal living room (it was too cold to paint outside).

Unfortunately, while I was prepping the chairs to paint I found little surprises stuck to every single leg of every single chair (that’s 24 legs total).
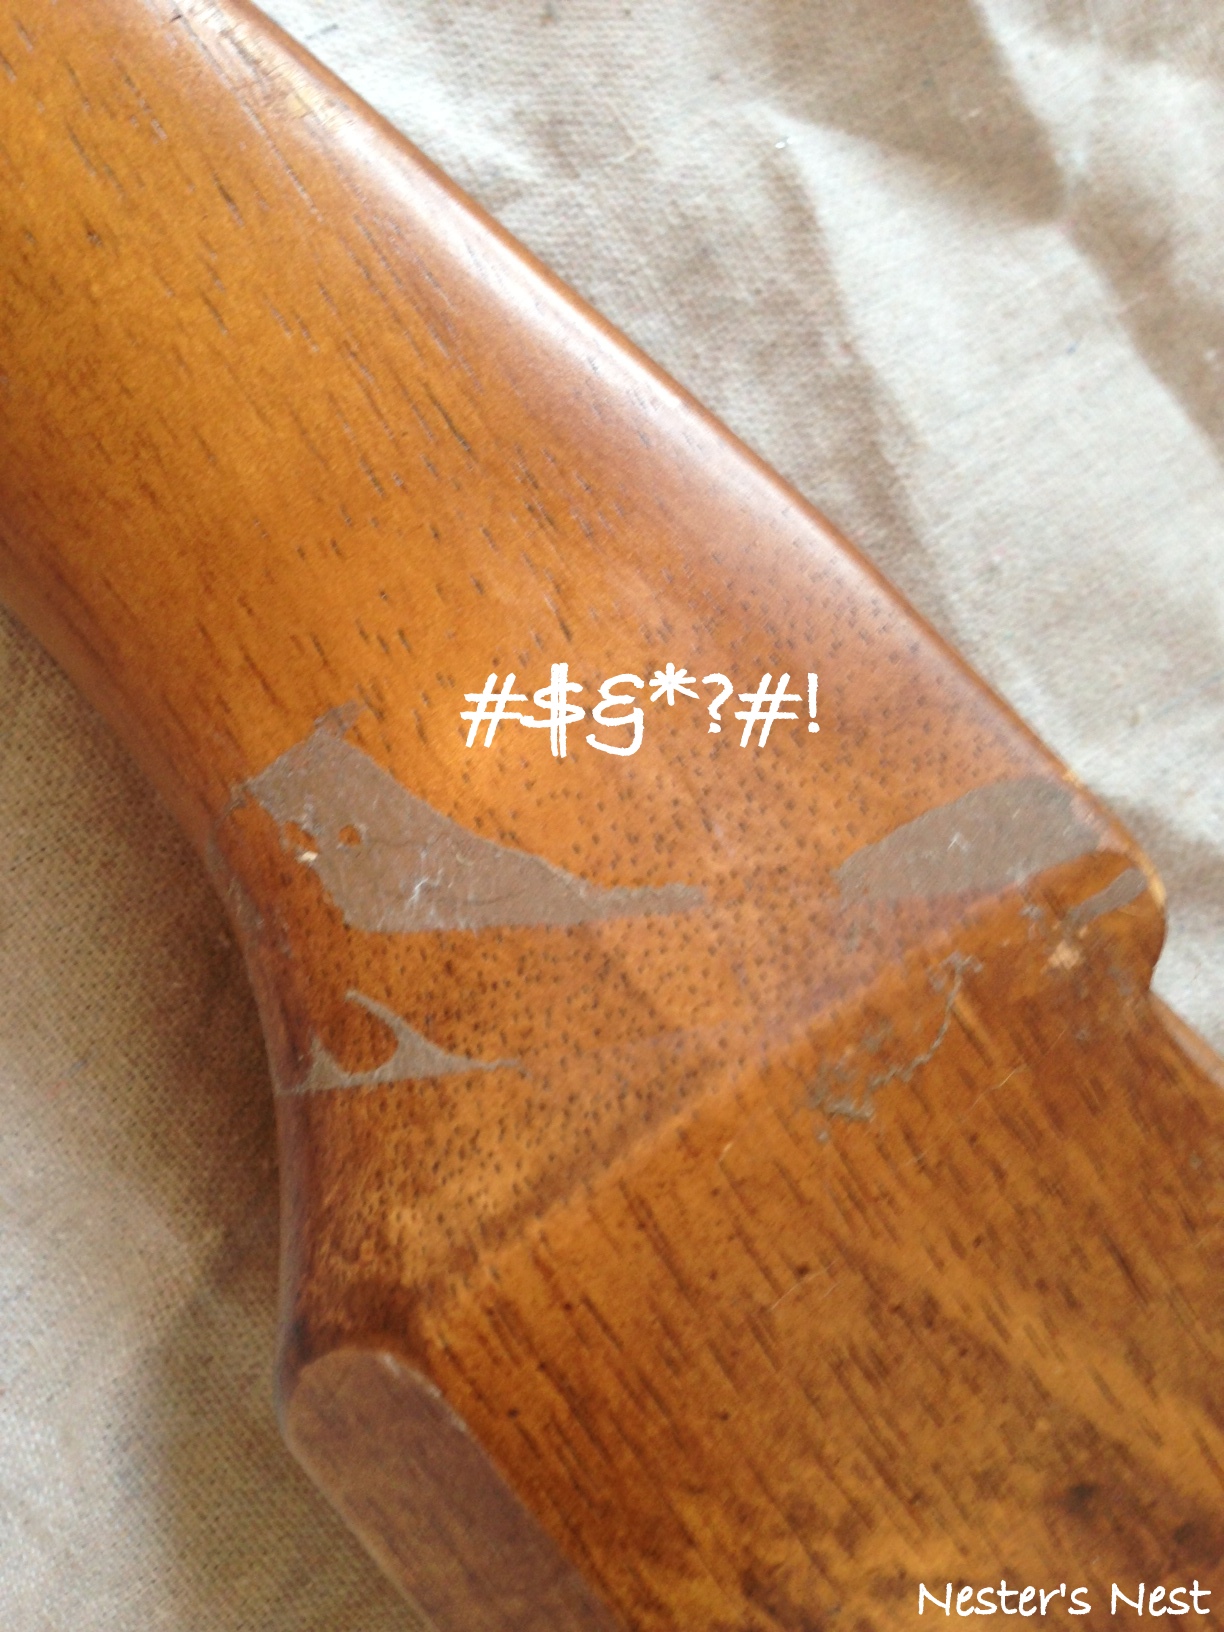
What you are looking at is what I can only describe as packing tape that probably melted onto the furniture while it was once in a storage unit…in Texas…in August. **I must note this was done by the original owners of the dining set, not the current owners.** Anyway, I tried about 7 different concoctions ranging from vinegar to WD-40 to remove the residue. Goof-Off is what finally came to my rescue. I’m a loyal customer for life.
After that fun surprise, I got to painting and learned another use for a paint scraper. It was the perfect solution to getting a clean edge around the fabric.


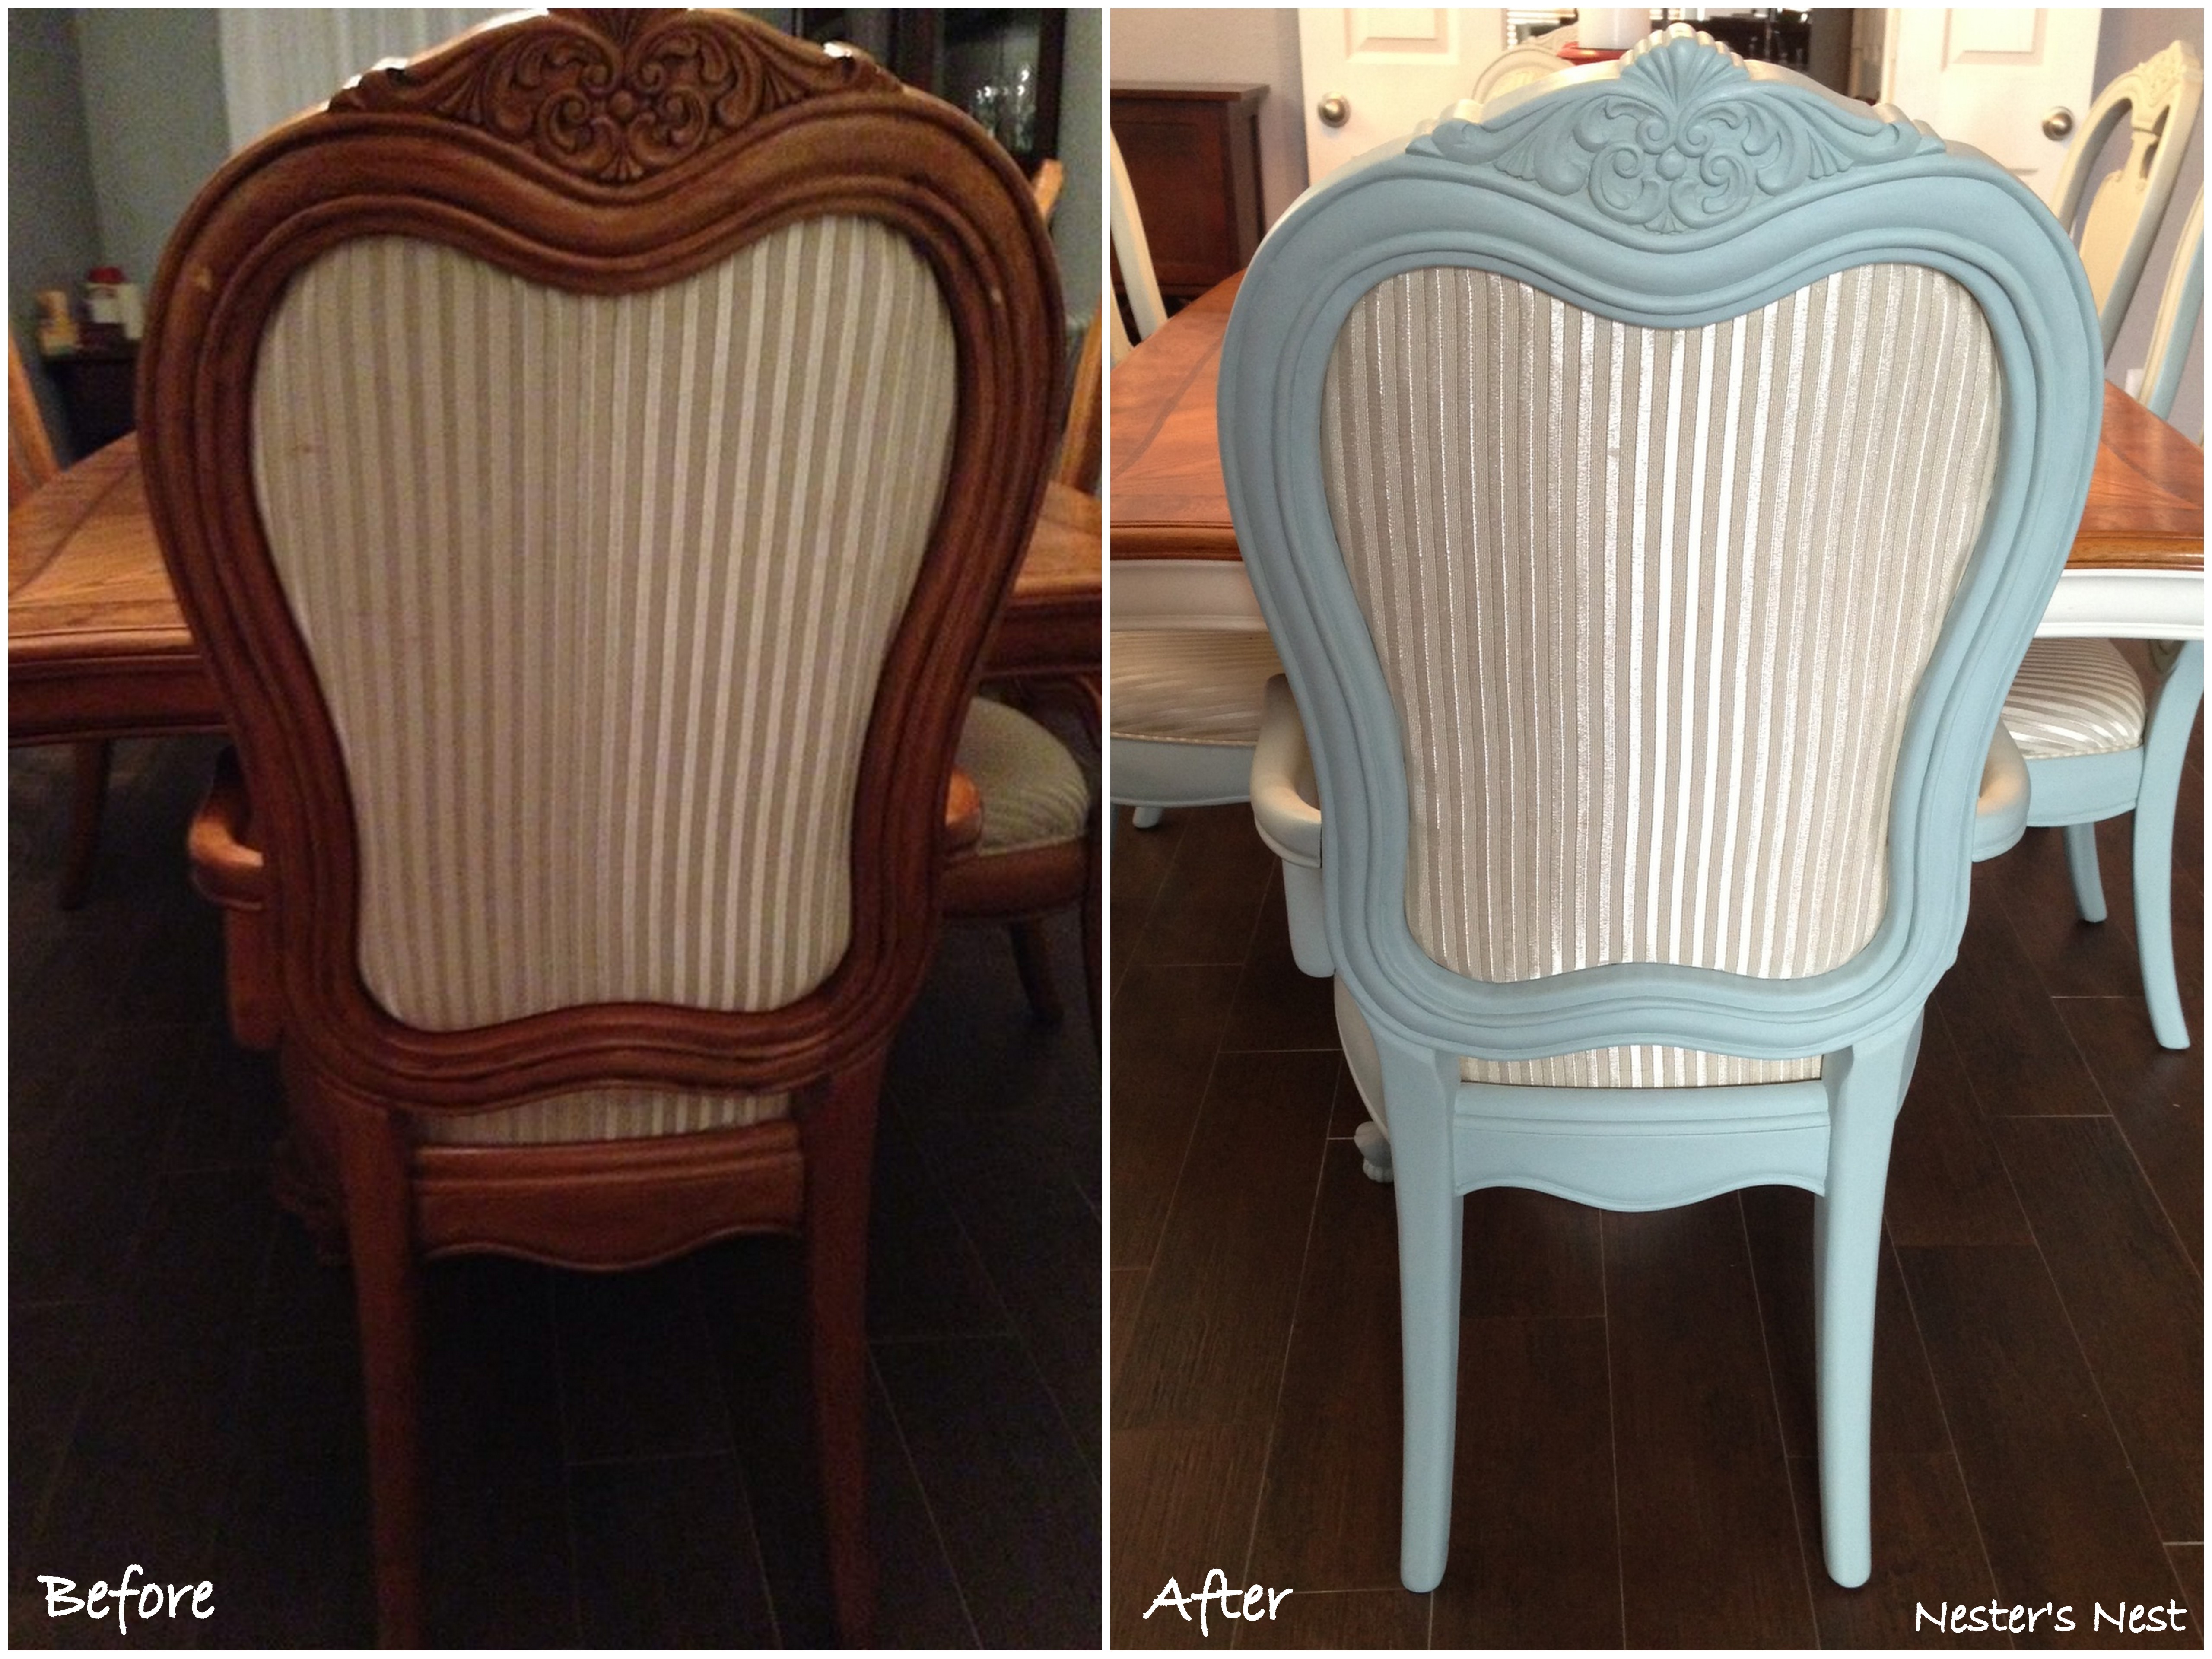
The chairs were the most time consuming part of the project and needed 3 coats of paint plus 3 coats of wax, but they turned out beautiful. Adios, 1990’s!

Second, painting the table legs was a breeze. I love how the white made the details stand out and added a nice contrast to my client’s darker floor.

The table top was a different story. I’ve removed heat marks from furniture before, but not of this magnitude. I first tried my stand-by trick of adding mayonnaise to the marks, but it didn’t work…not even a little. So, I dared a trick I had heard about where you use heat from an iron to remove the the marks. Worked like a charm!
I just placed a white towel over the heat marks, turned my iron to the steam setting, and pressed it over the stain for about 30 seconds or so. Then, I applied a little Old English Lemon Oil to the surface to condition and smooth out the finish.

I also had to deal with a few scratches. I used my trusty Minwax Wood Finish Stain Marker and the scratches were drastically minimized.

After going over the entire table top with more lemon oil and adding 3 coats of wax over the painted base, the project was finally complete.

The biggest thrill was getting to see the table back in its rightful surroundings.

Talk about a difference!
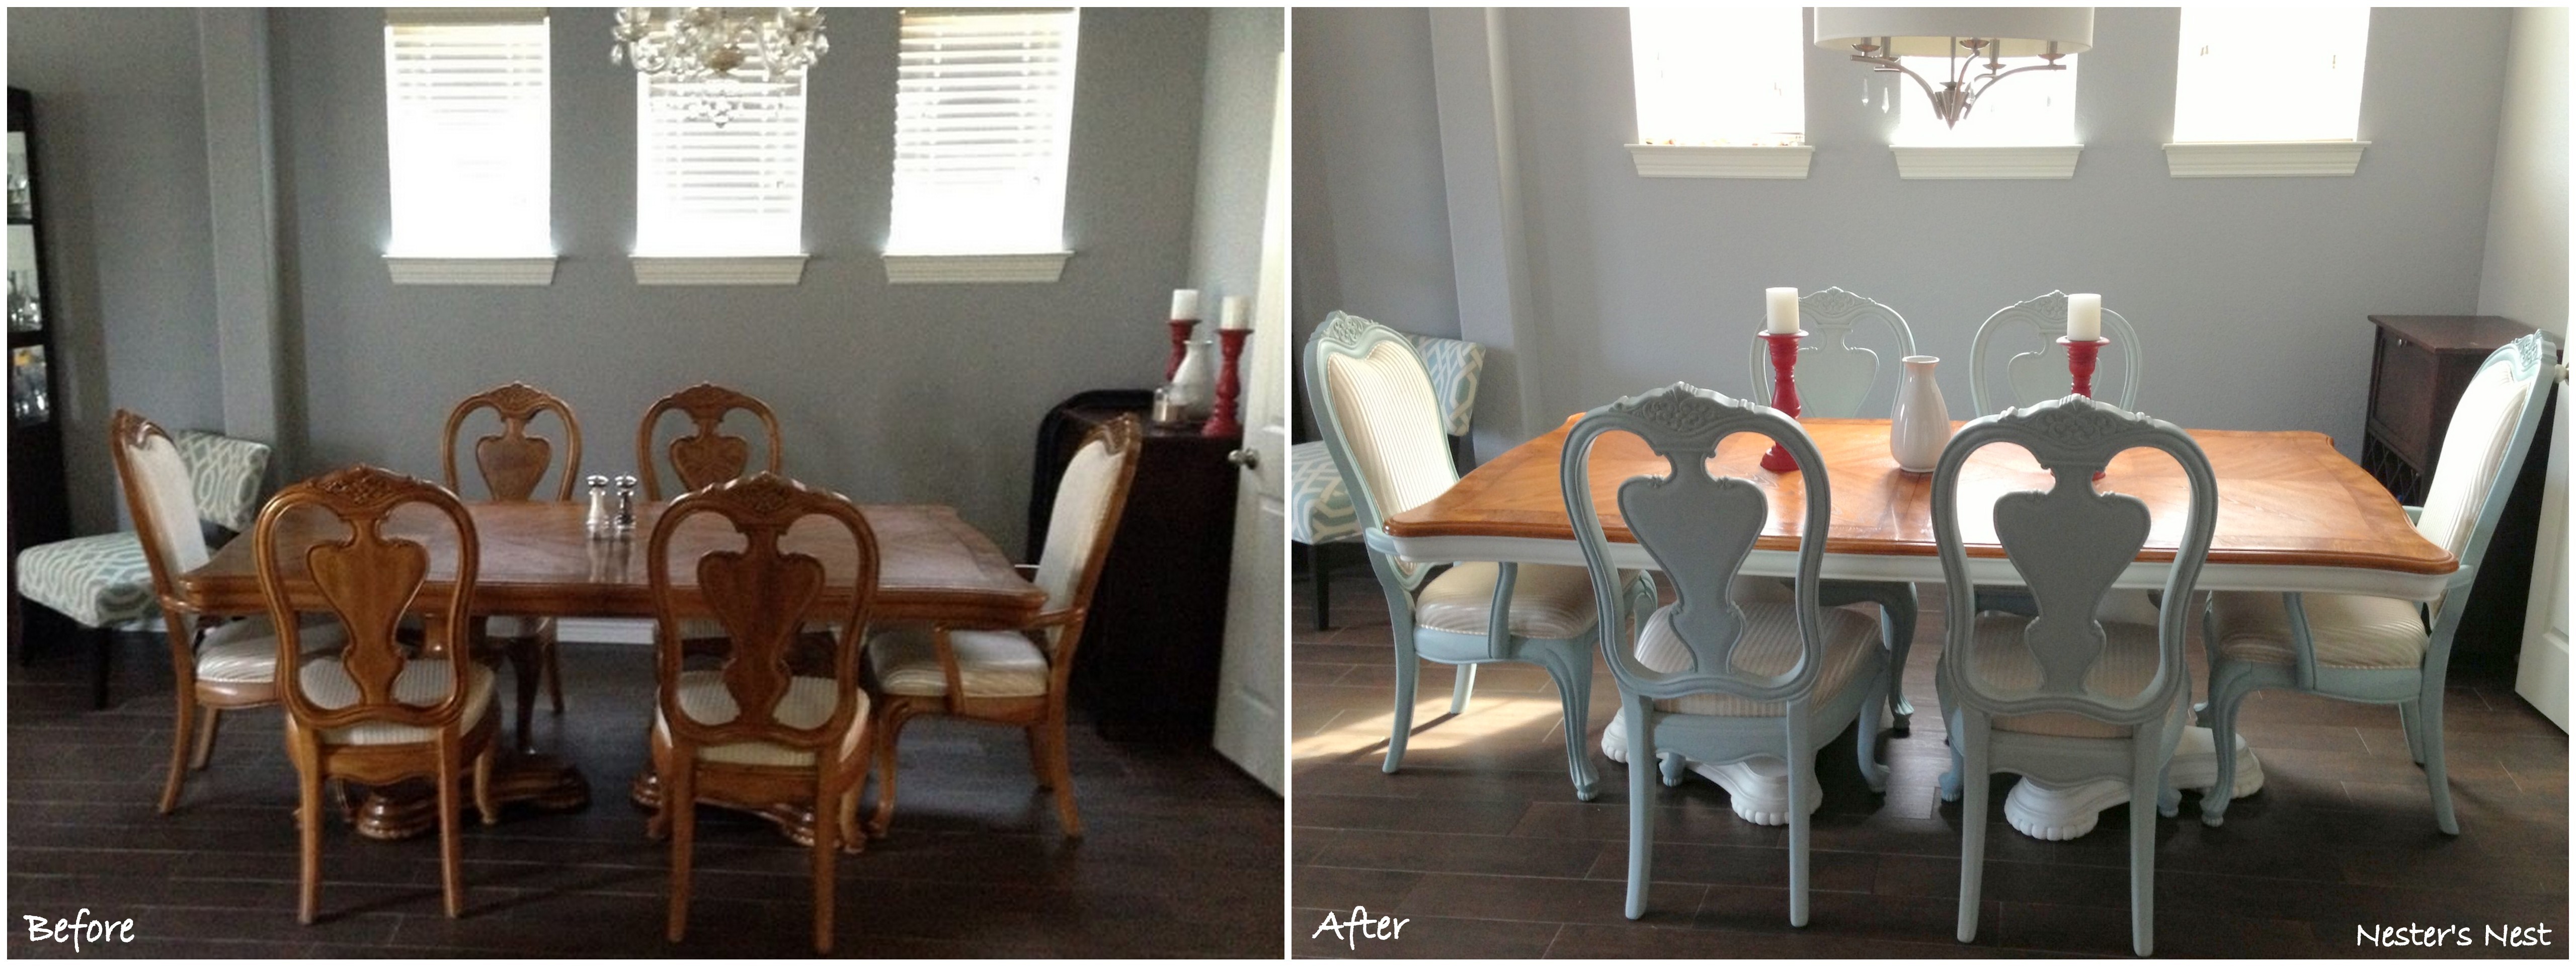
I also helped my client find a new chandelier. She originally had a chandelier that belonged to her husband’s grandmother. Normally, I wouldn’t have let her replace it, but the chandelier was a little too small and wasn’t giving off enough light. This chandelier I spotted at Lowe’s was the perfect solution.

This was quite the project, but I’m so glad I was able to help bring this beautiful dining set back to life. And because I think the family who owns this table is so awesome, I wouldn’t hesitate to do it all over again…well, I might hesitate a little. 😉


What a great transformation! Love to read about your projects!!! Very impressive work!!!
Thank you so much, Becky! It’s been a fun and rewarding ride. 🙂
Wow it’s a gorgeous set now, such a lot of work I know but so worth it! As a side note I would love to see bigger pictures in your posts. Have you ever tried writing your posts outside of the blog then posting it?
Thank you, Susan, not only for your kind compliment, but also for giving me the kick in the pants I needed to piddle around with my image settings. I’ve been meaning to try to fix that glitch for a long time and kept getting sidetracked. Moving forward, I think I’ve figured out the problem. I also fixed it for my previous post on my family room. Thanks again!
Oh like a gazillion times better! So easy to see the beautifulness now 😉
Yay!! Thanks again!
Absolutely stunning transformation! What a lot of time and hard work you put into it! The pay-off had to be amazing and from the way it looks, it is! Very impressed!
Thank you so much!! The biggest pay-offs always seem to come from the most challenging projects. 🙂