
FARE is thrilled that so many families across the country are planning to participate in the Teal Pumpkin Project! The idea is simple –pick up some inexpensive toys (ideas can be found on our website), paint a pumpkin teal and…

FARE is thrilled that so many families across the country are planning to participate in the Teal Pumpkin Project! The idea is simple –pick up some inexpensive toys (ideas can be found on our website), paint a pumpkin teal and…
I’m about to show you a DIY project I did a little over a year ago. Before I share, you have to promise me two things. 1. Don’t judge my dirty windows…or cobwebs…or bad paint job around the window (it … Continue reading
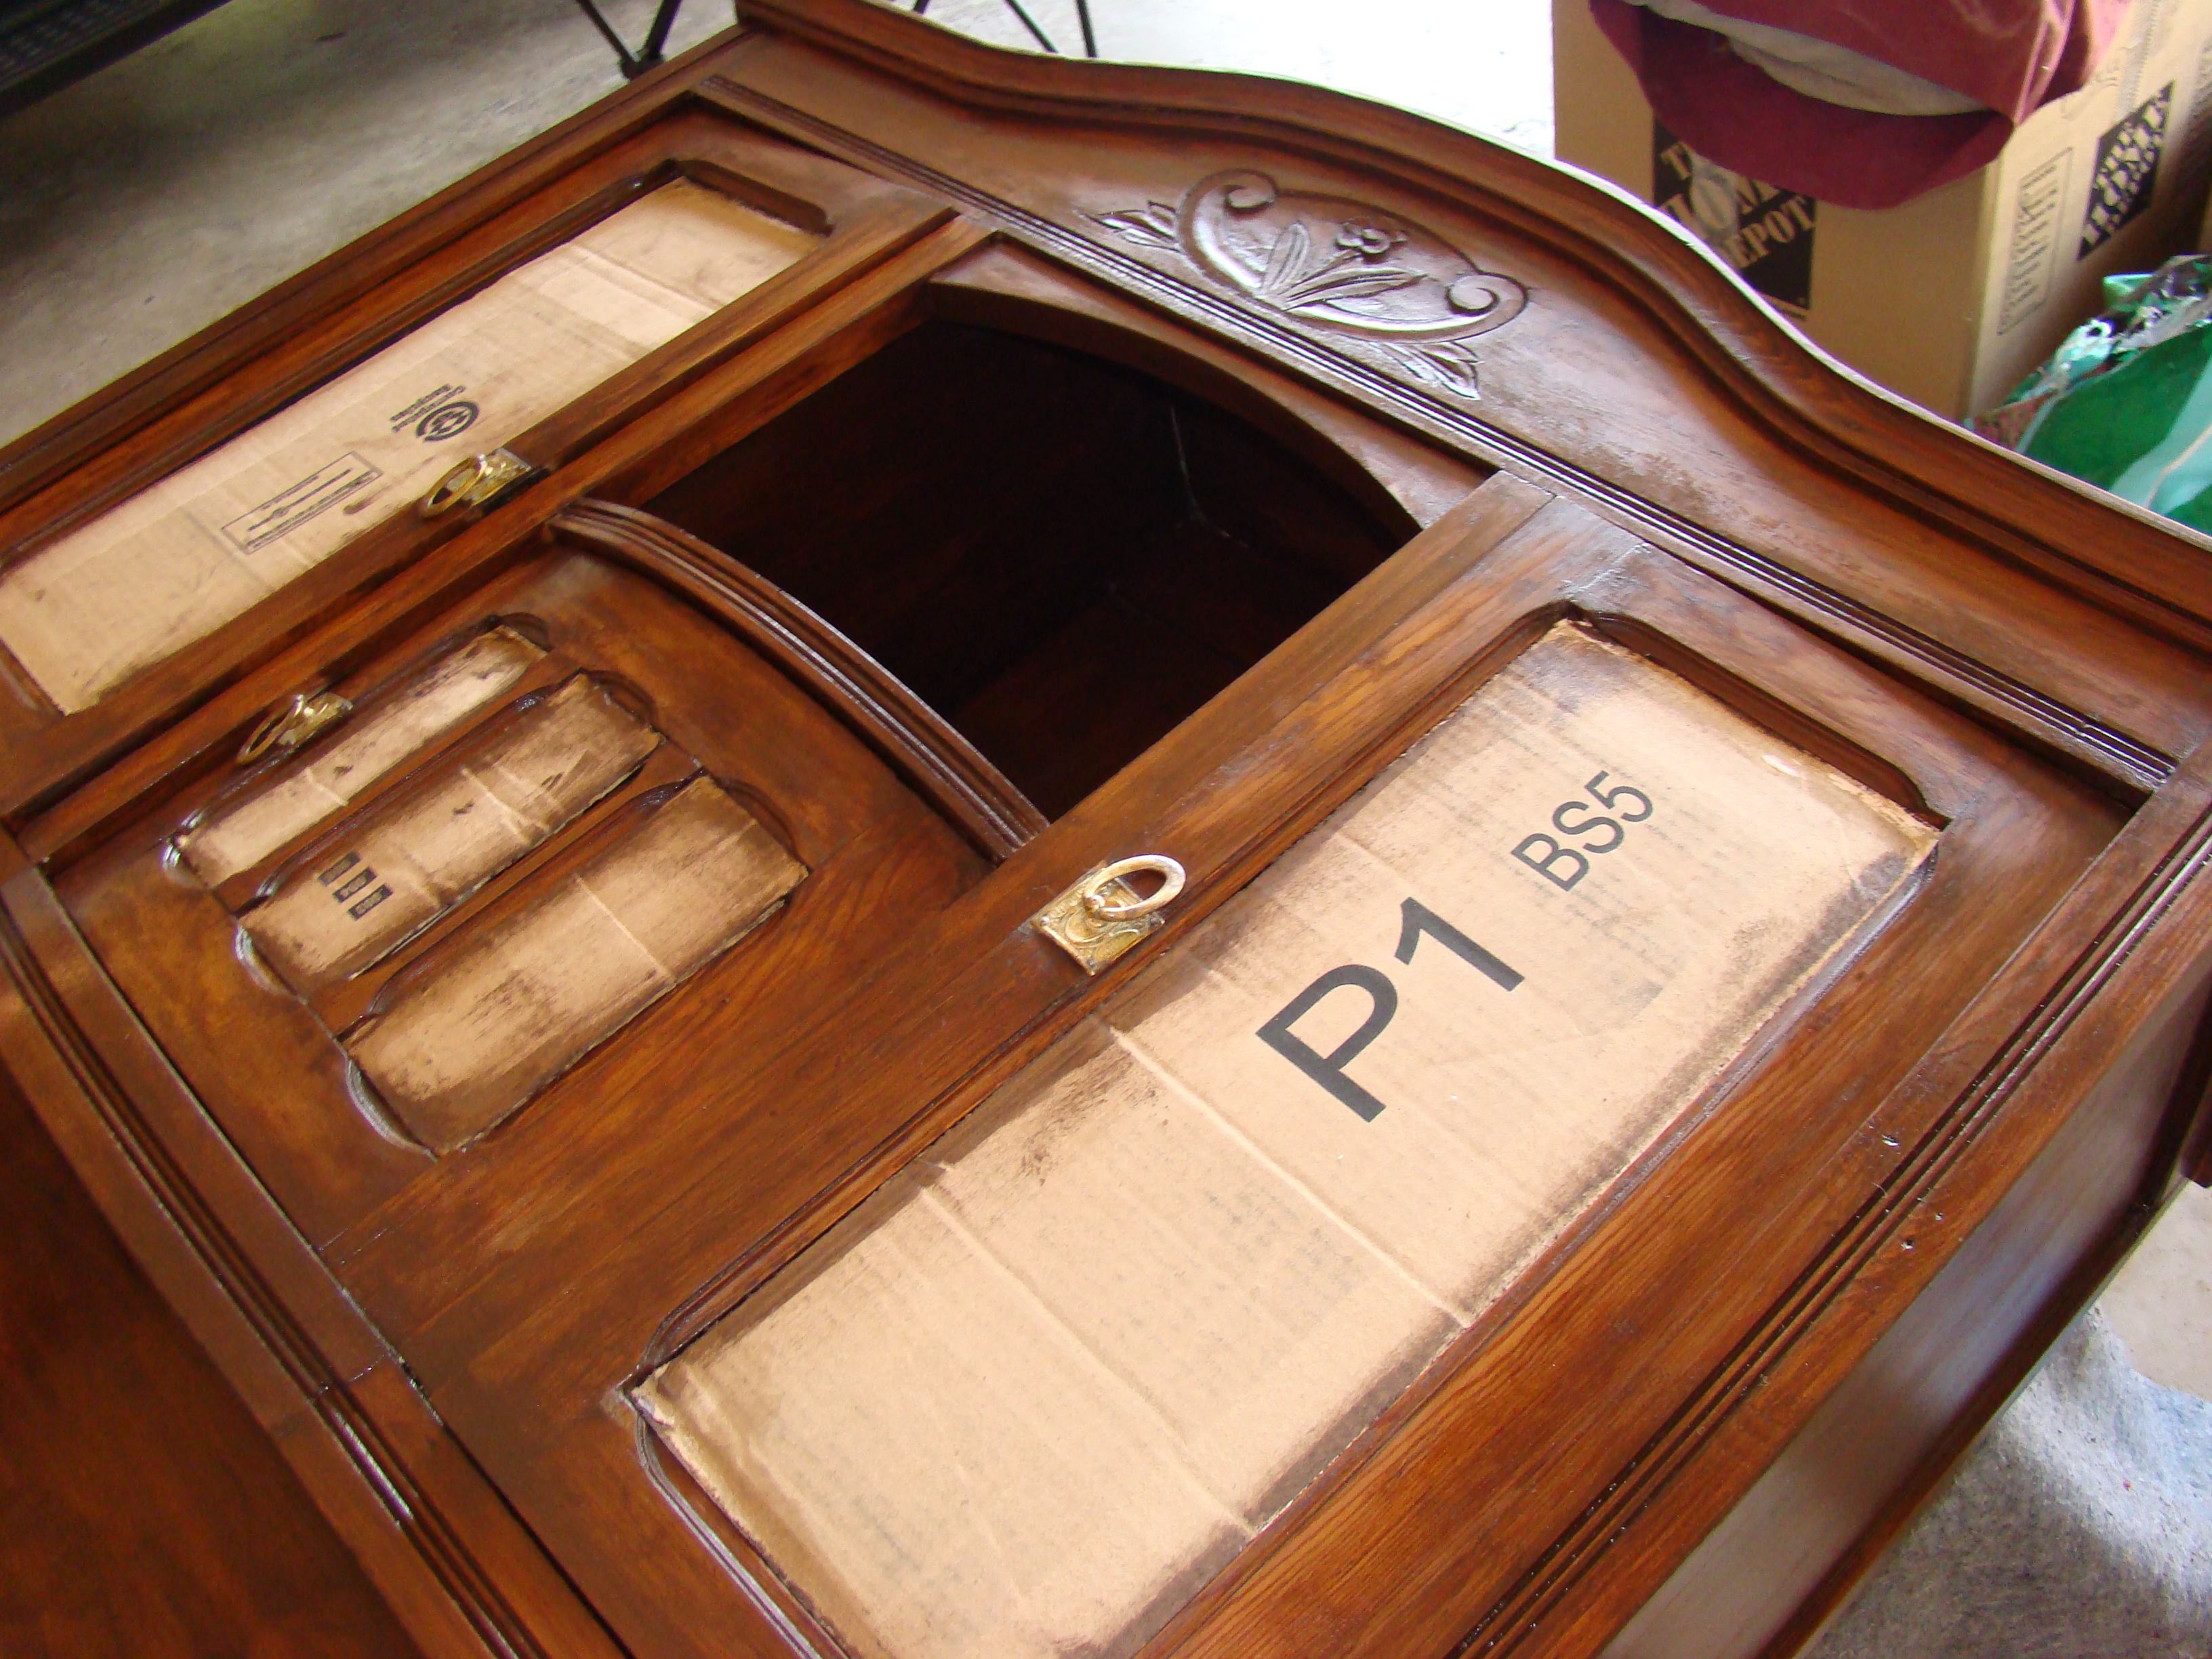
Eight years ago I spotted this hutch at an antique fair and just knew I had to have it.
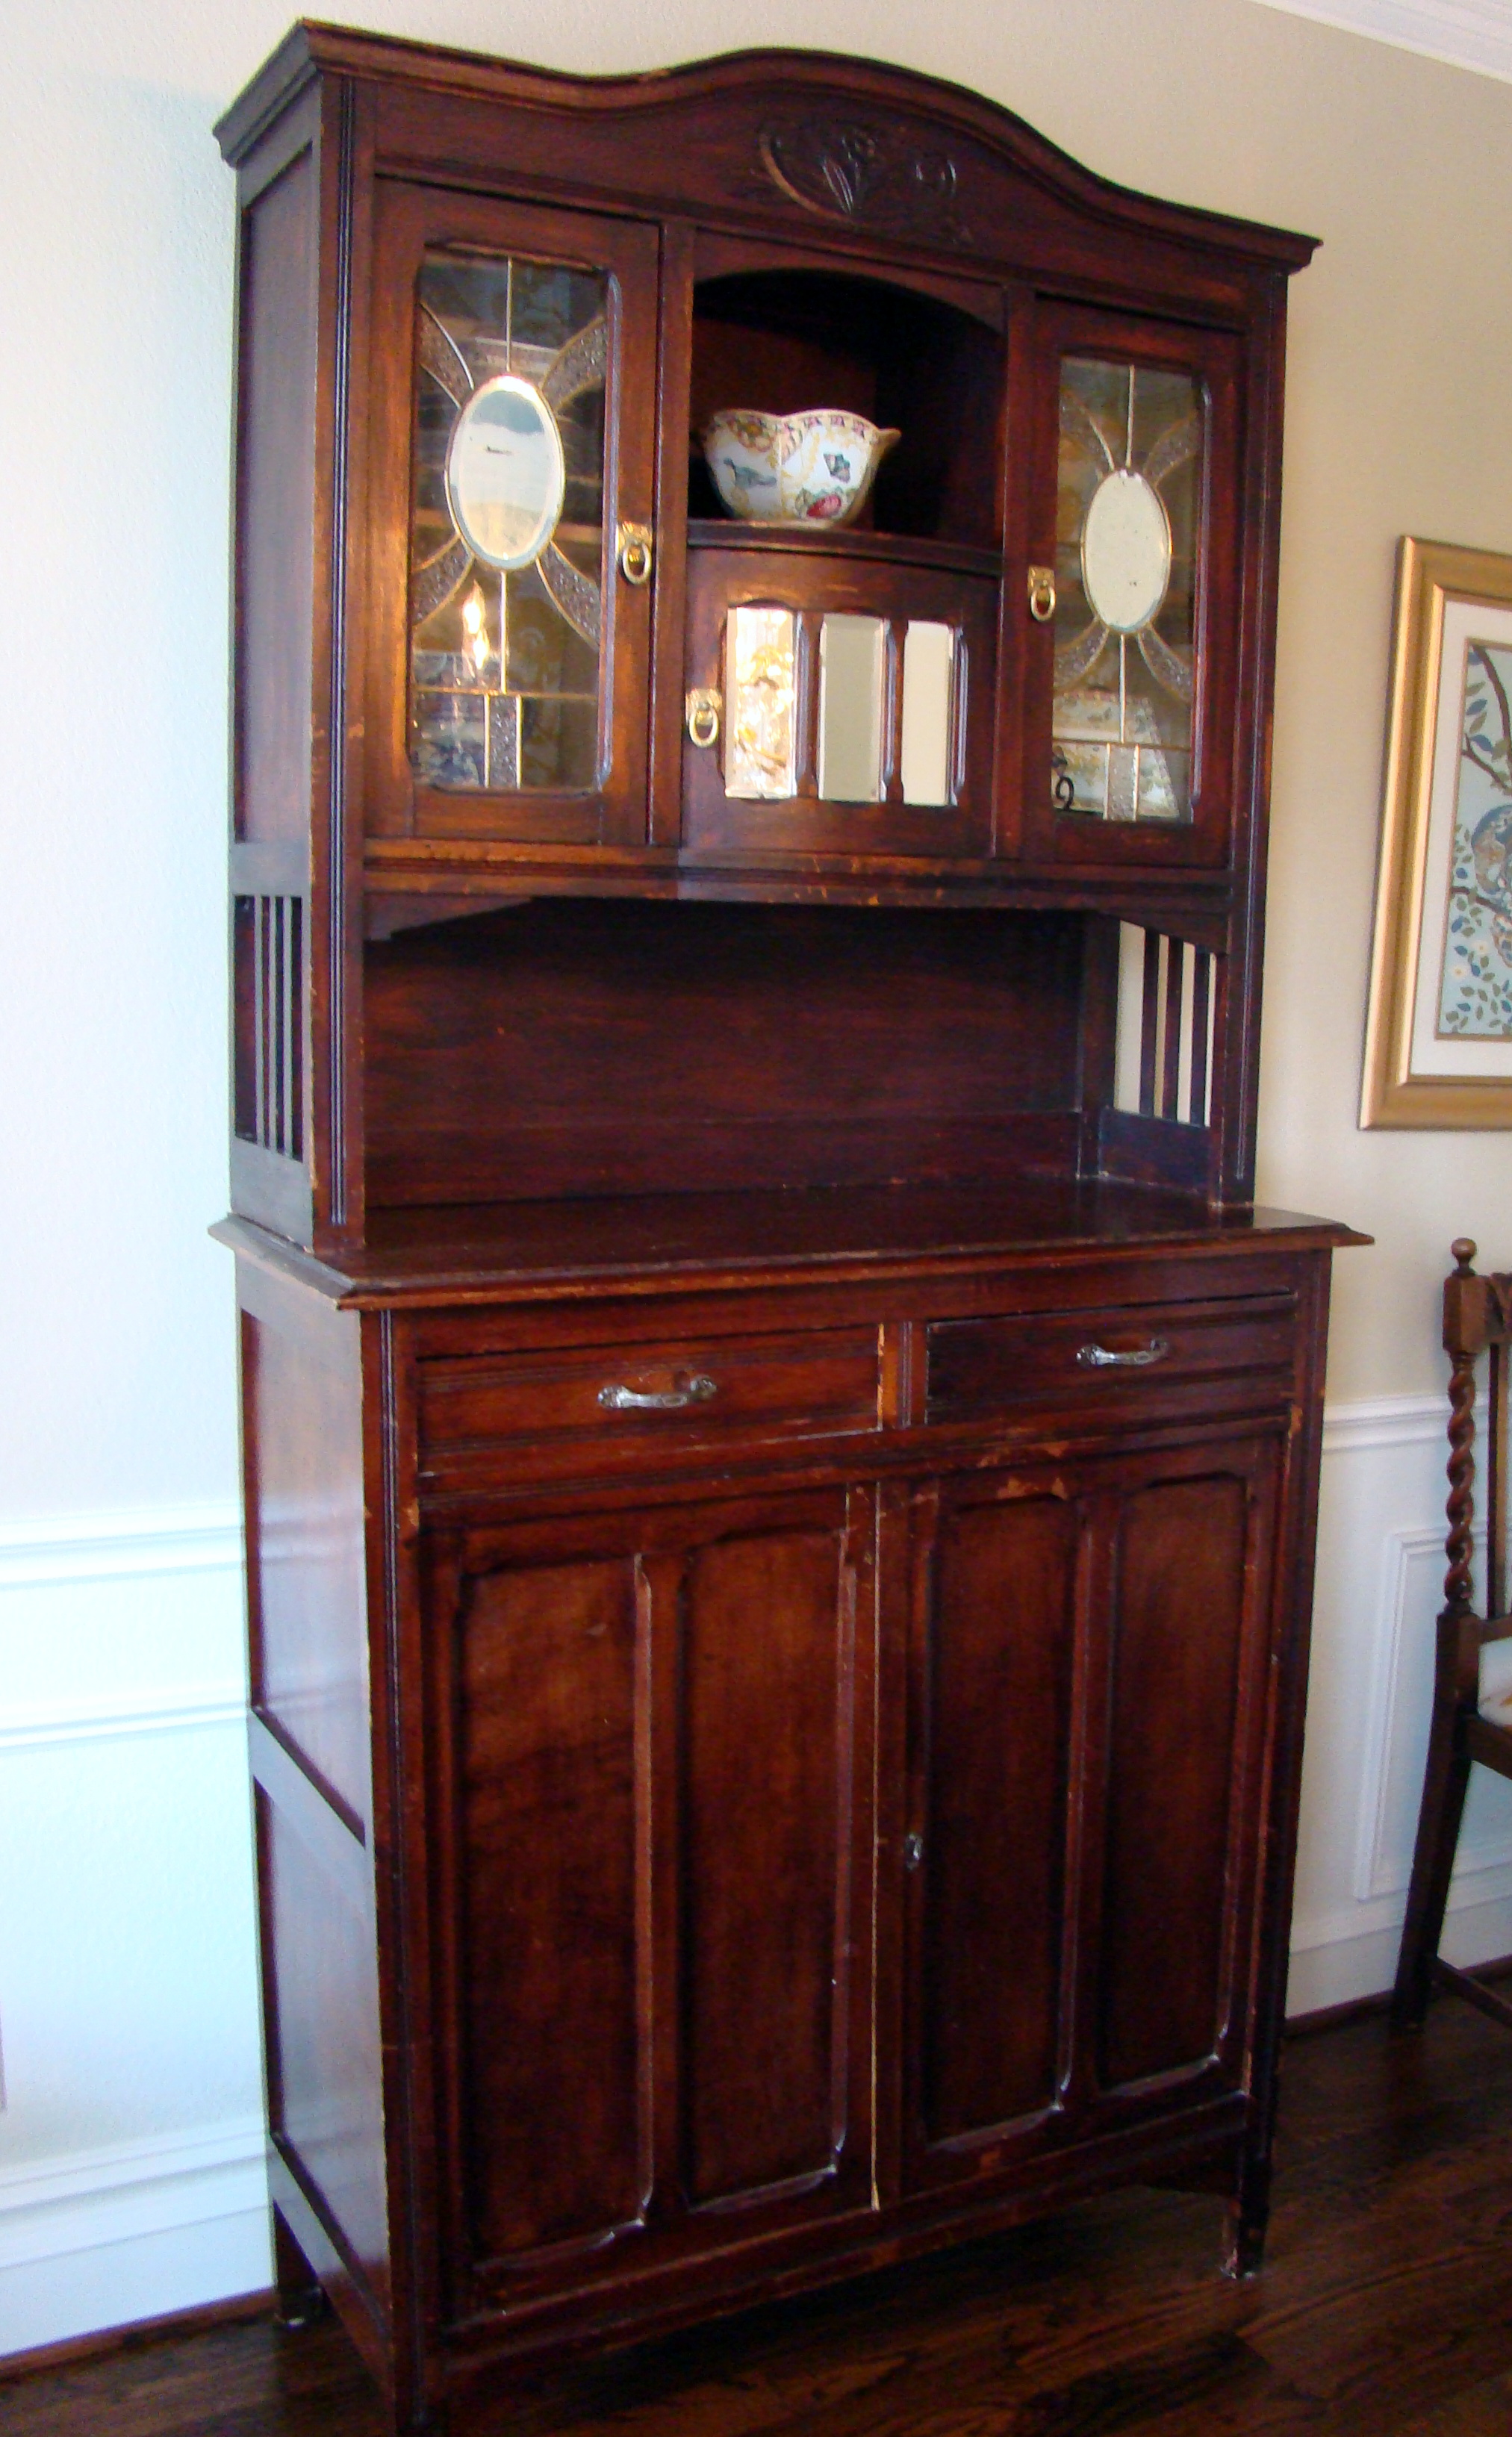
The piece isn’t very sturdy (it’s made of only plywood and pine) and it needed A LOT of TLC. But, it had so much character and I loved the hand carved detailing and antique glass. Plus, the seller knocked 40% off the price (I’m a sucker for a deal). When I bought it I was a newlywed with no kids, no dogs and I just knew I would have plenty of time to give it a makeover, however, I somehow managed to find other things to do. Fast forward 8 years, 2 kids, 2 dogs and 4 moves later and there it still sat, with no love and now I really didn’t have any time on my hands. One day last summer, for some inexplicable reason, I woke up and thought, “NOW is the time!” So what if I had to refinish the piece in my garage…in Texas…in July? GREAT idea! So, off I went to purchase supplies…
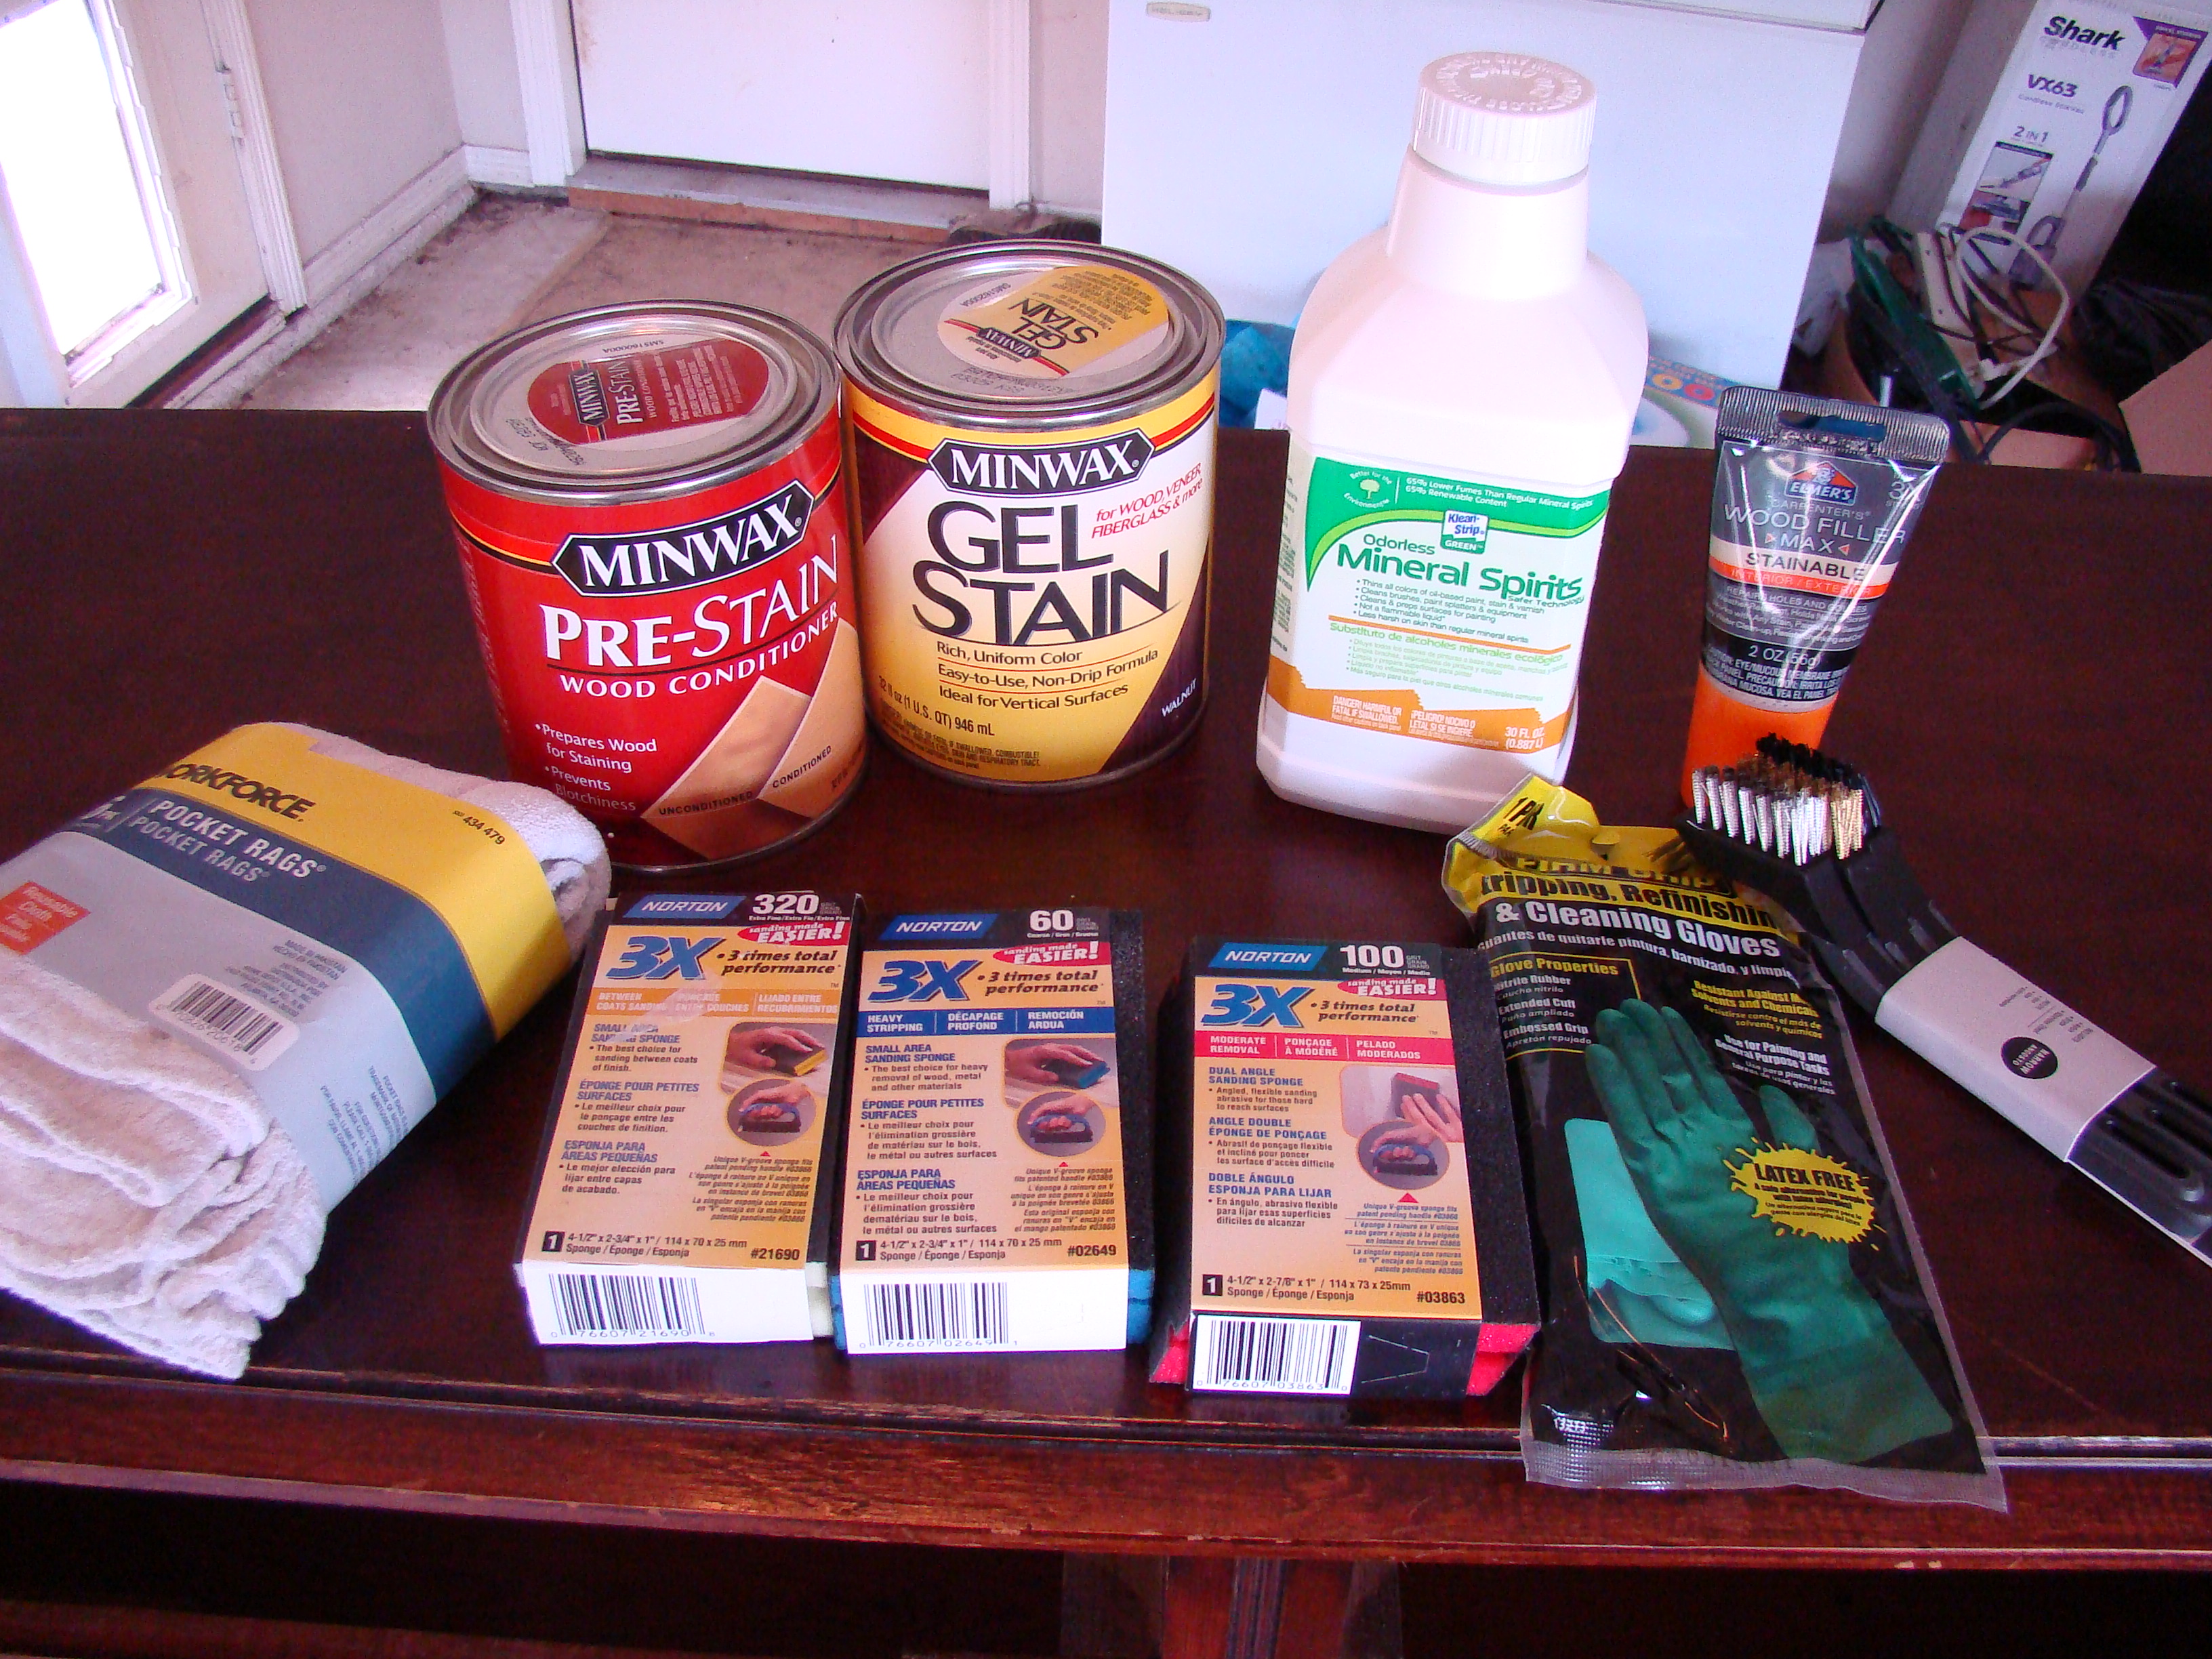
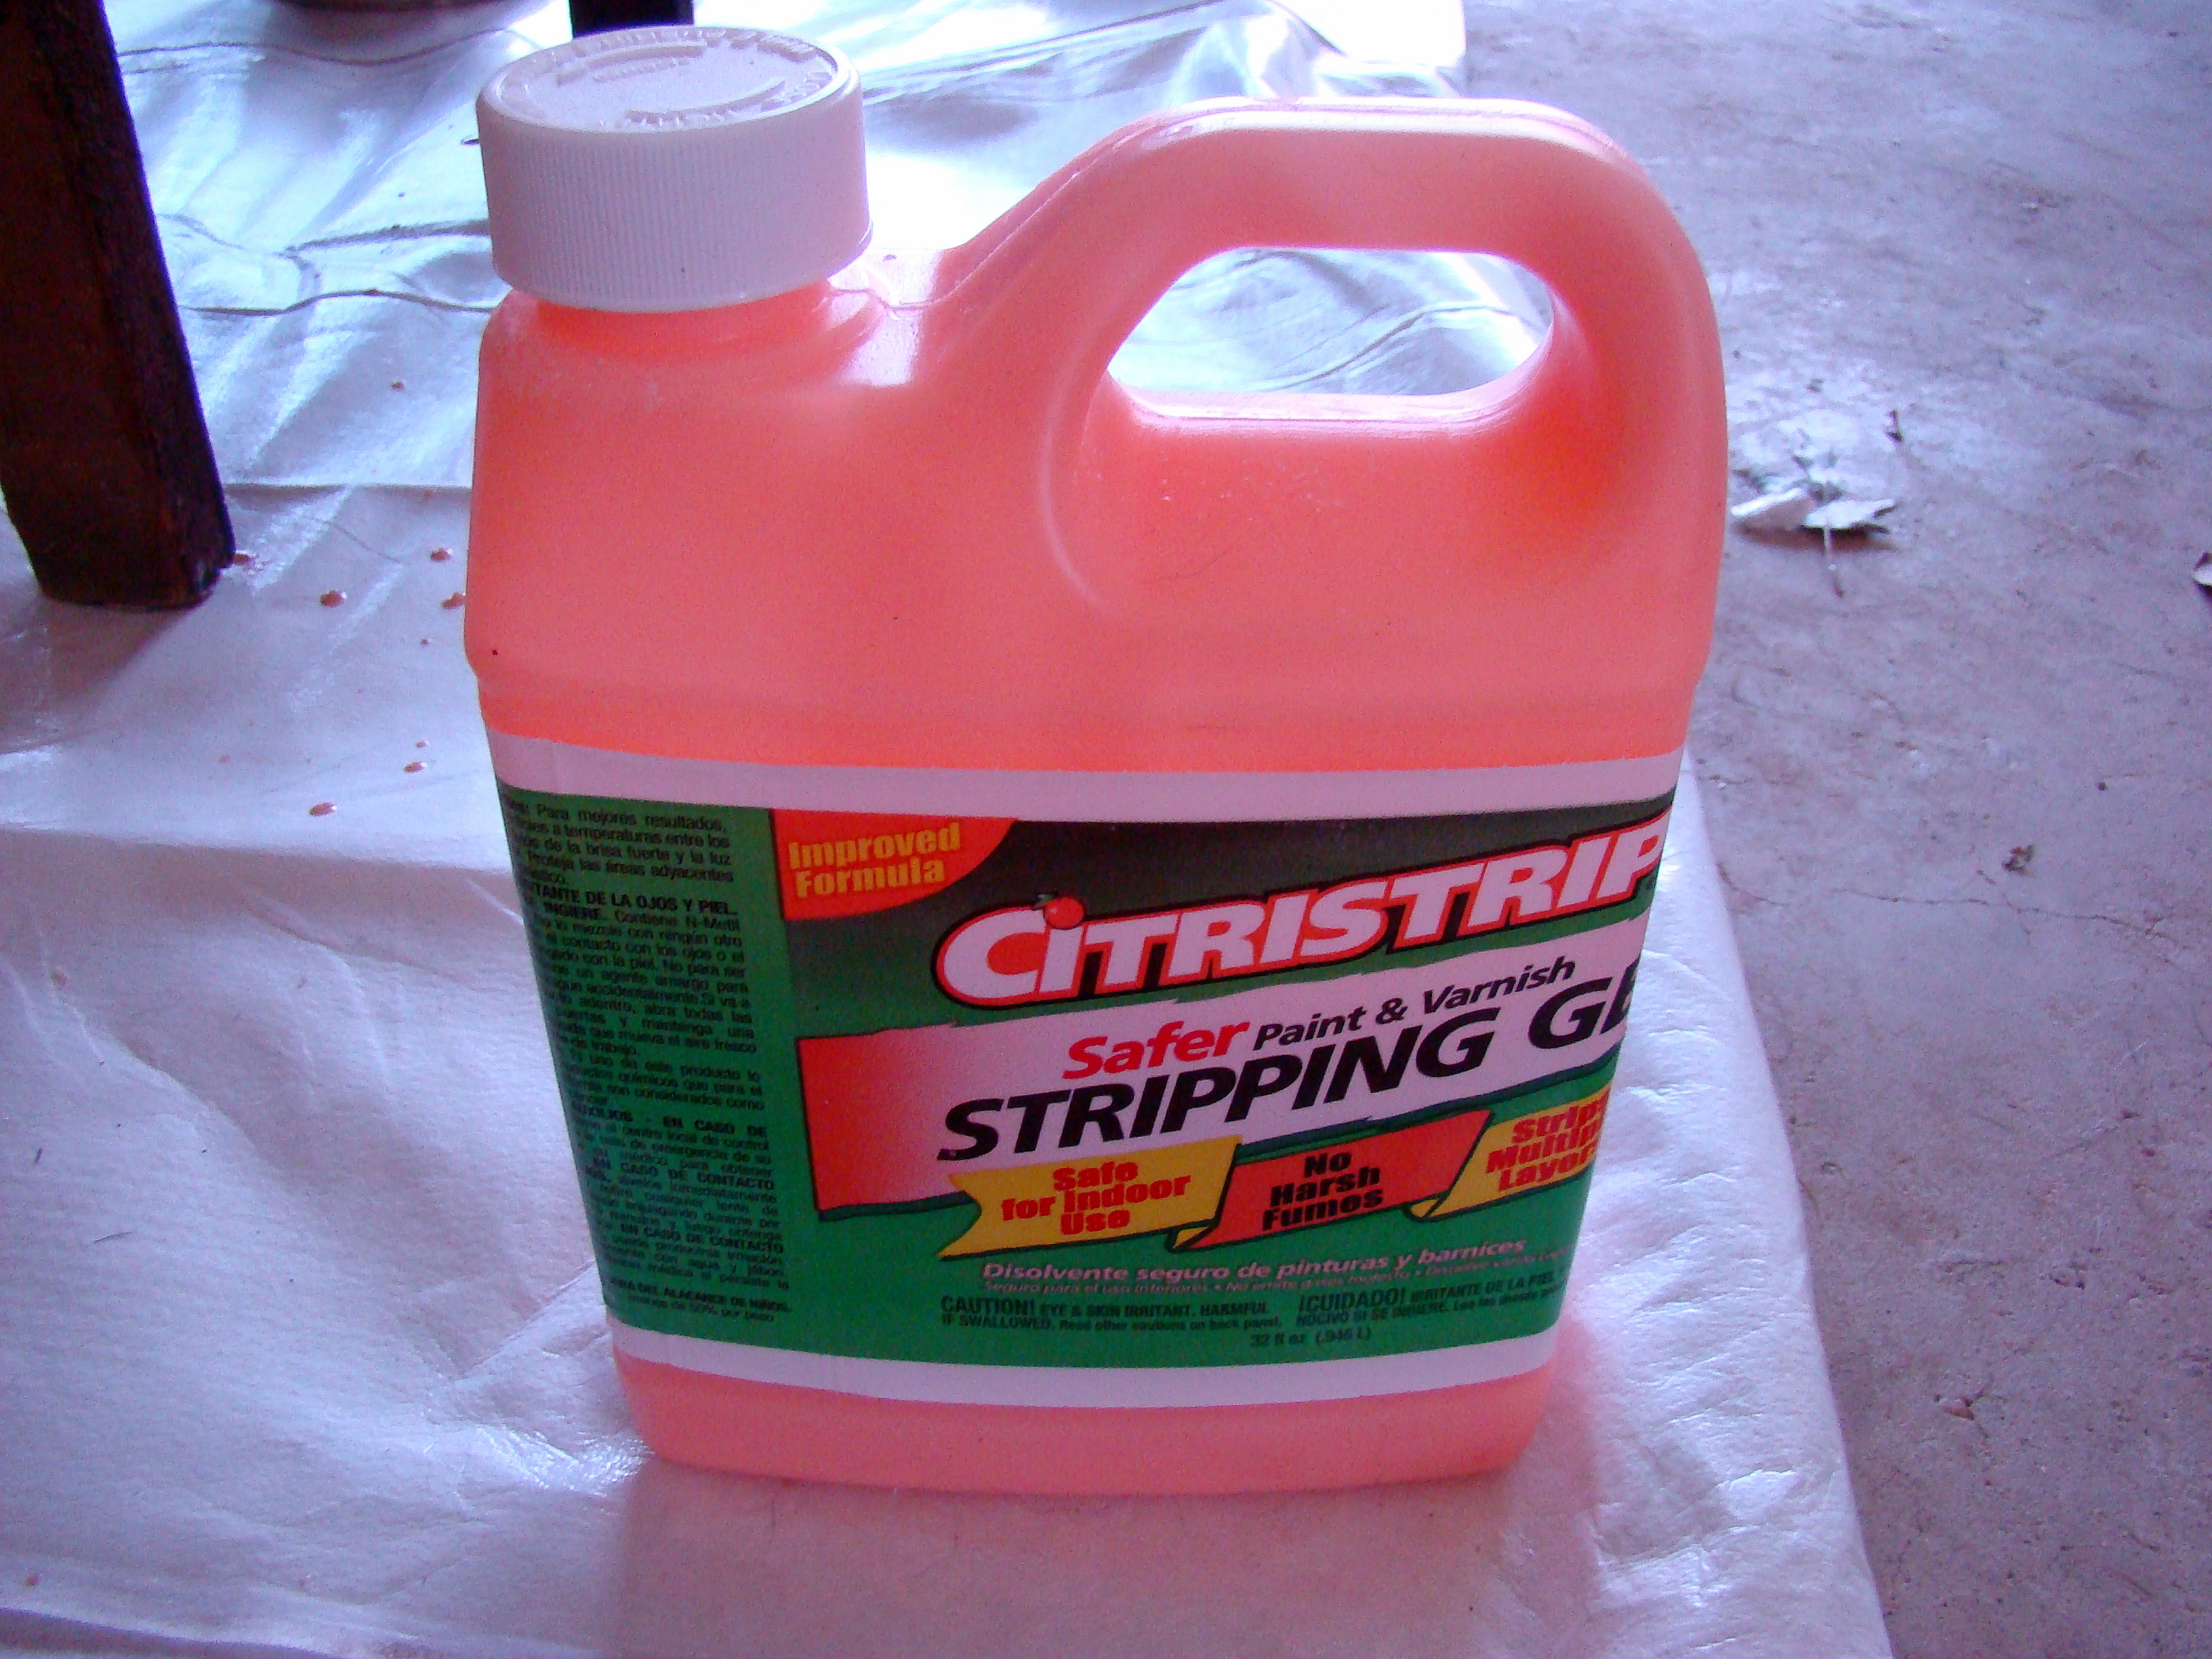
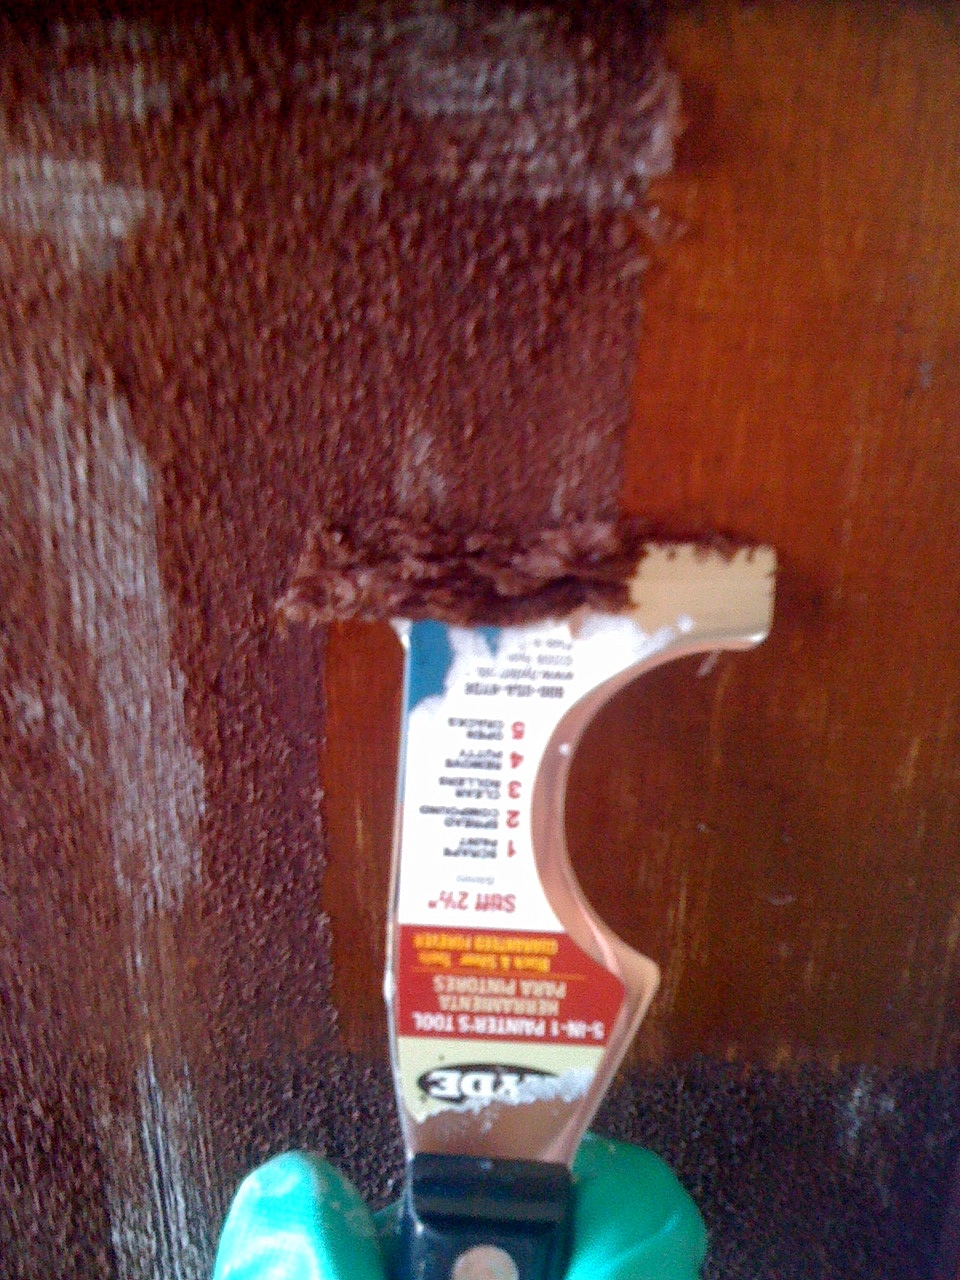
Since I don’t want to bore you to tears, I won’t go into each detailed step of the refinishing process (feel free to ask me questions about it, though). But, I am going to tell you Citristrip is the most amazing stuff ever. It makes removing old varnish a breeze….And I had LOTS of old varnish to remove. Let’s take a look at all of the before shots, shall we?

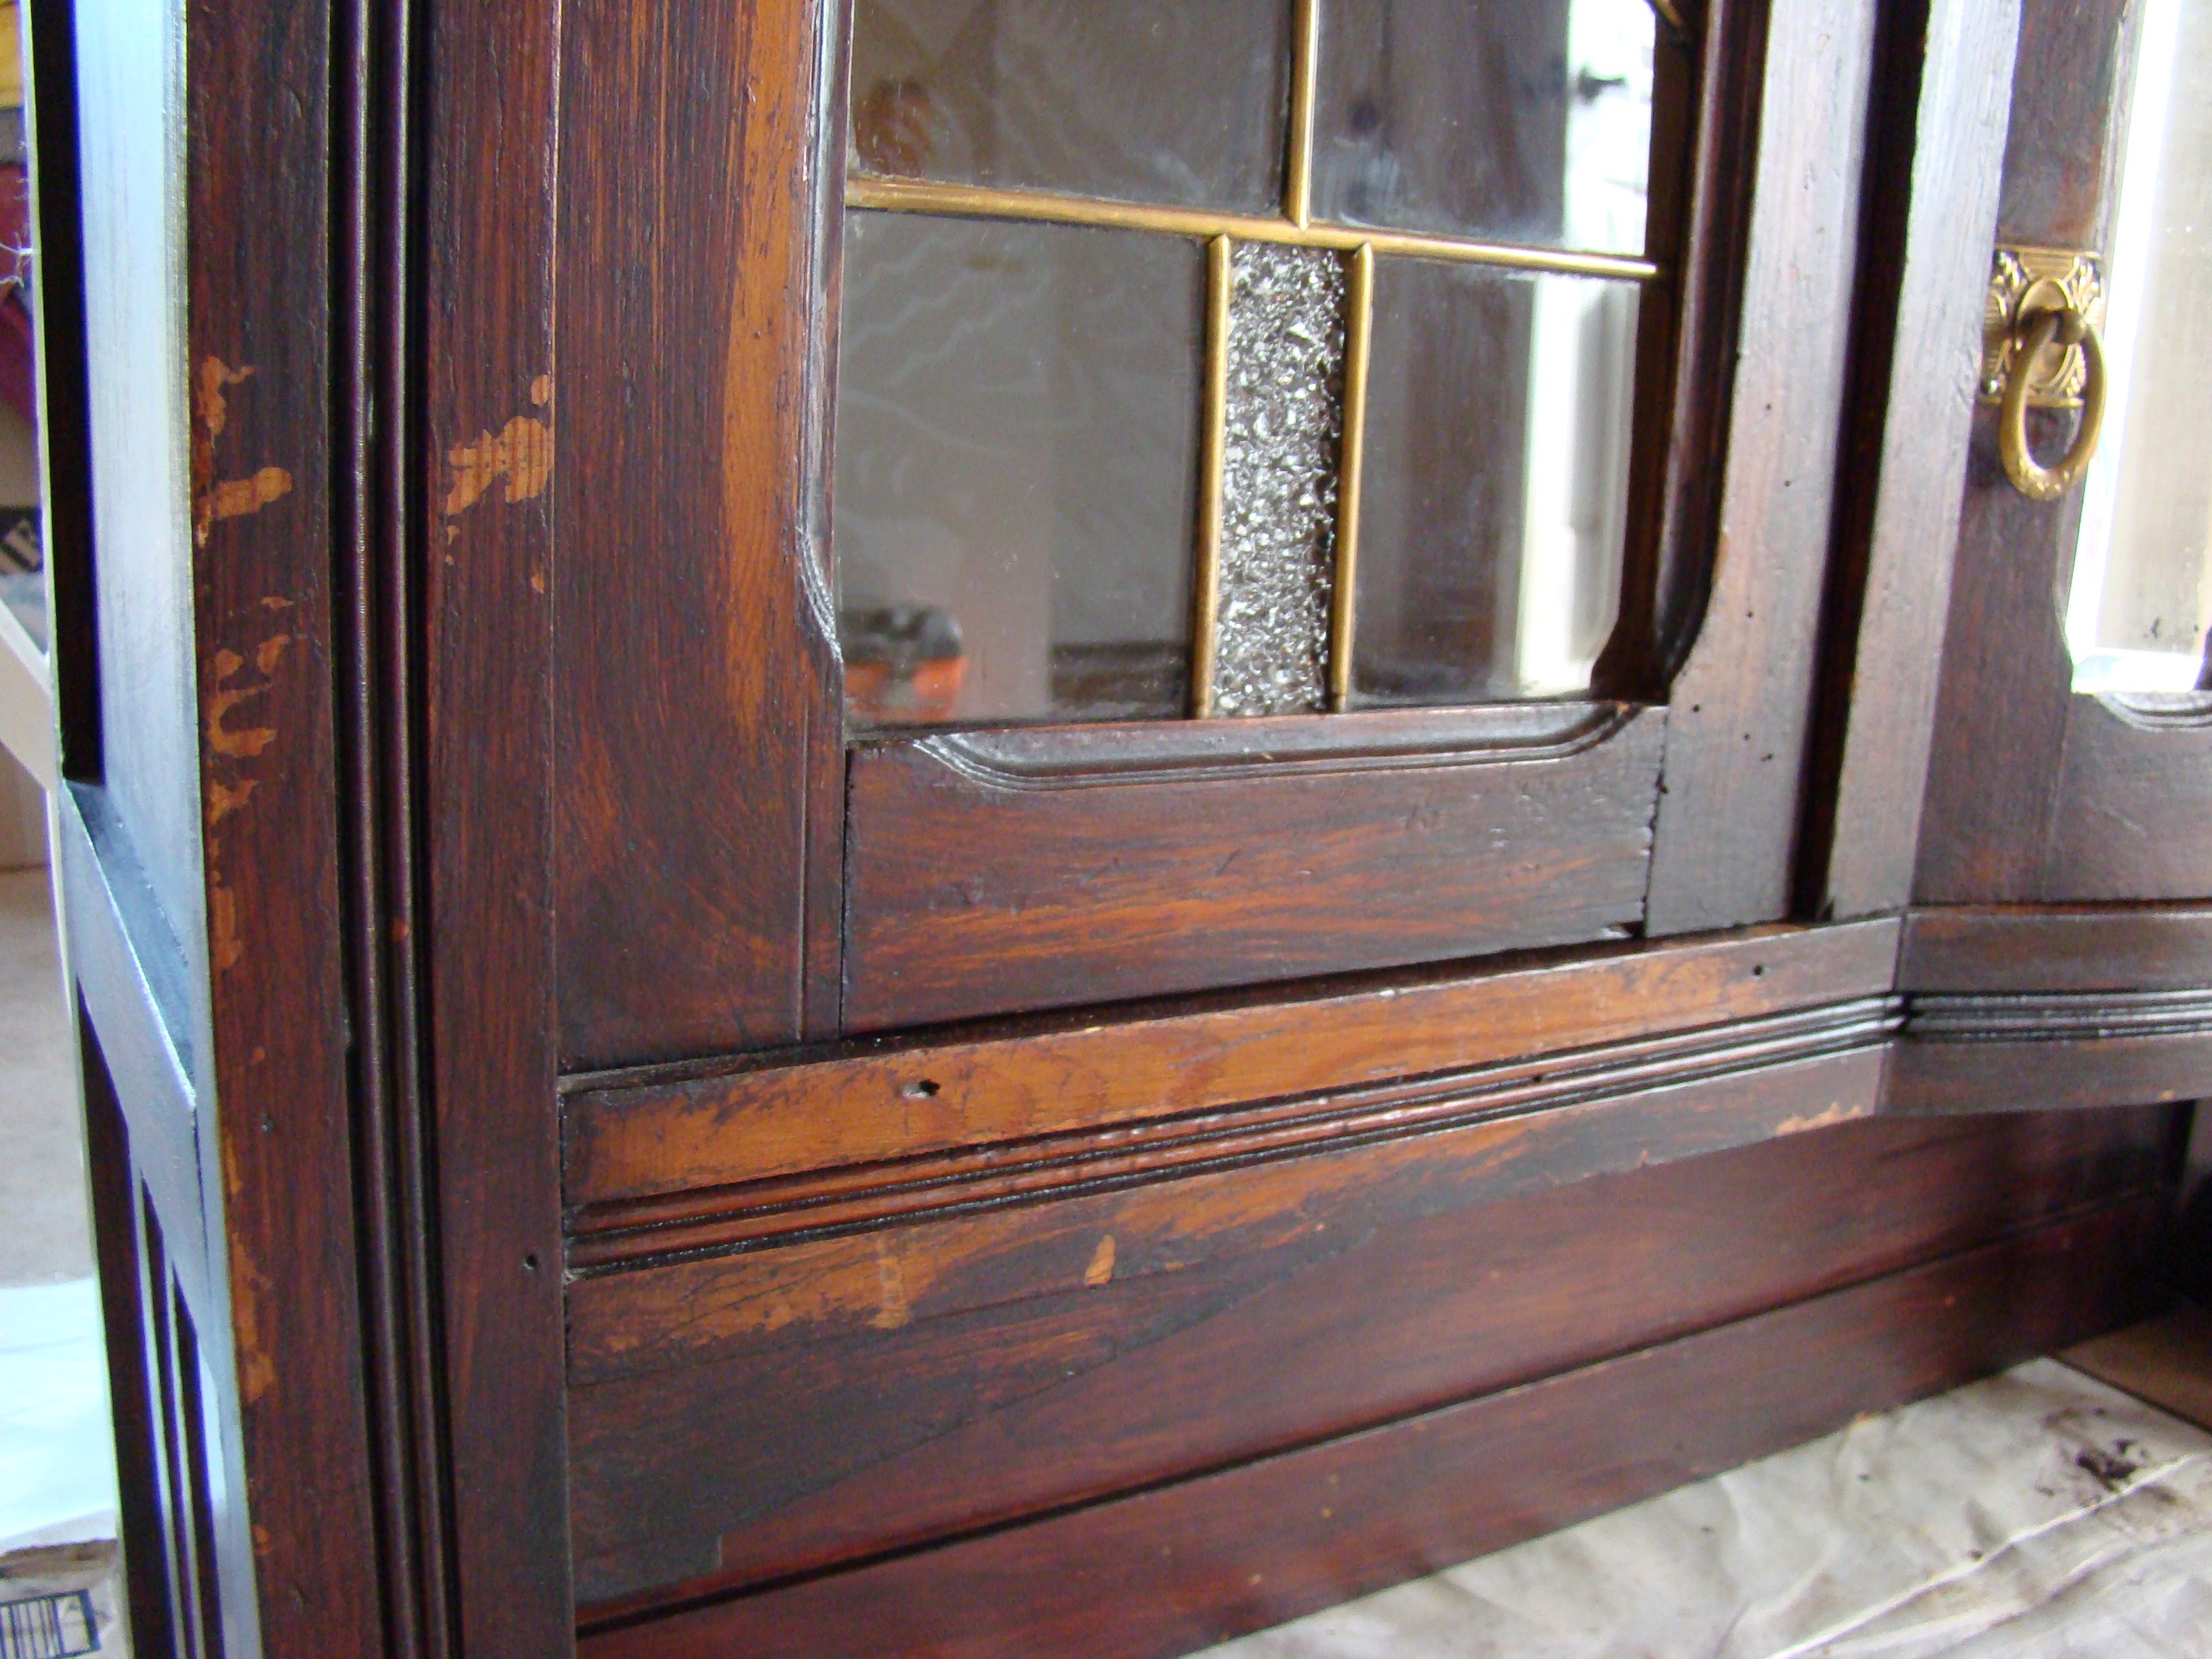

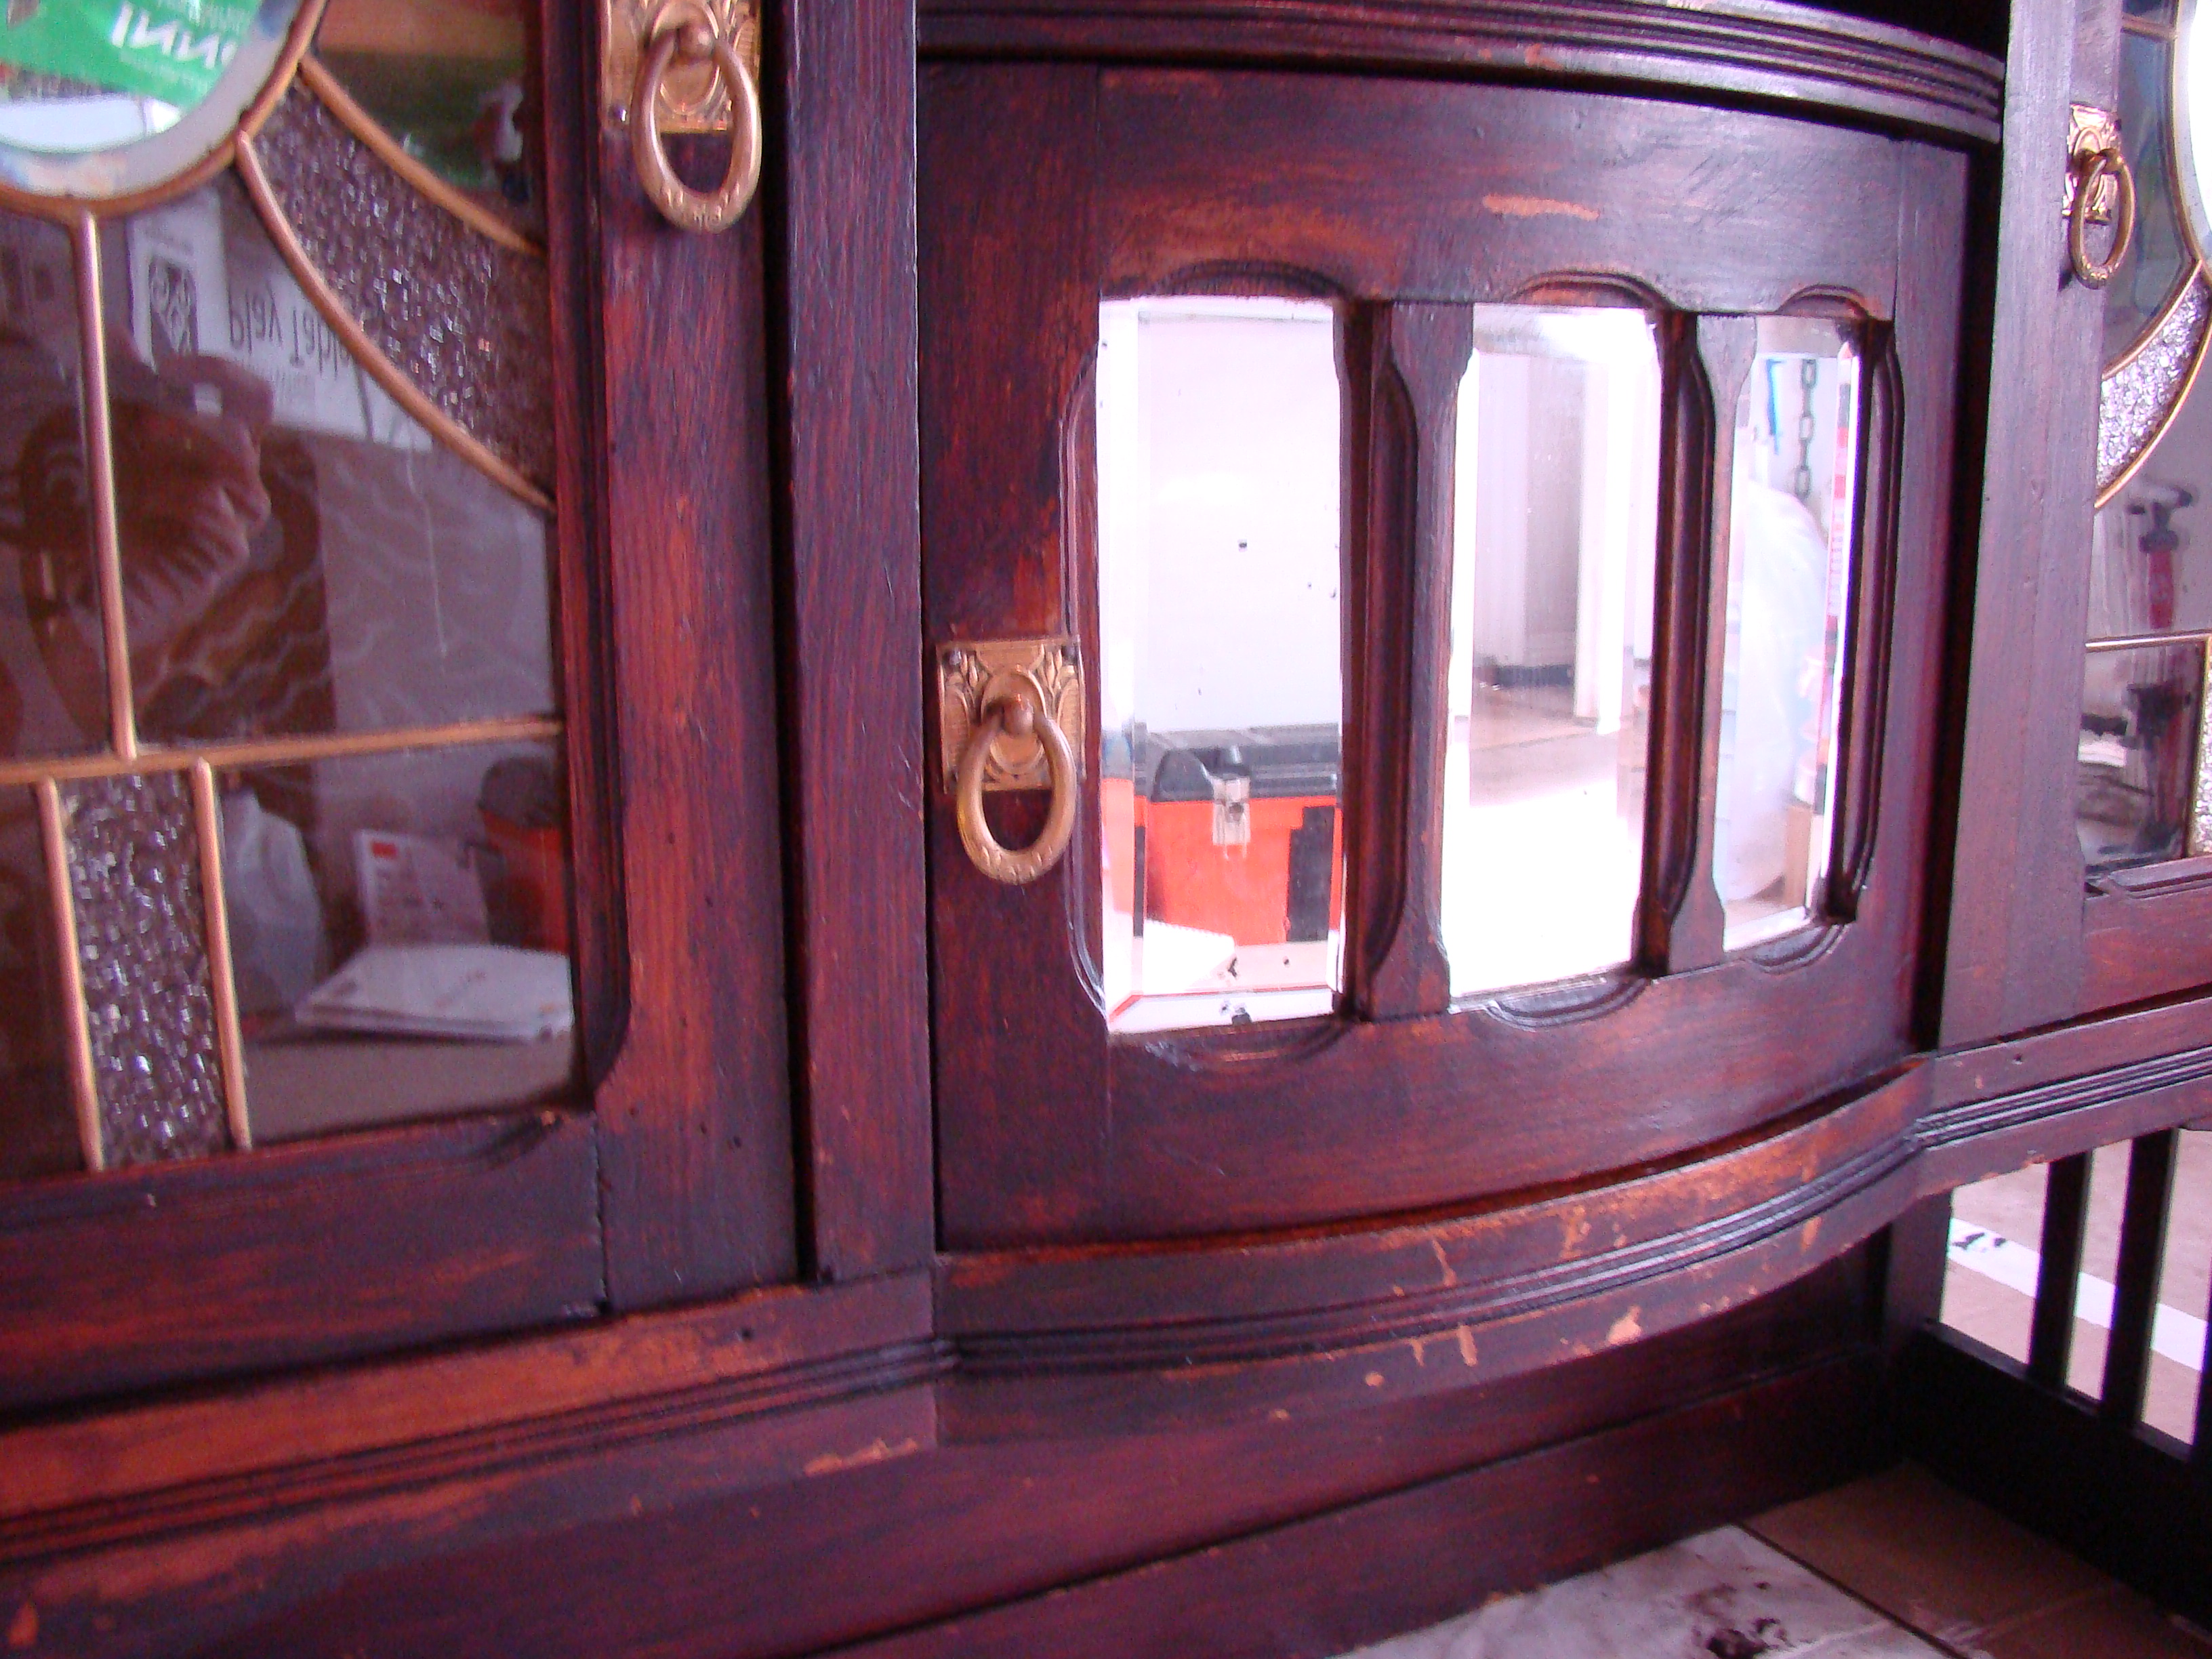
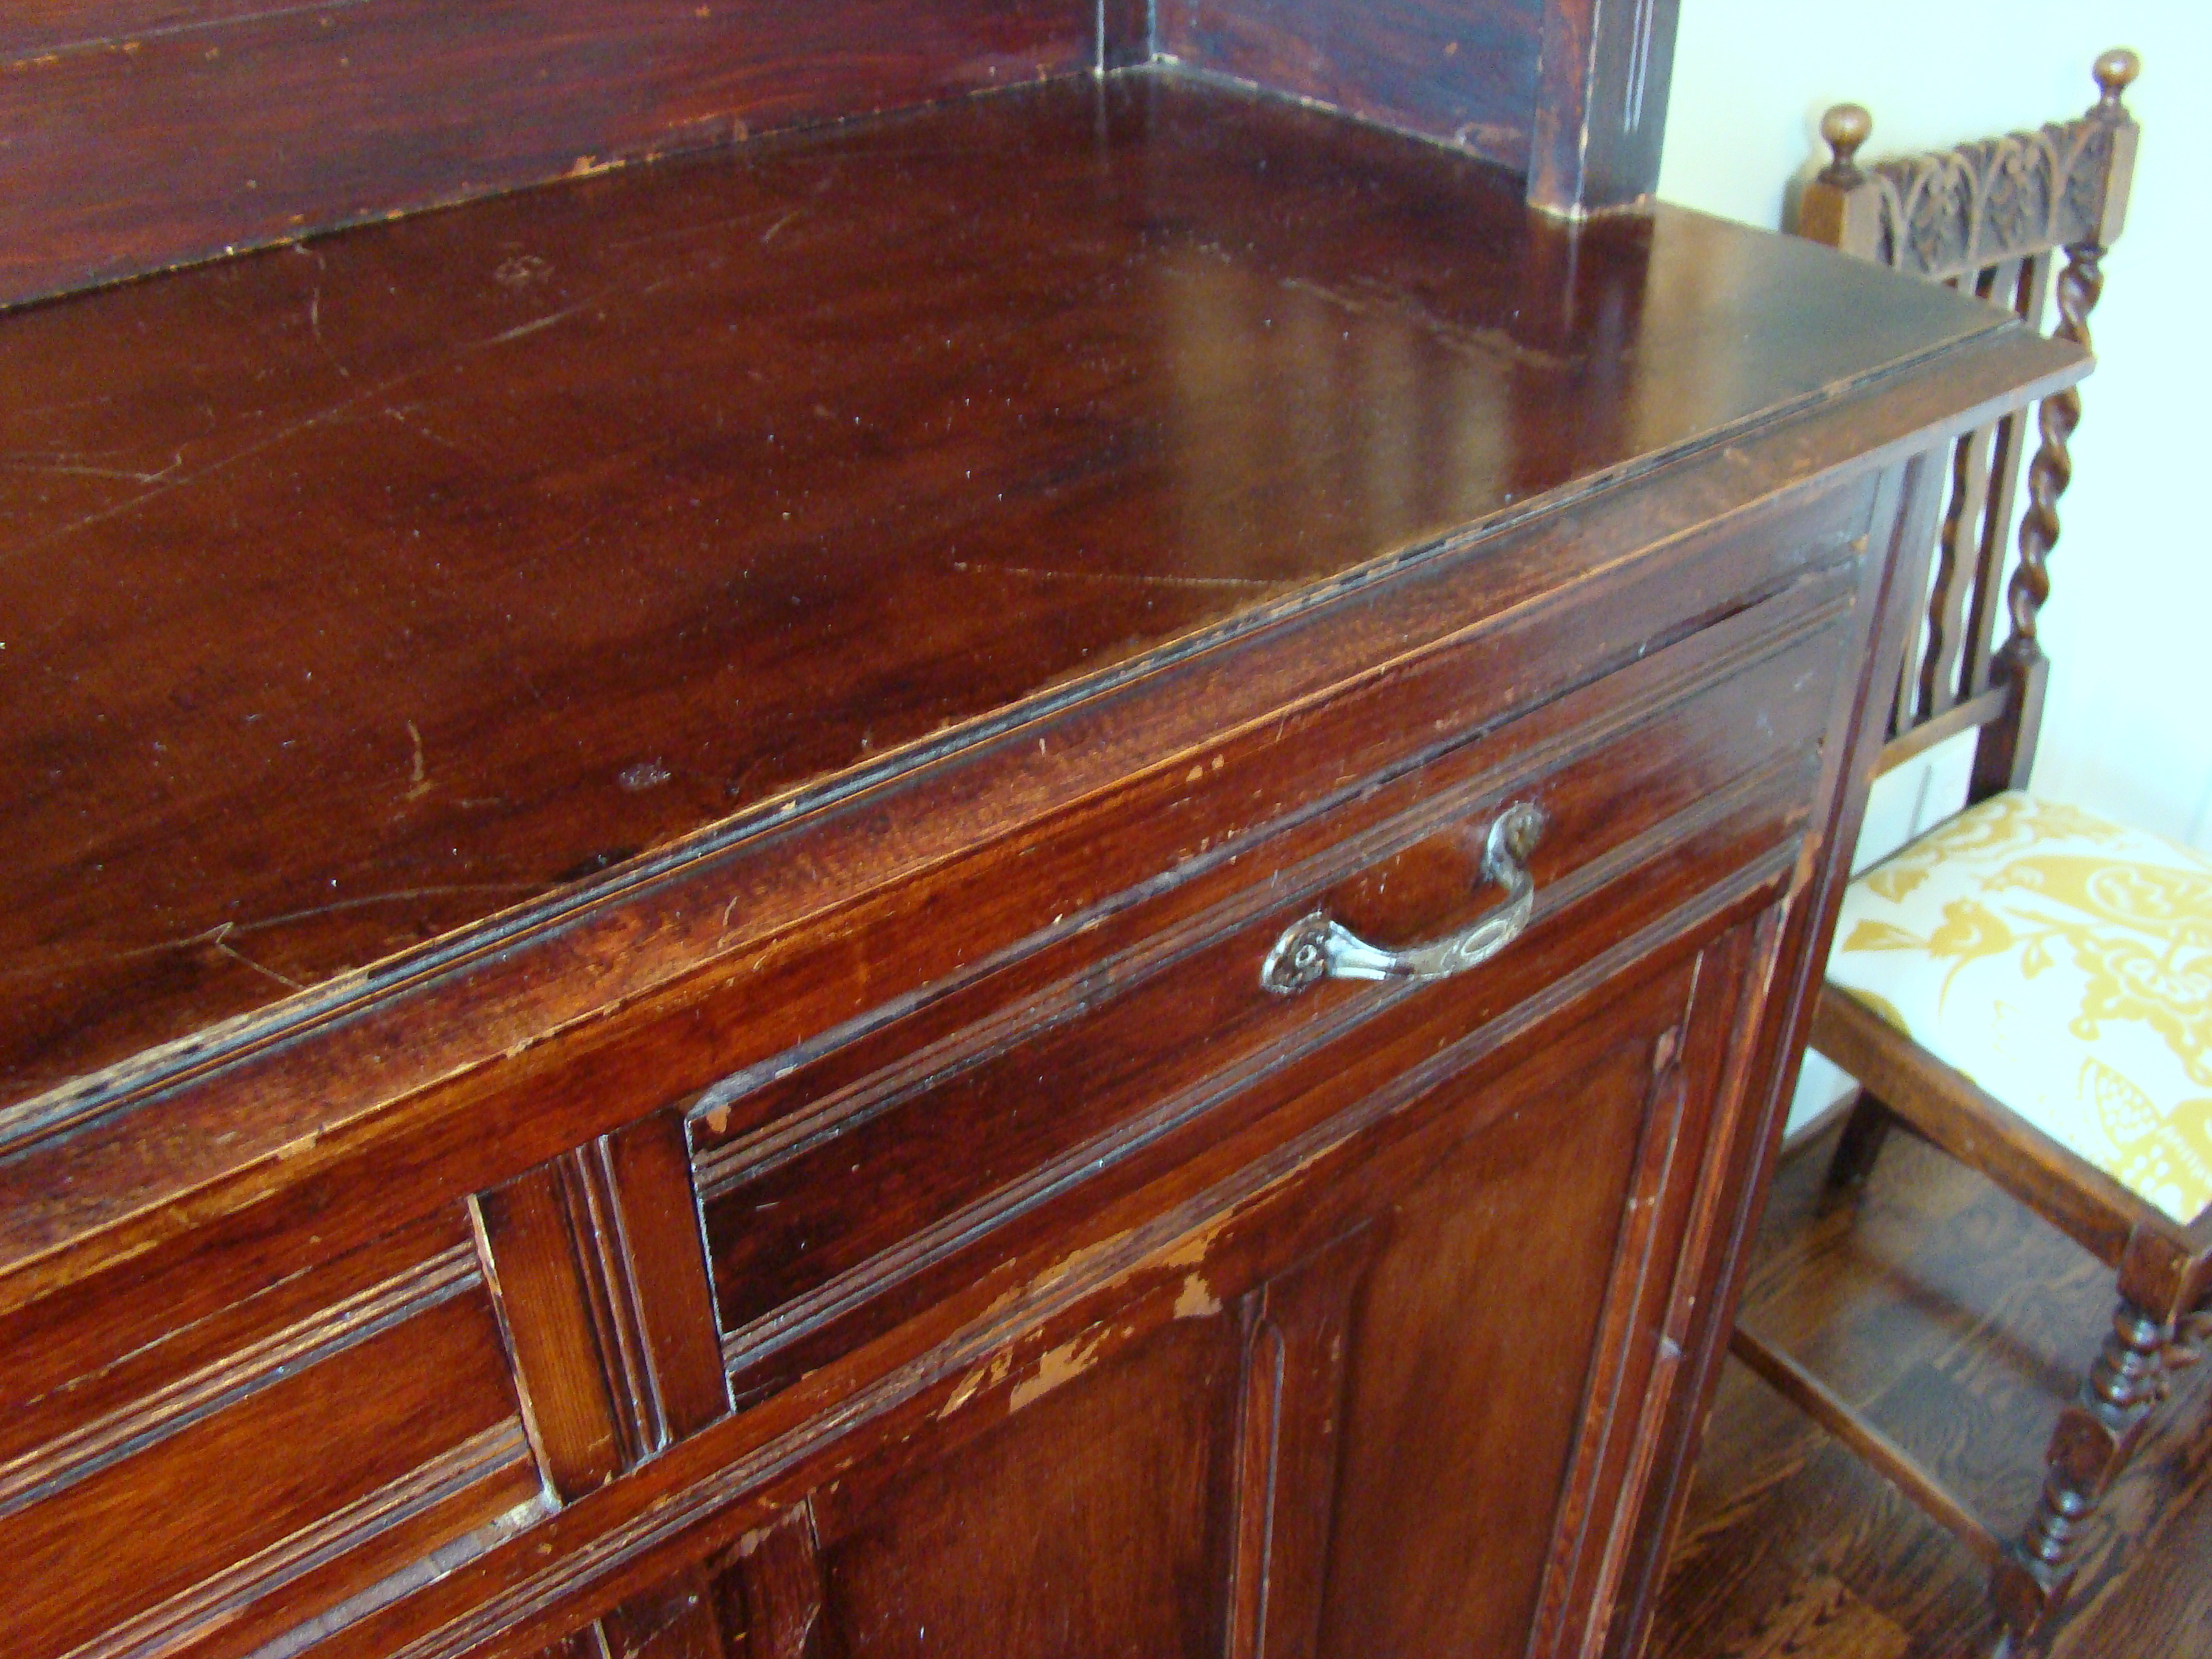

It had clearly seen better days. After stripping off the varnish, the hutch looked like this (sorry, no pics of the top half. I think it melted)…

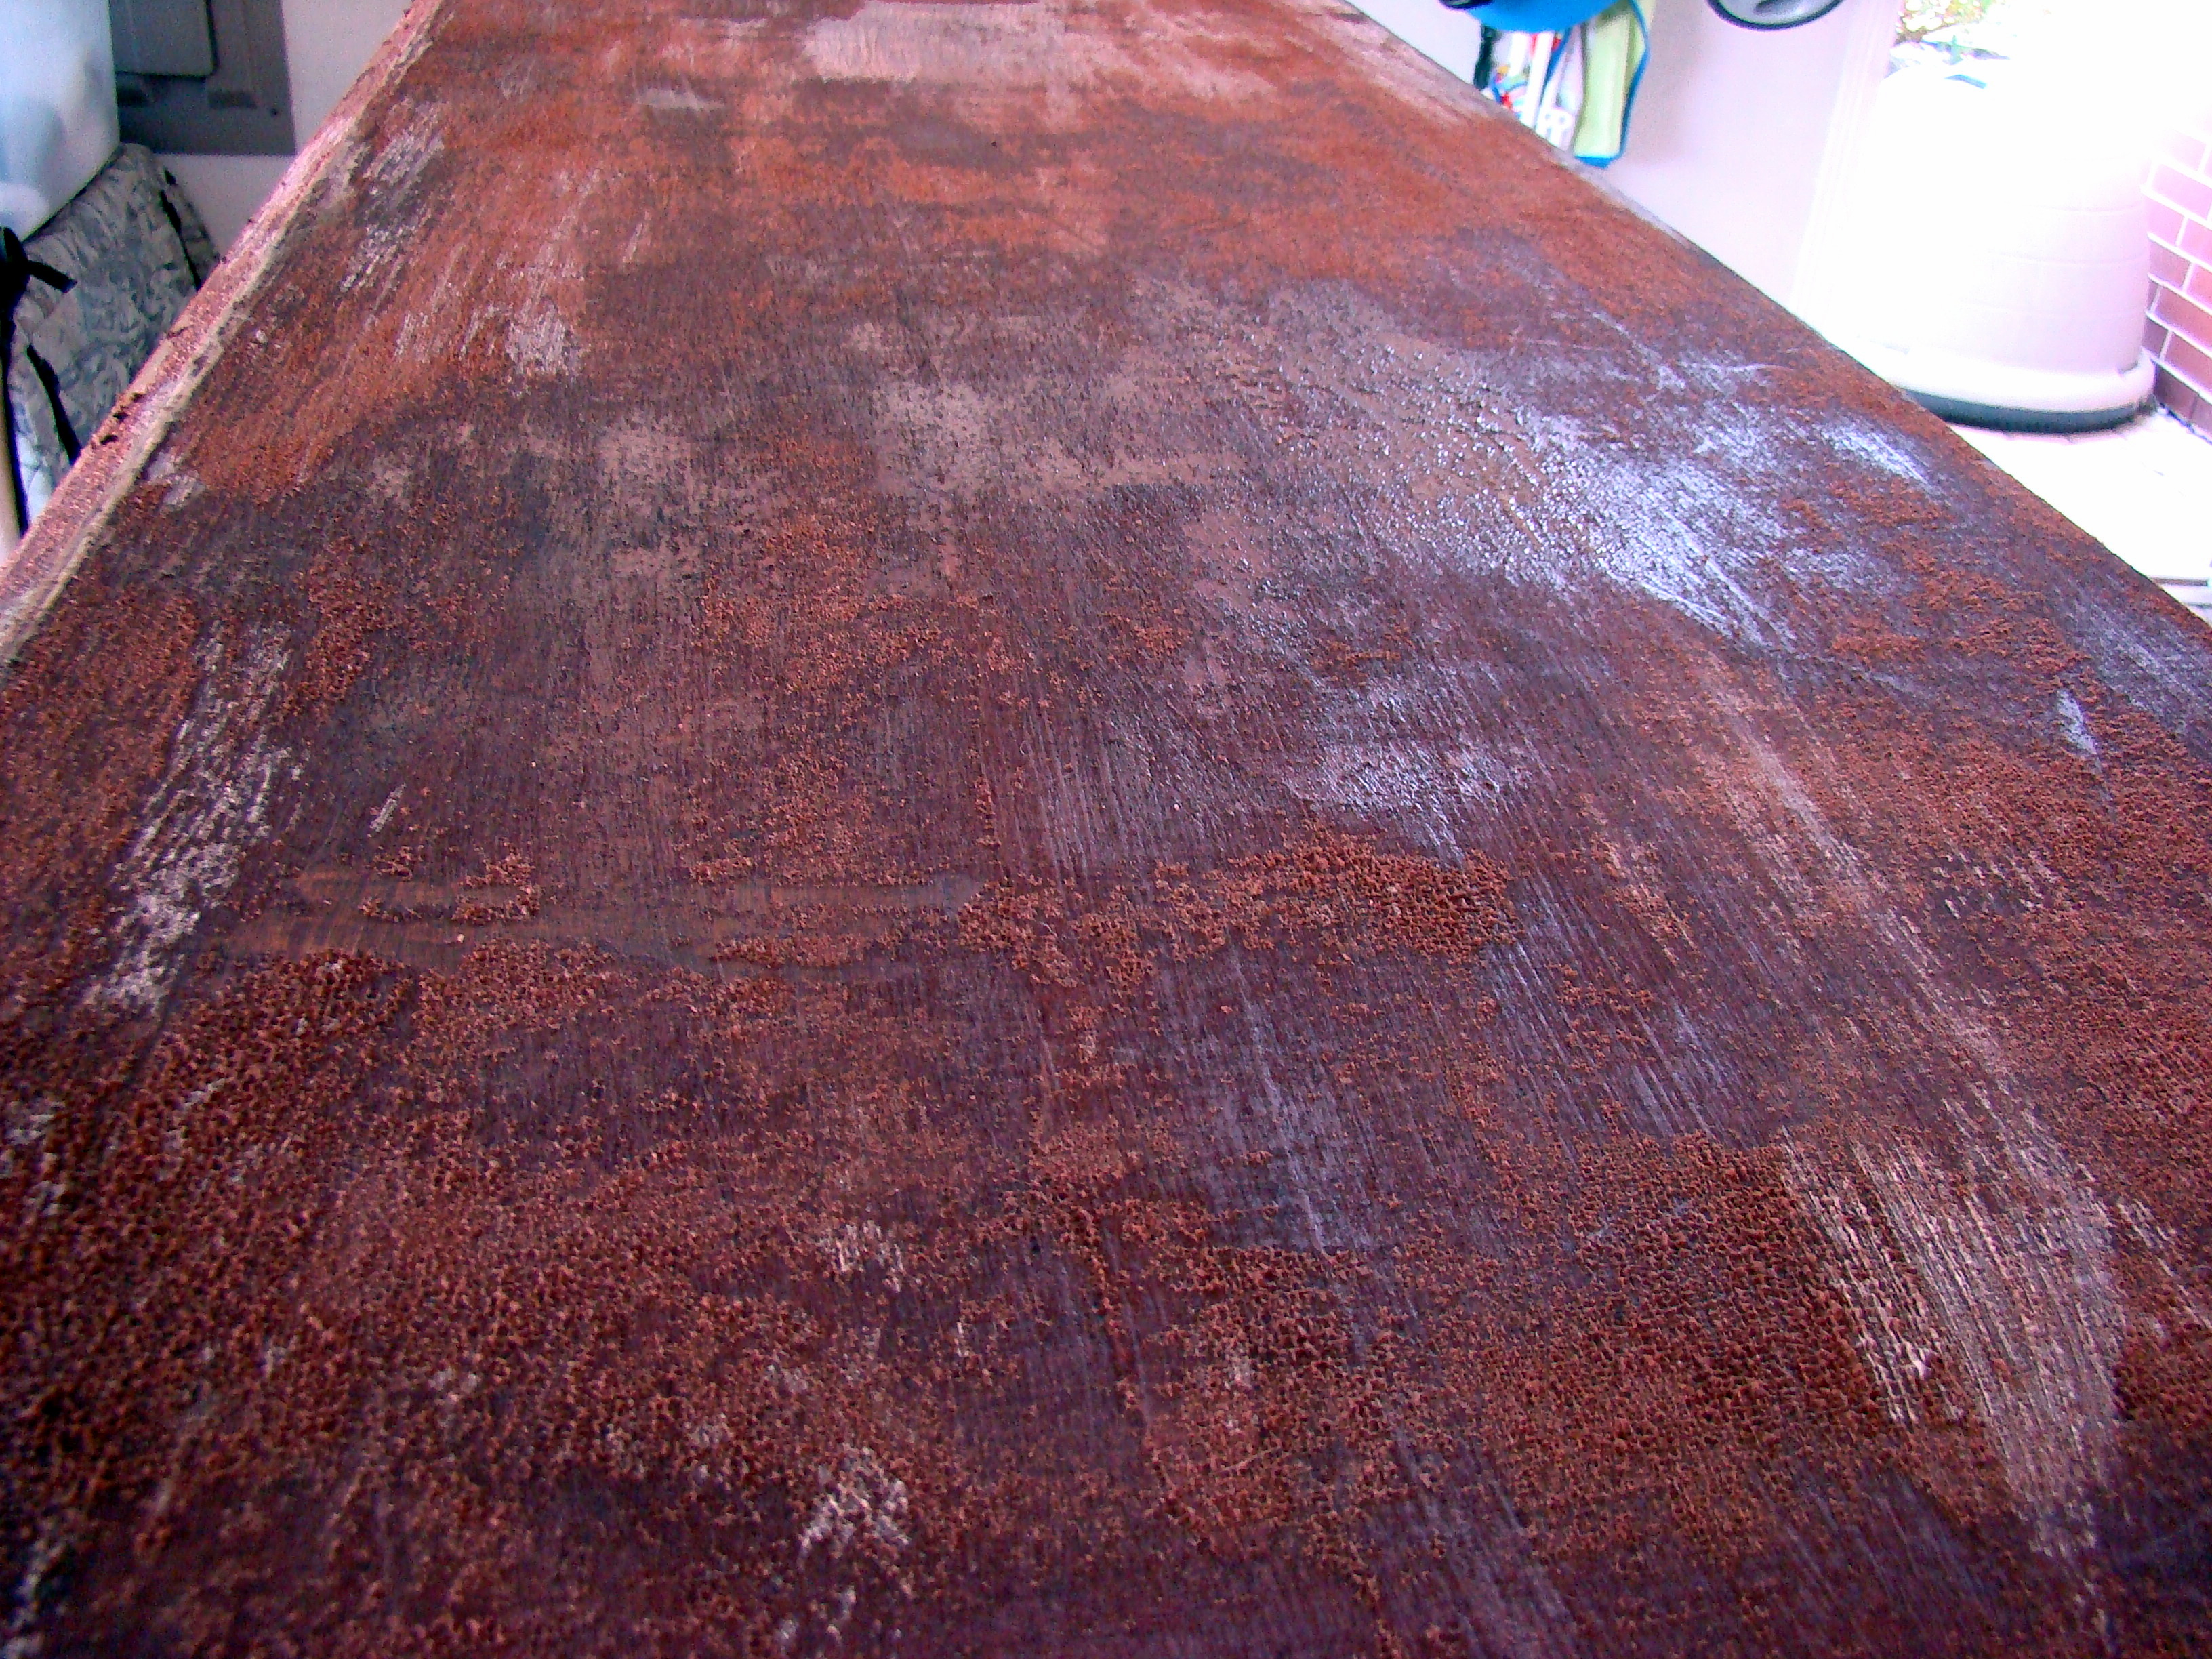

Now, keep in mind I am in the midst of a Texas summer, with ZERO wind. At this point, I really wanted to forget the whole thing. I was in hell, dripping sweat, and my hutch was mocking me. She was the devil and I just assumed use her as firewood the next winter. Seriously. Then, I added the first coat of gel stain. Hmmm, did I just feel the hint of a breeze?
So, I carried on and am so glad I did. After a week in the heat, this was my end result…
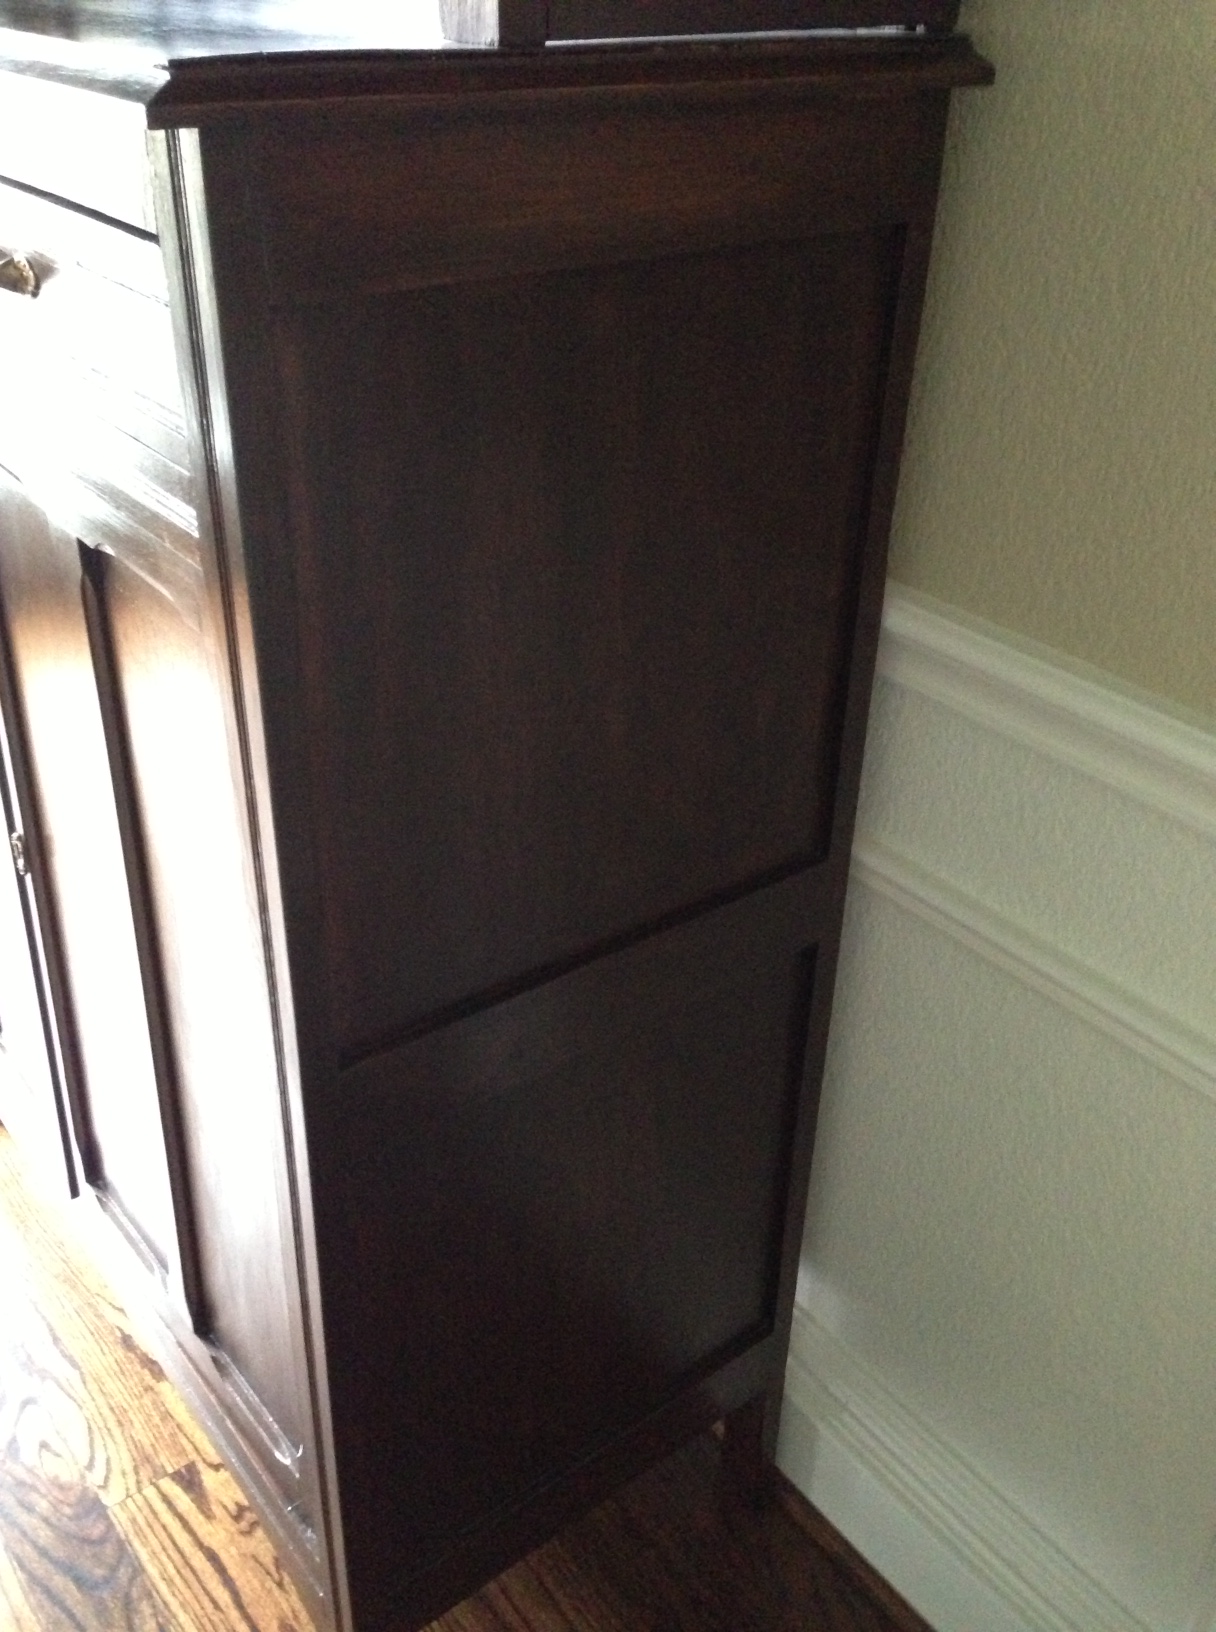
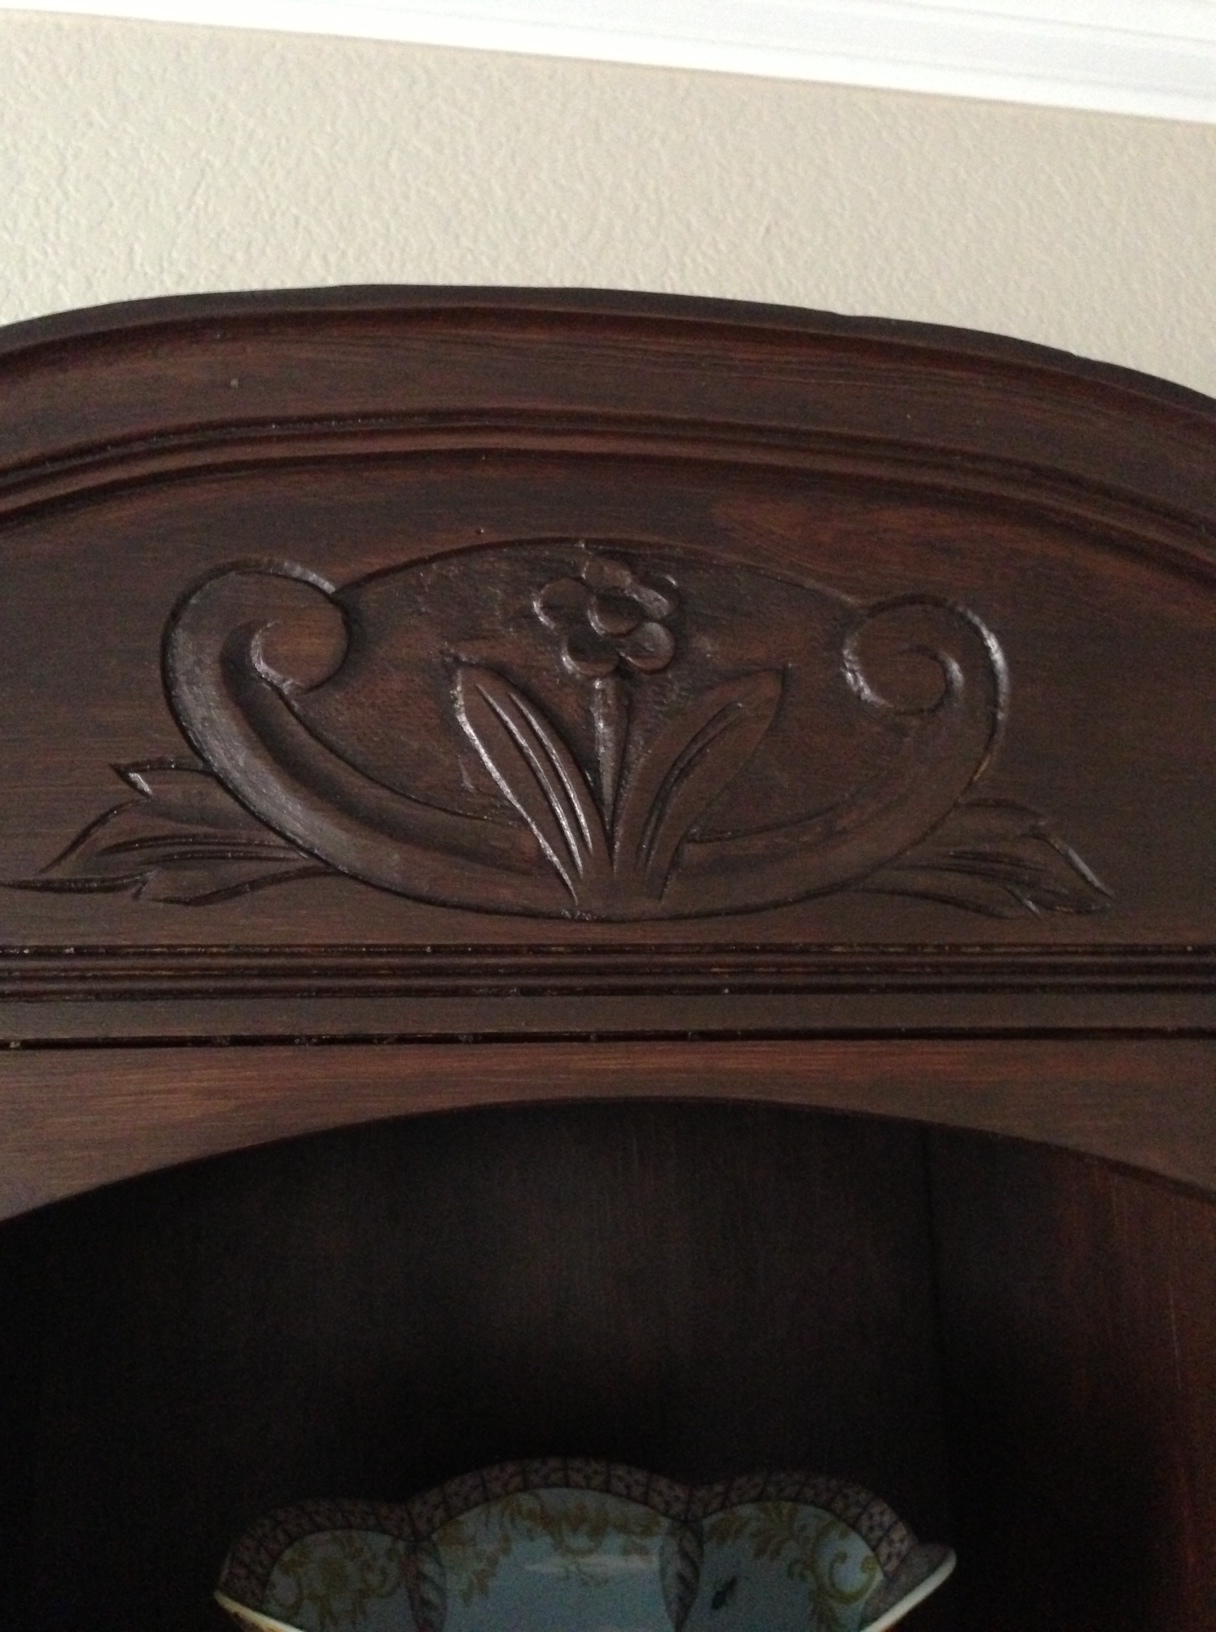

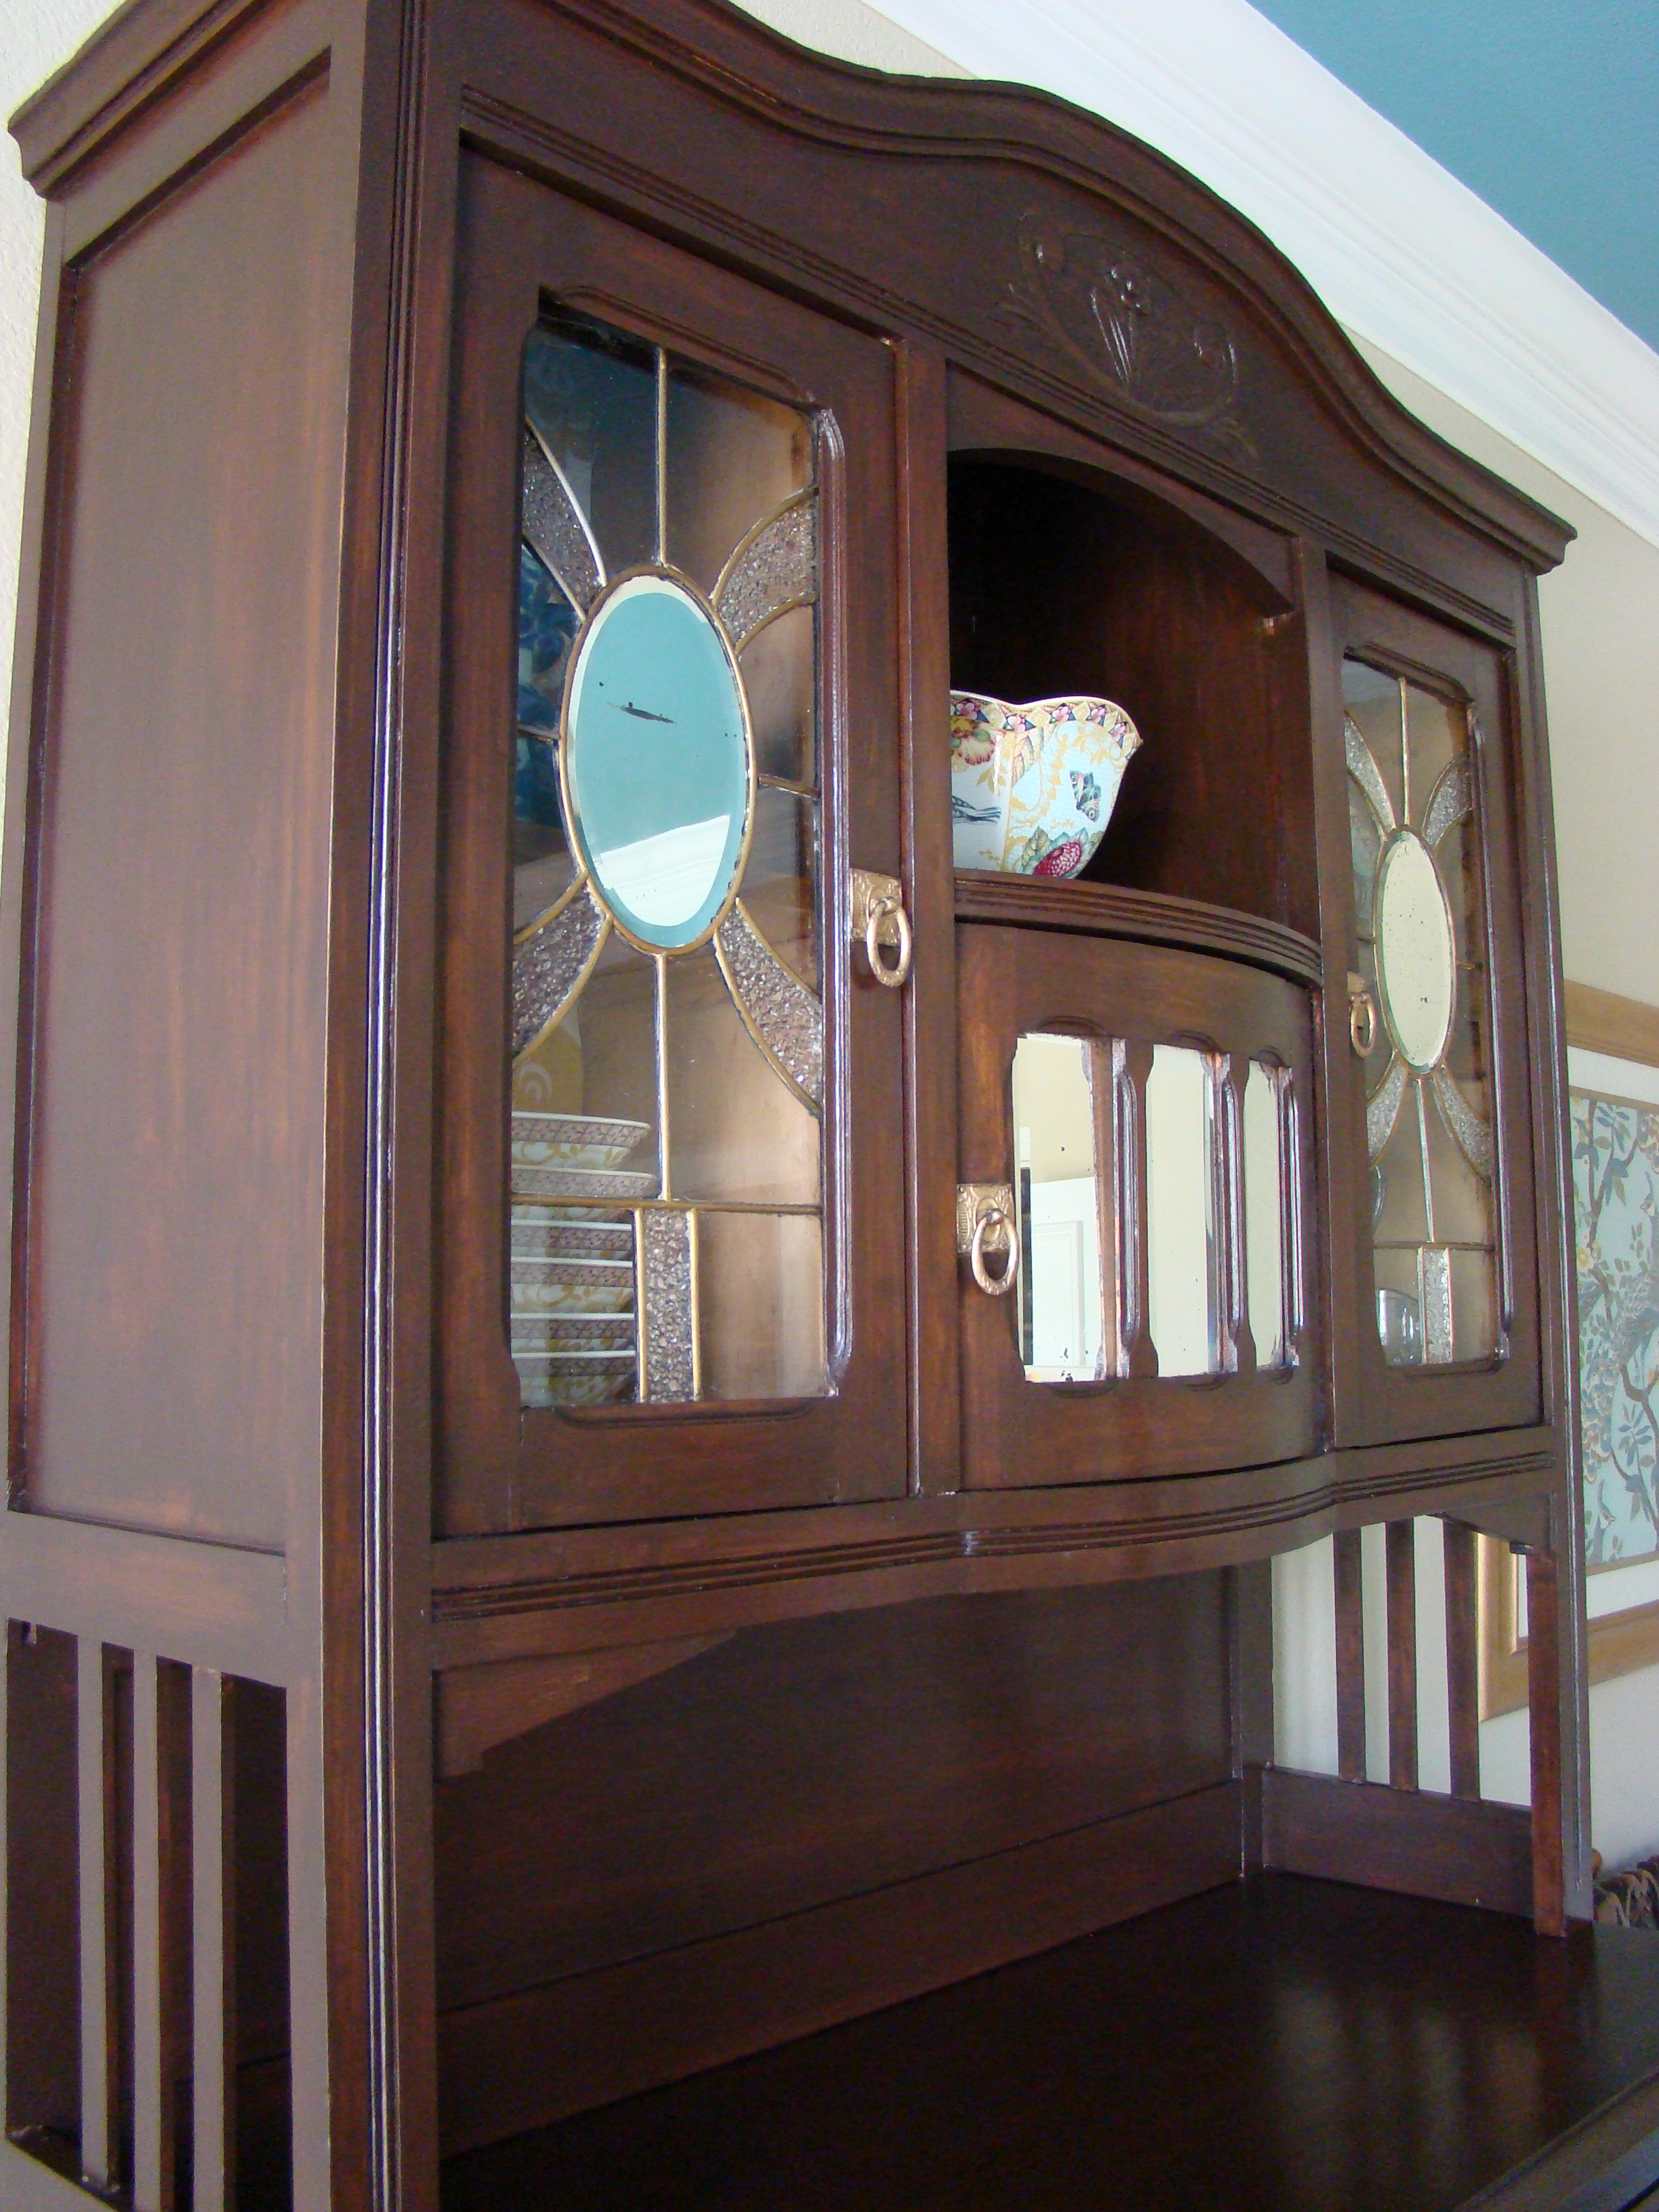
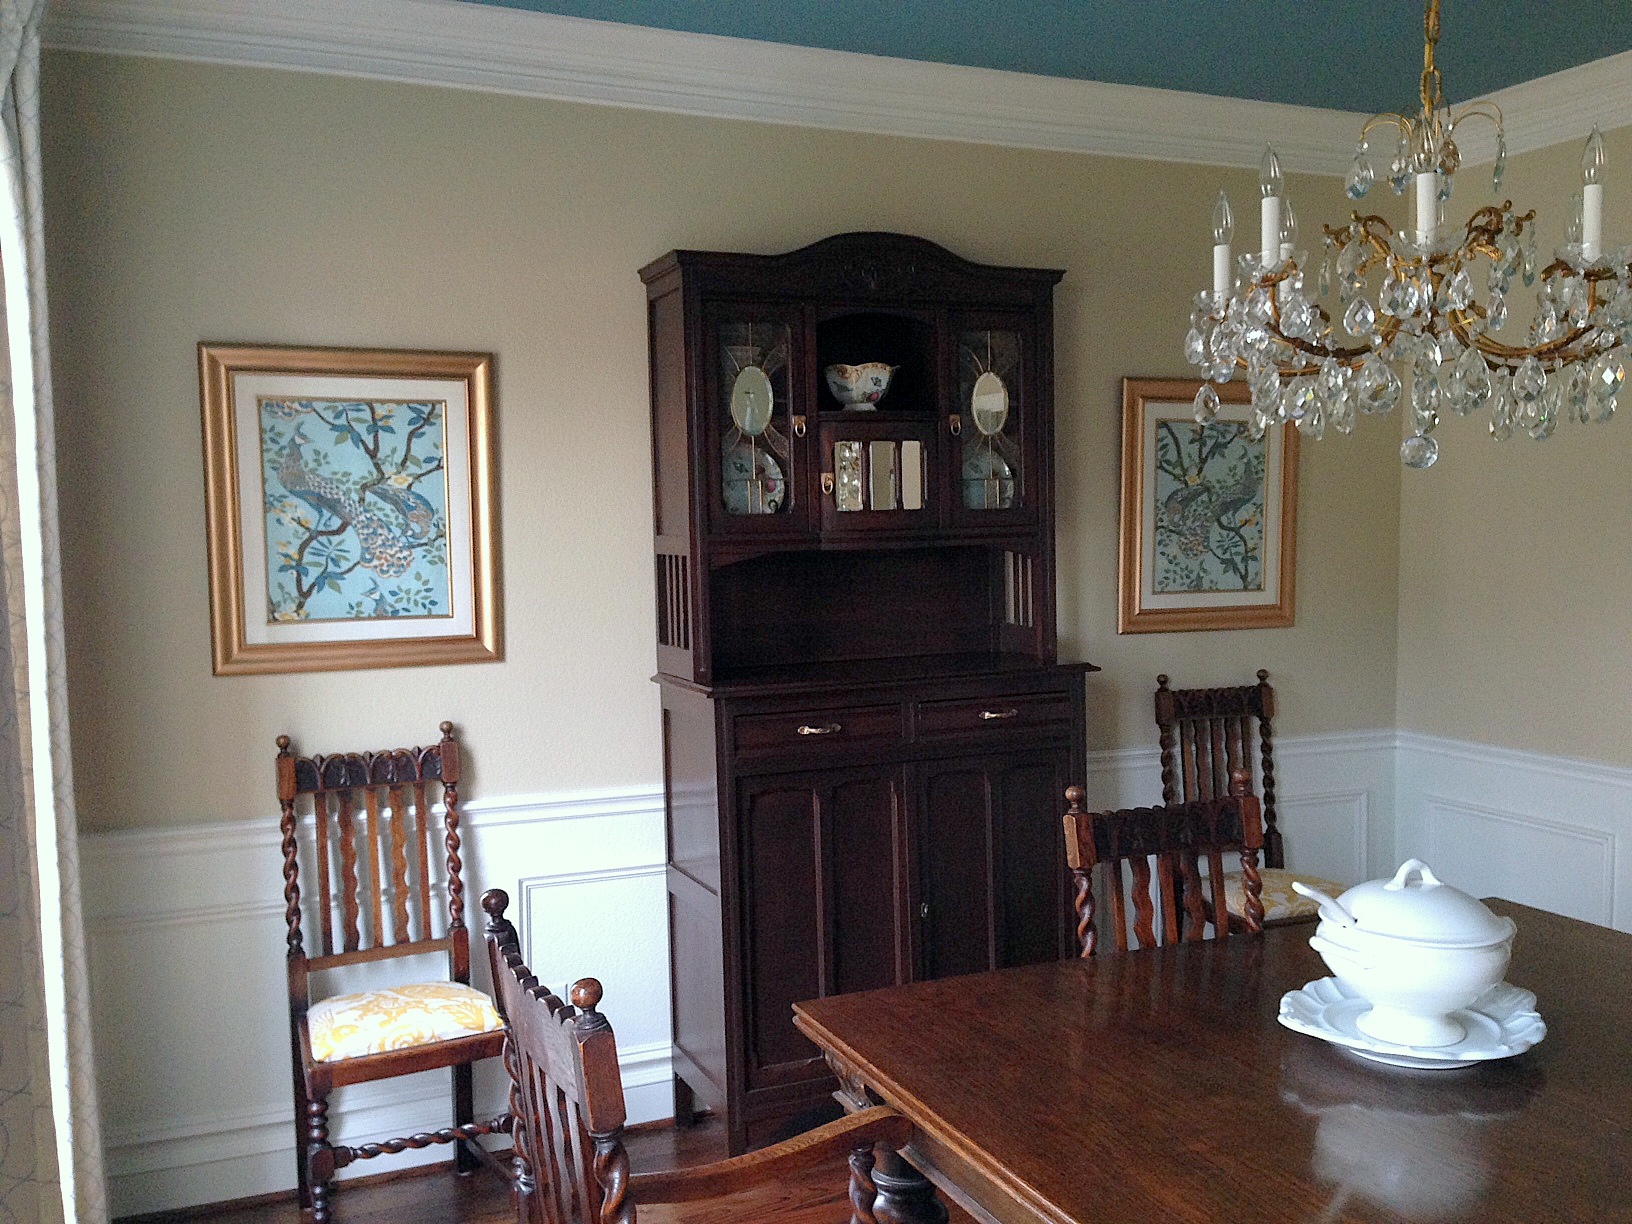
No more reddish, uneven, chipped, neglected finish. My hutch is now a rich, even chocolaty brown. Here is a side by side before and after comparison…
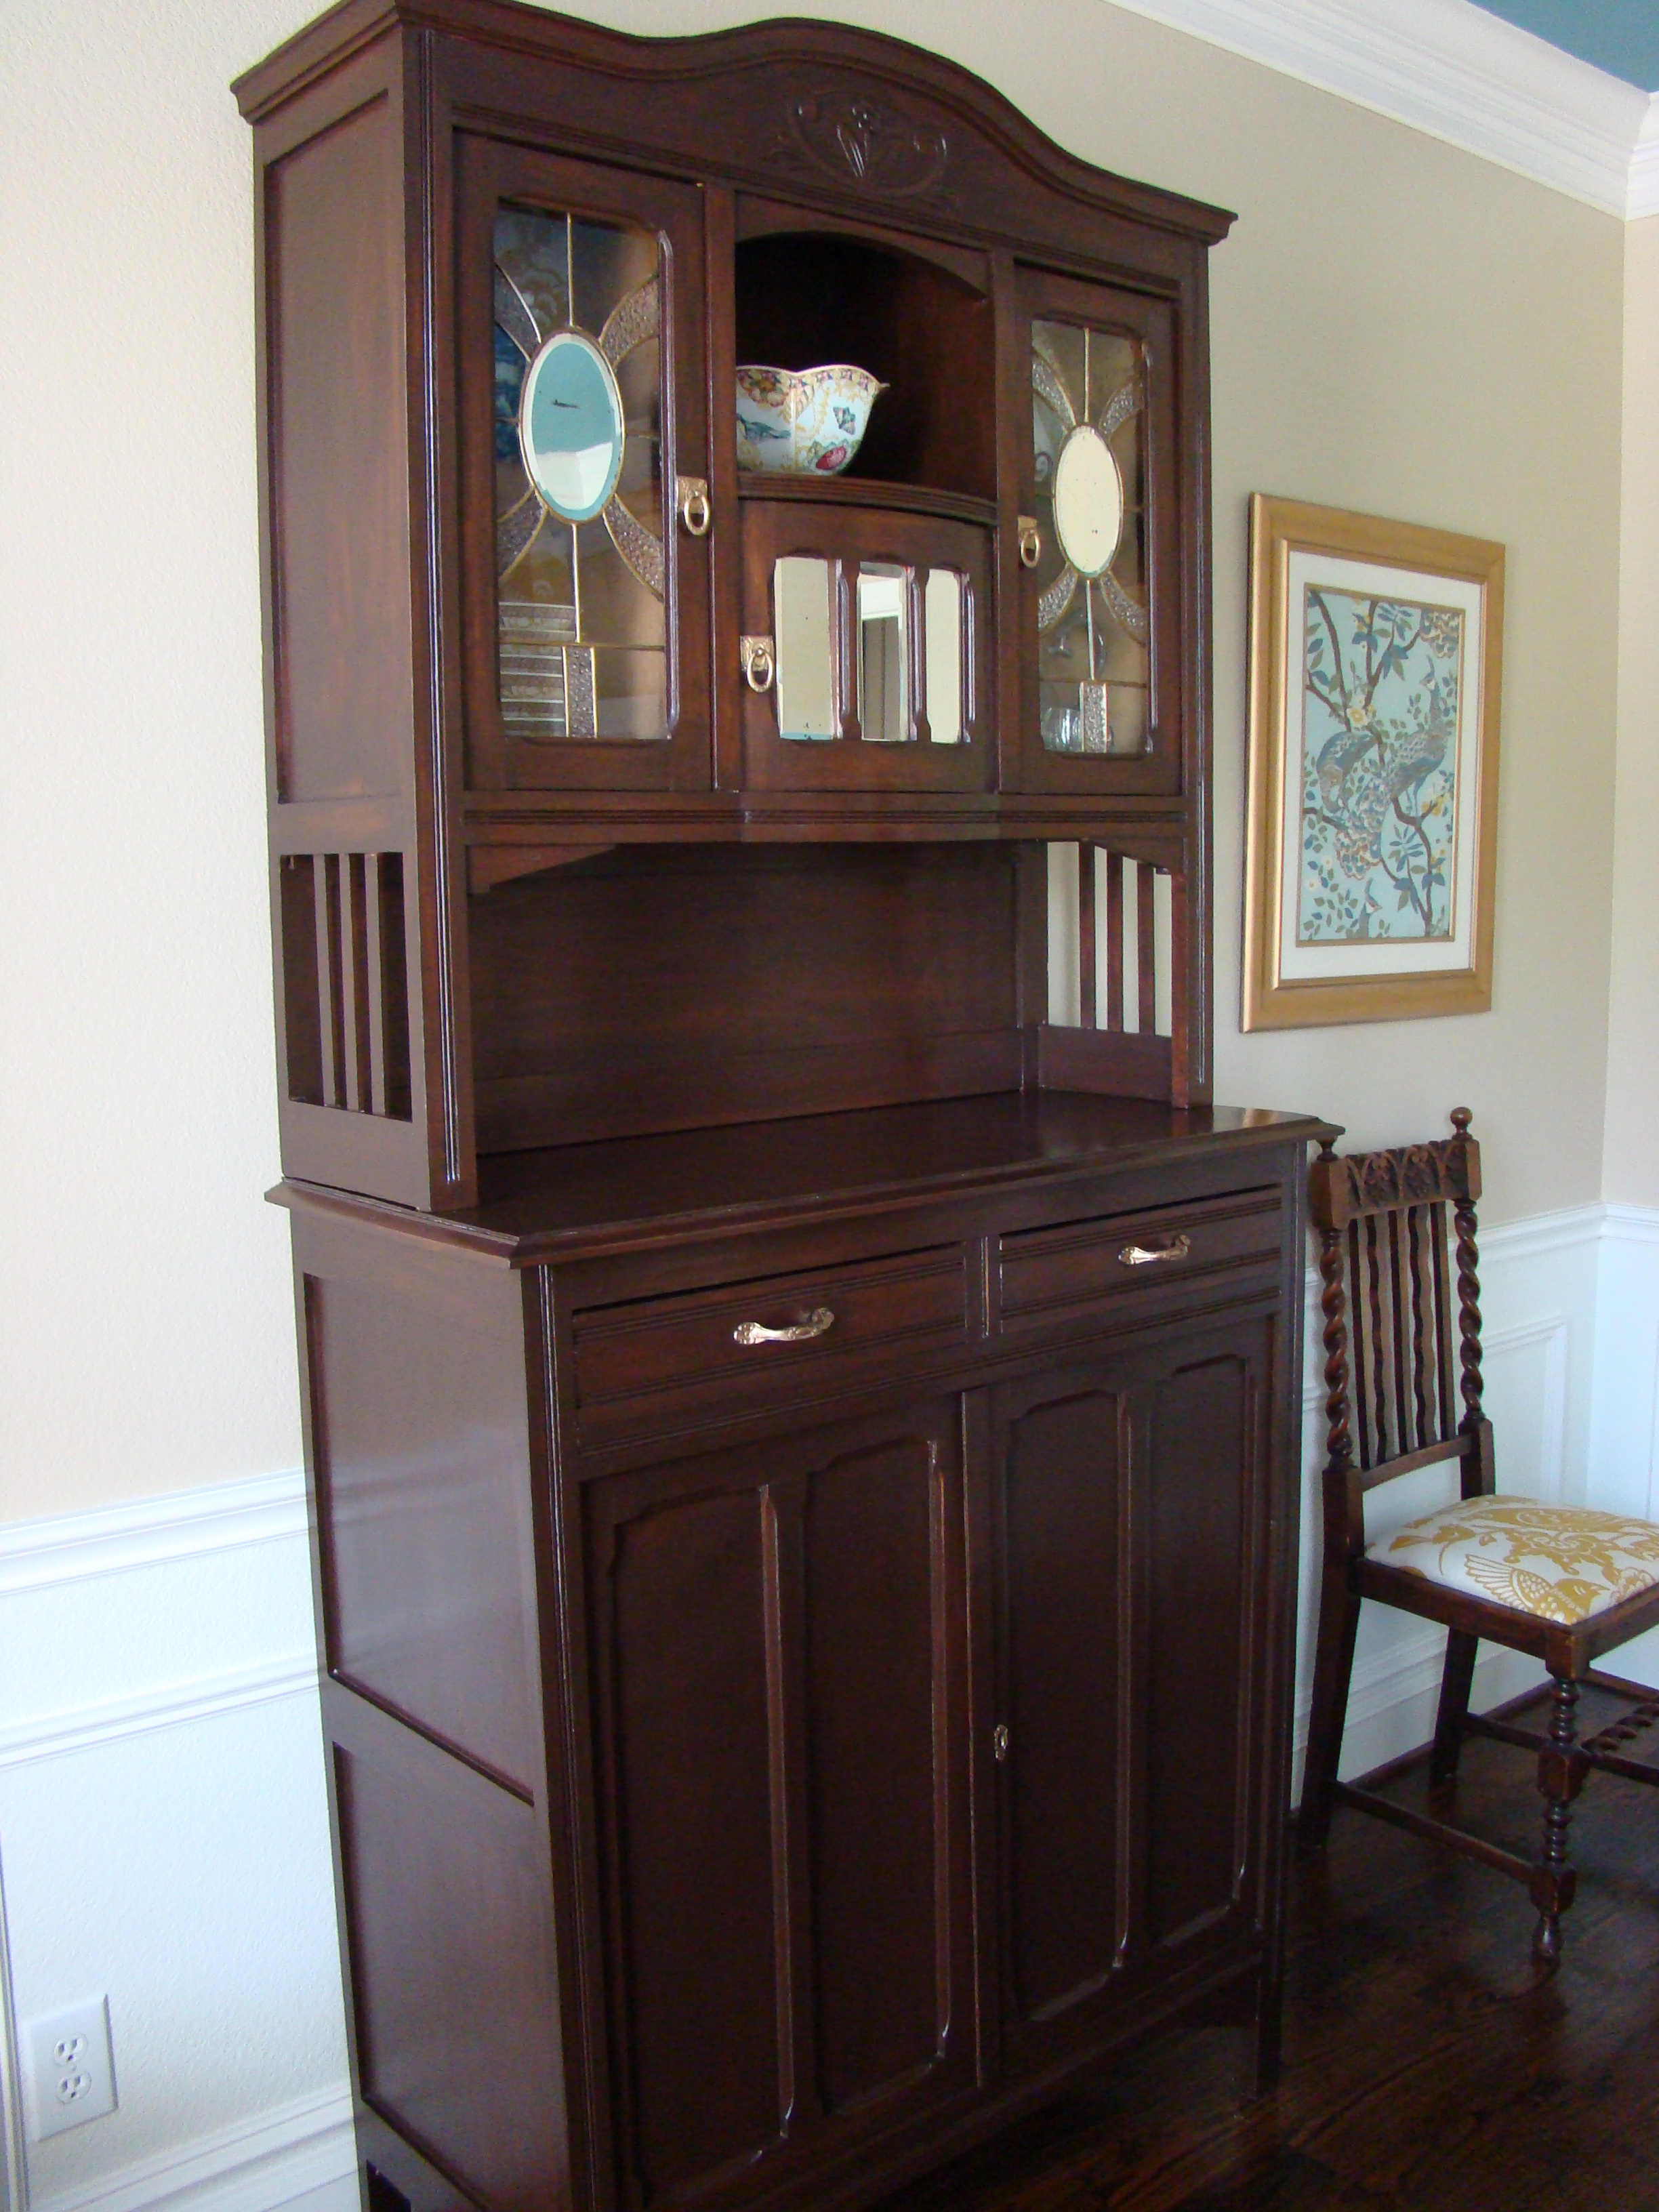
Isn’t she beautiful?! So, was refinishing this piece in a garage when it was eleventy billion degrees worth it? You bet! Not only did I sweat off 5 pounds (bonus!), but I have a piece that I will be proud of for years to come.
If any of you happened to read the “About Me” section of my blog (and who wouldn’t want to read that?), you may have noticed the mention of my father’s mother. She was a cooking, cleaning, gardening, sewing, hardware store owning, garage sale frequenting, furniture repurposing superwoman. And she still managed to have plenty of time to be a doting wife, mother and grandmother. Grandma was amazing.
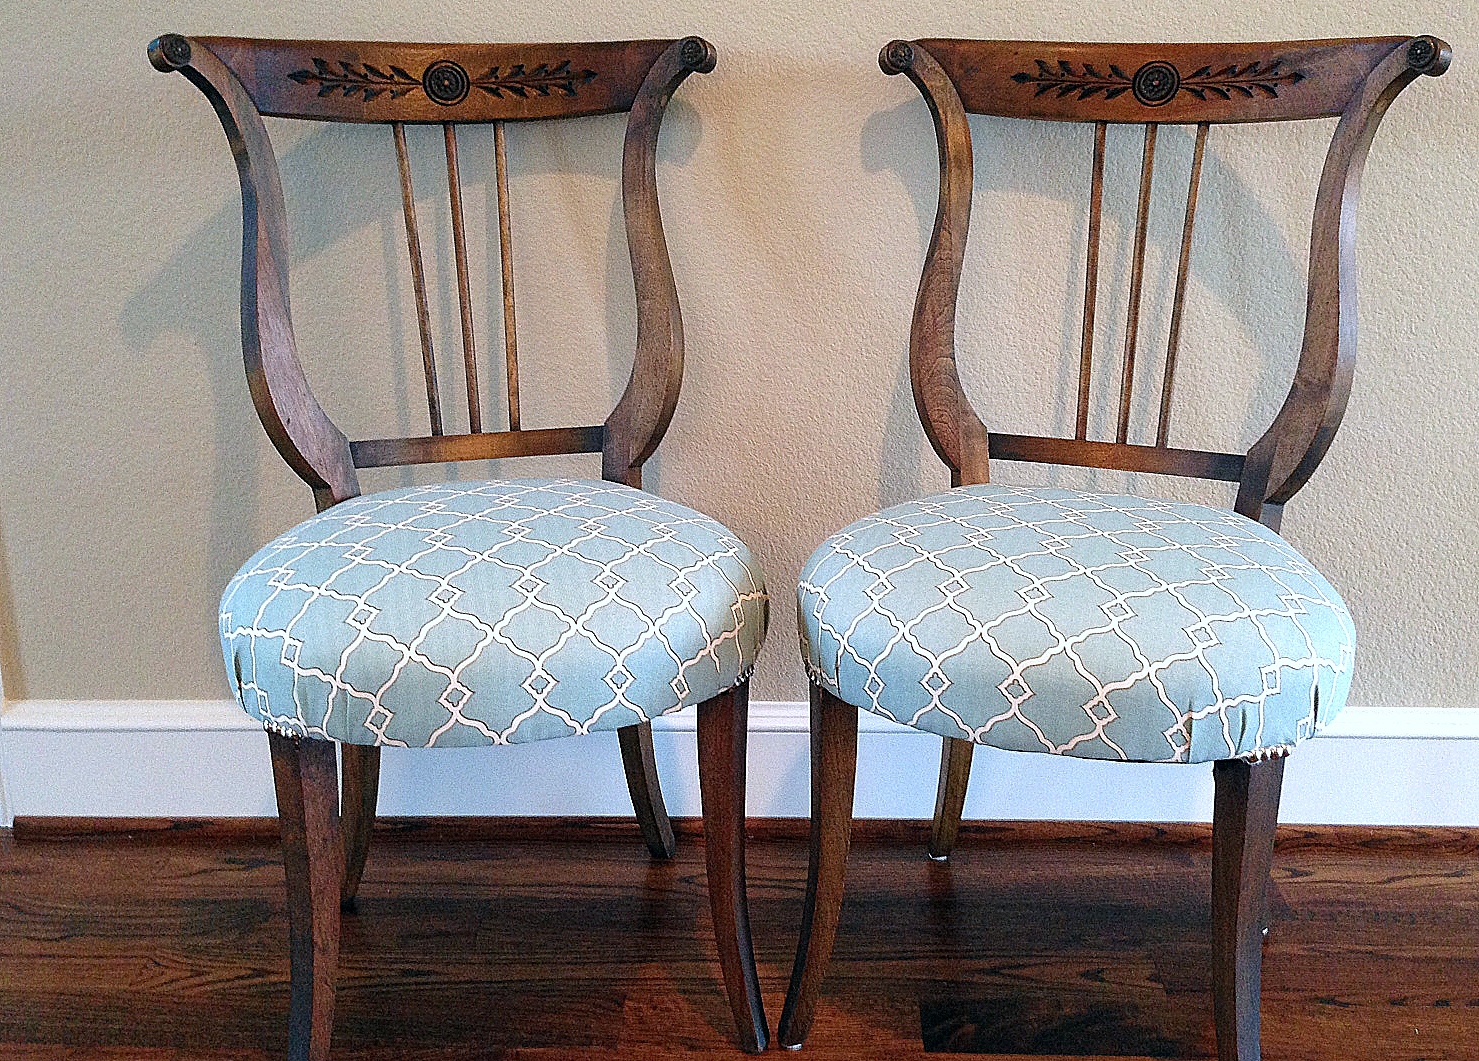
On Christmas Day in 1995, Grandma gave me two antique accent chairs she lovingly restored after purchasing them at a garage sale . When she found the chairs, they were covered in chipped black paint and the seats were covered in worn gold velvet (cue the disco music). My grandmother painstakingly stripped all that nasty black paint off every crevice, sanded and restained the wood and added new fabric and nailhead trim to the seats. She must have spent hours and hours on those chairs…all just for me. Earlier this week, I was excited to find some photos she took of the transformation…
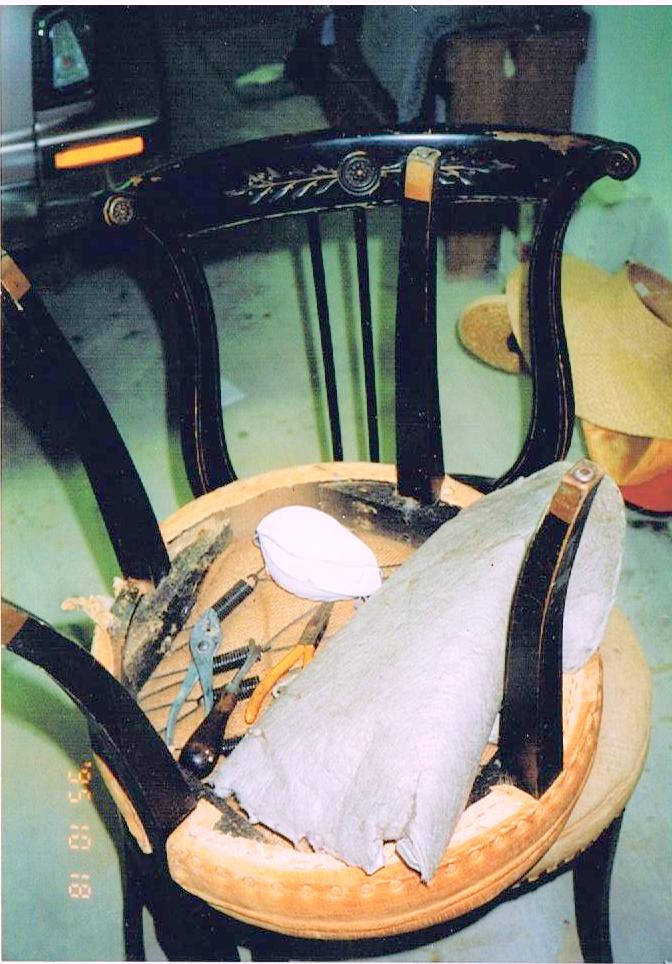

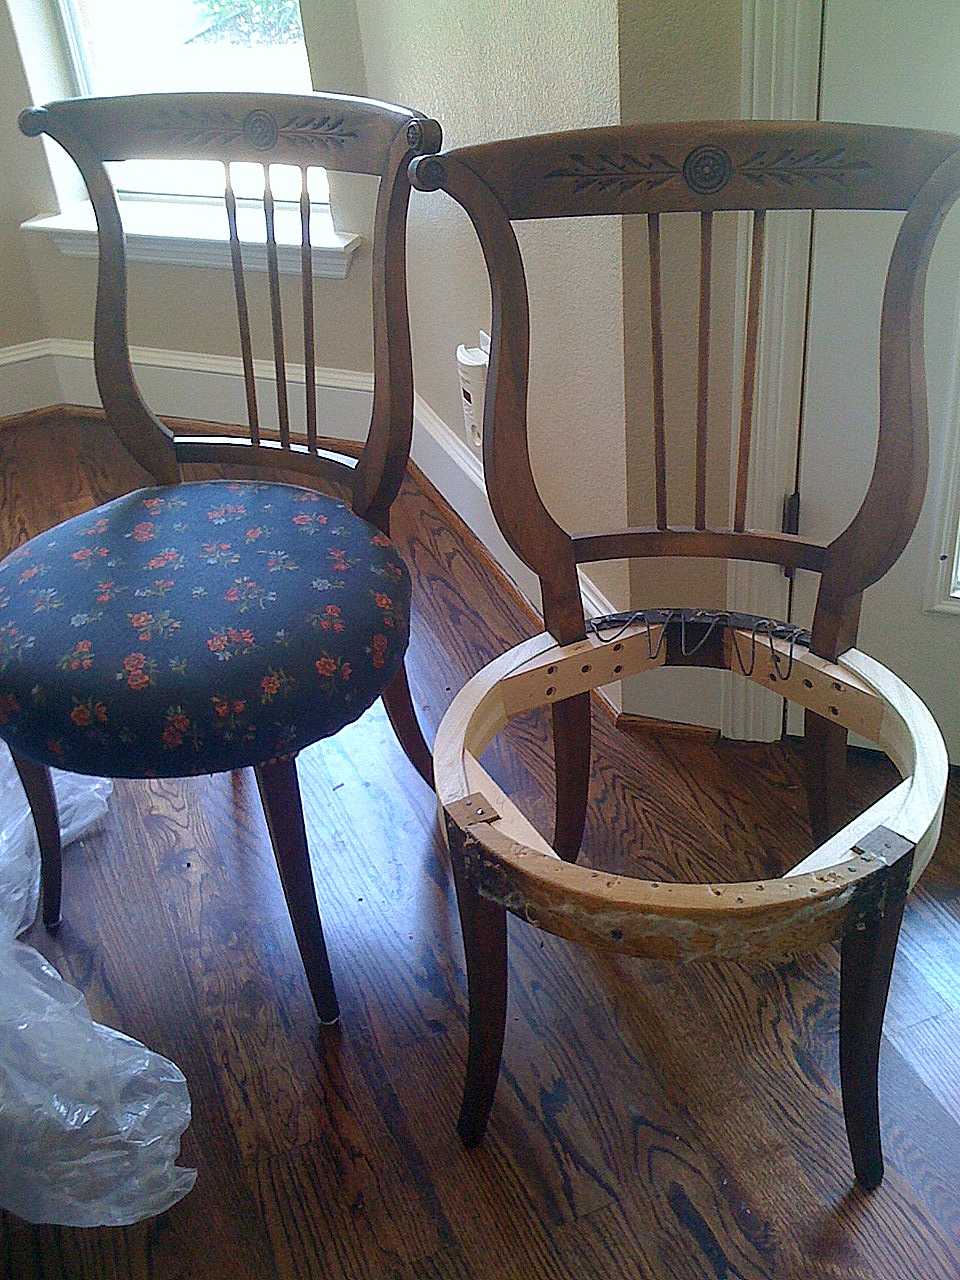
Huge difference! I was incredibly grateful for those chairs and they proceeded to follow me through my 20’s, 30’s, marriage, 2 dogs, 2 kids and at least 11 moves (yes, 11). I guess 11 moves was one too many because one of the chairs broke. I had the broken chair fixed, but for the past two years the chairs looked like this…
And why did they look like that for so long? Well, apparently I was a little stubborn over-confident in my capabilities. When I initially had the broken chair fixed, I asked that the chair not be reupholstered because I was confident I could do it myself . I remember the strange look the furniture restoration employees gave me when they handed over the bag filled with what was left of my chair. I thought nothing of it until a few months later when I decided I would do my grandmother proud by reupholstering my chairs myself. Um, not so much. I eventually opened up my bag of chair guts and found this…
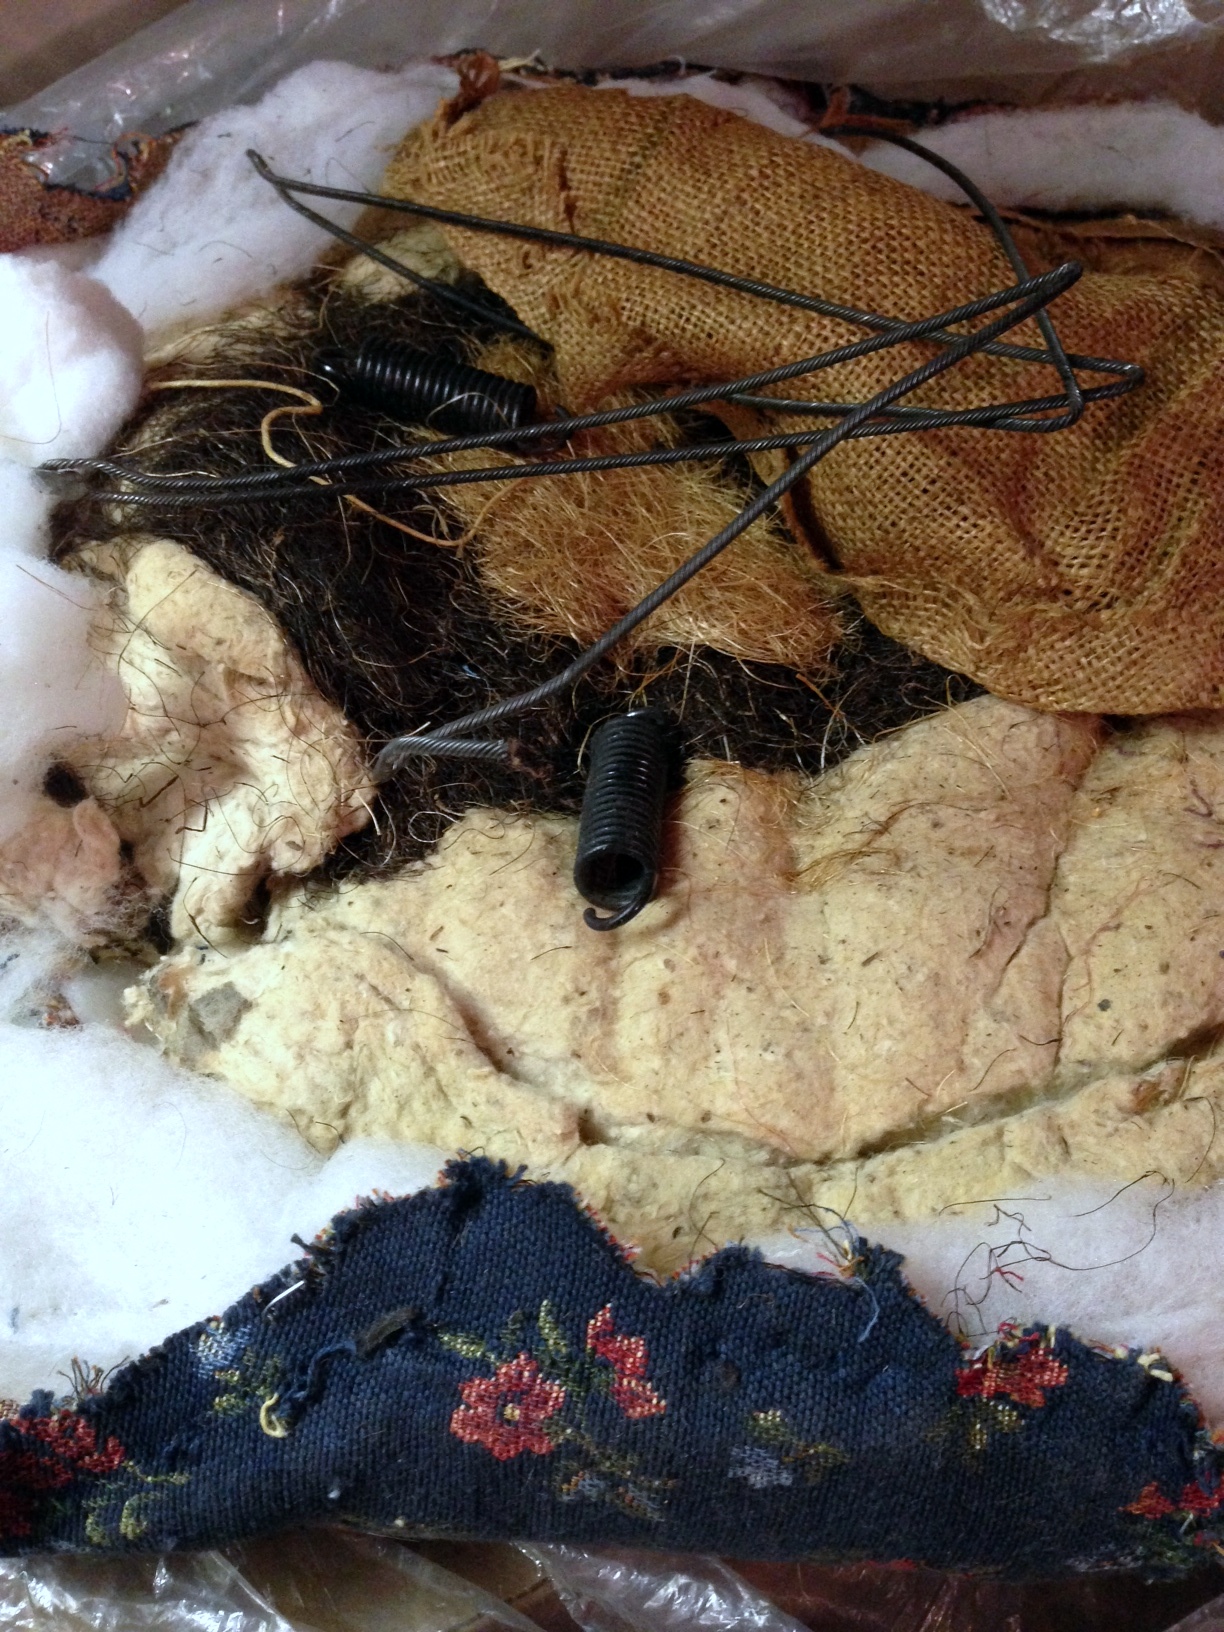
Gross. Yes folks, you are looking at a combination of 100 year old horse hair, straw, cotton, burlap, rusty wire and metal springs (and a few 100 year old dust mites to boot). Sooooo, I was just a tad in over my head (sorry Grandma!). And what did I do about it? Nothing. I just hid the chairs away.
Finally, a couple of weeks ago I realized it was now or never for those chairs. I had to do something with them. My practical Grandmother would not be happy with me for letting two perfectly good chairs go to waste. Plus, she worked so hard on them! So, I took the chairs back to a furniture restoration place where they were yet again returned to their former glory (minus the 100 year old dust mites). So, here they are in their new homes …fresh and clean and with new upholstery…
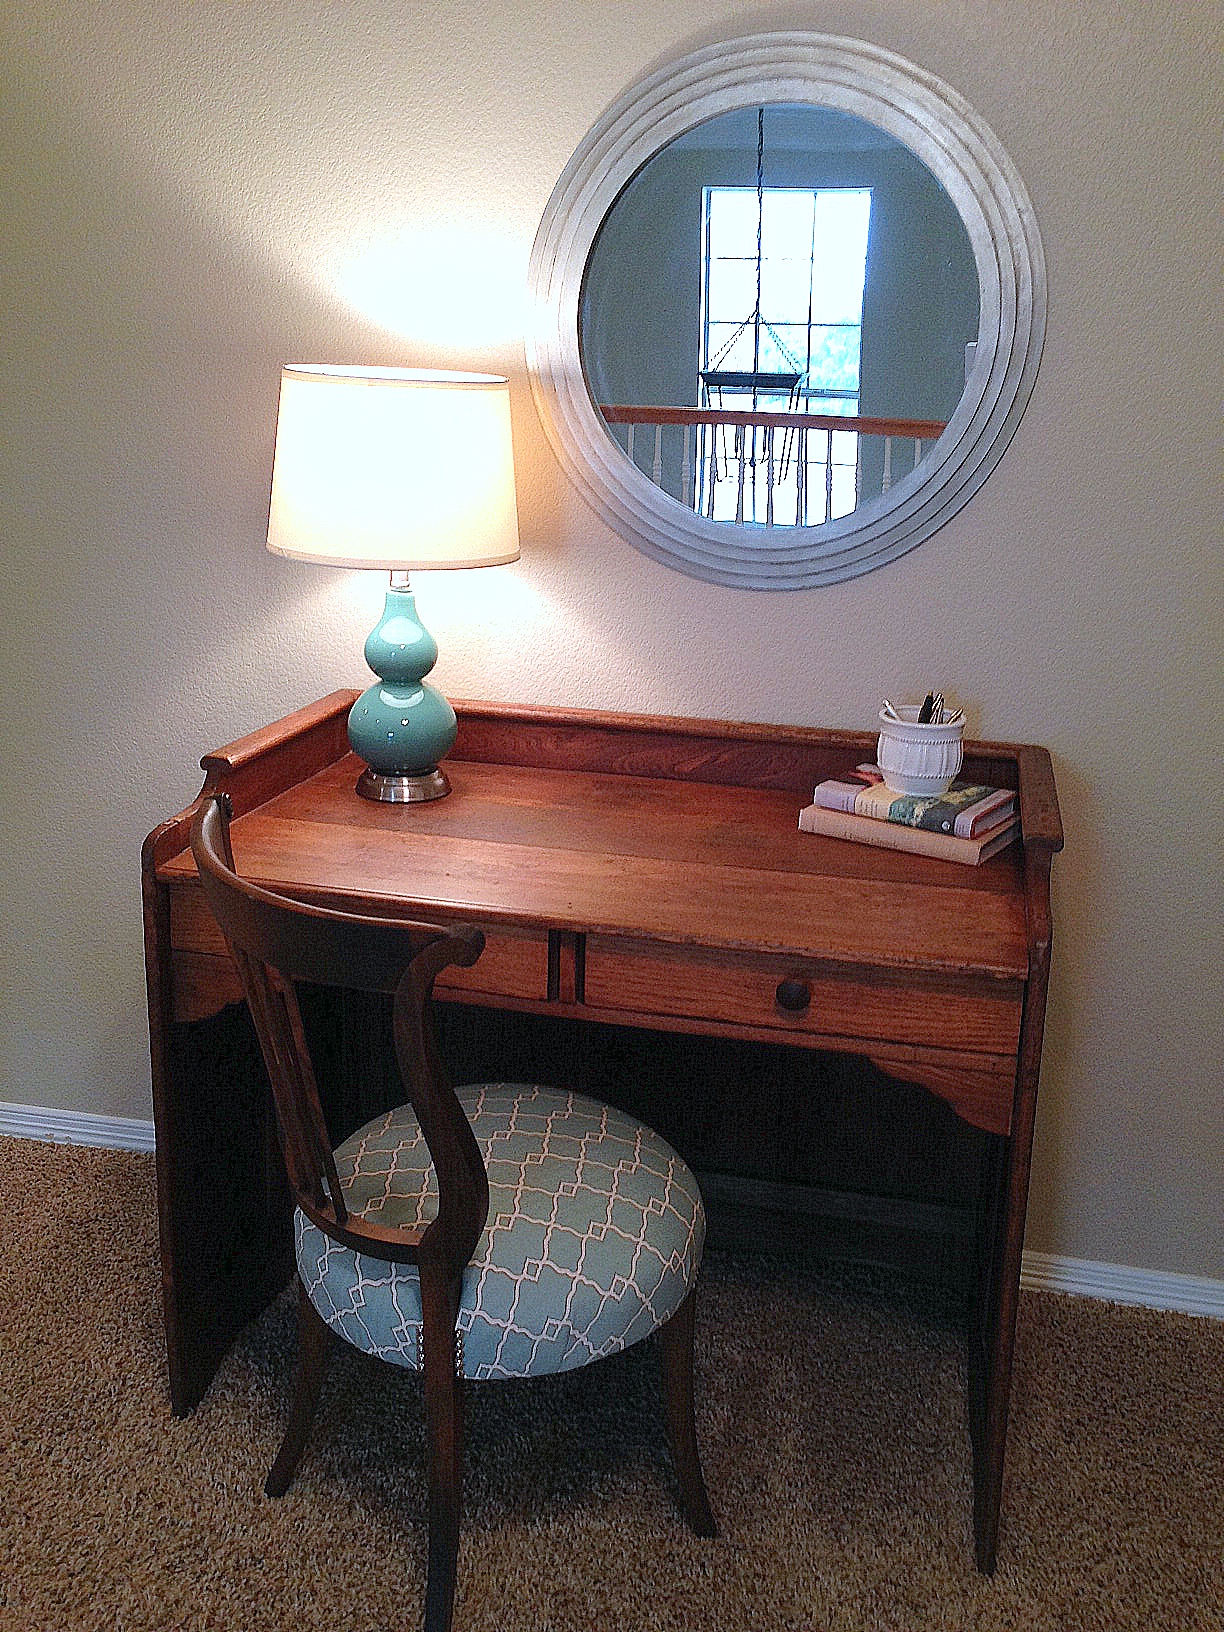

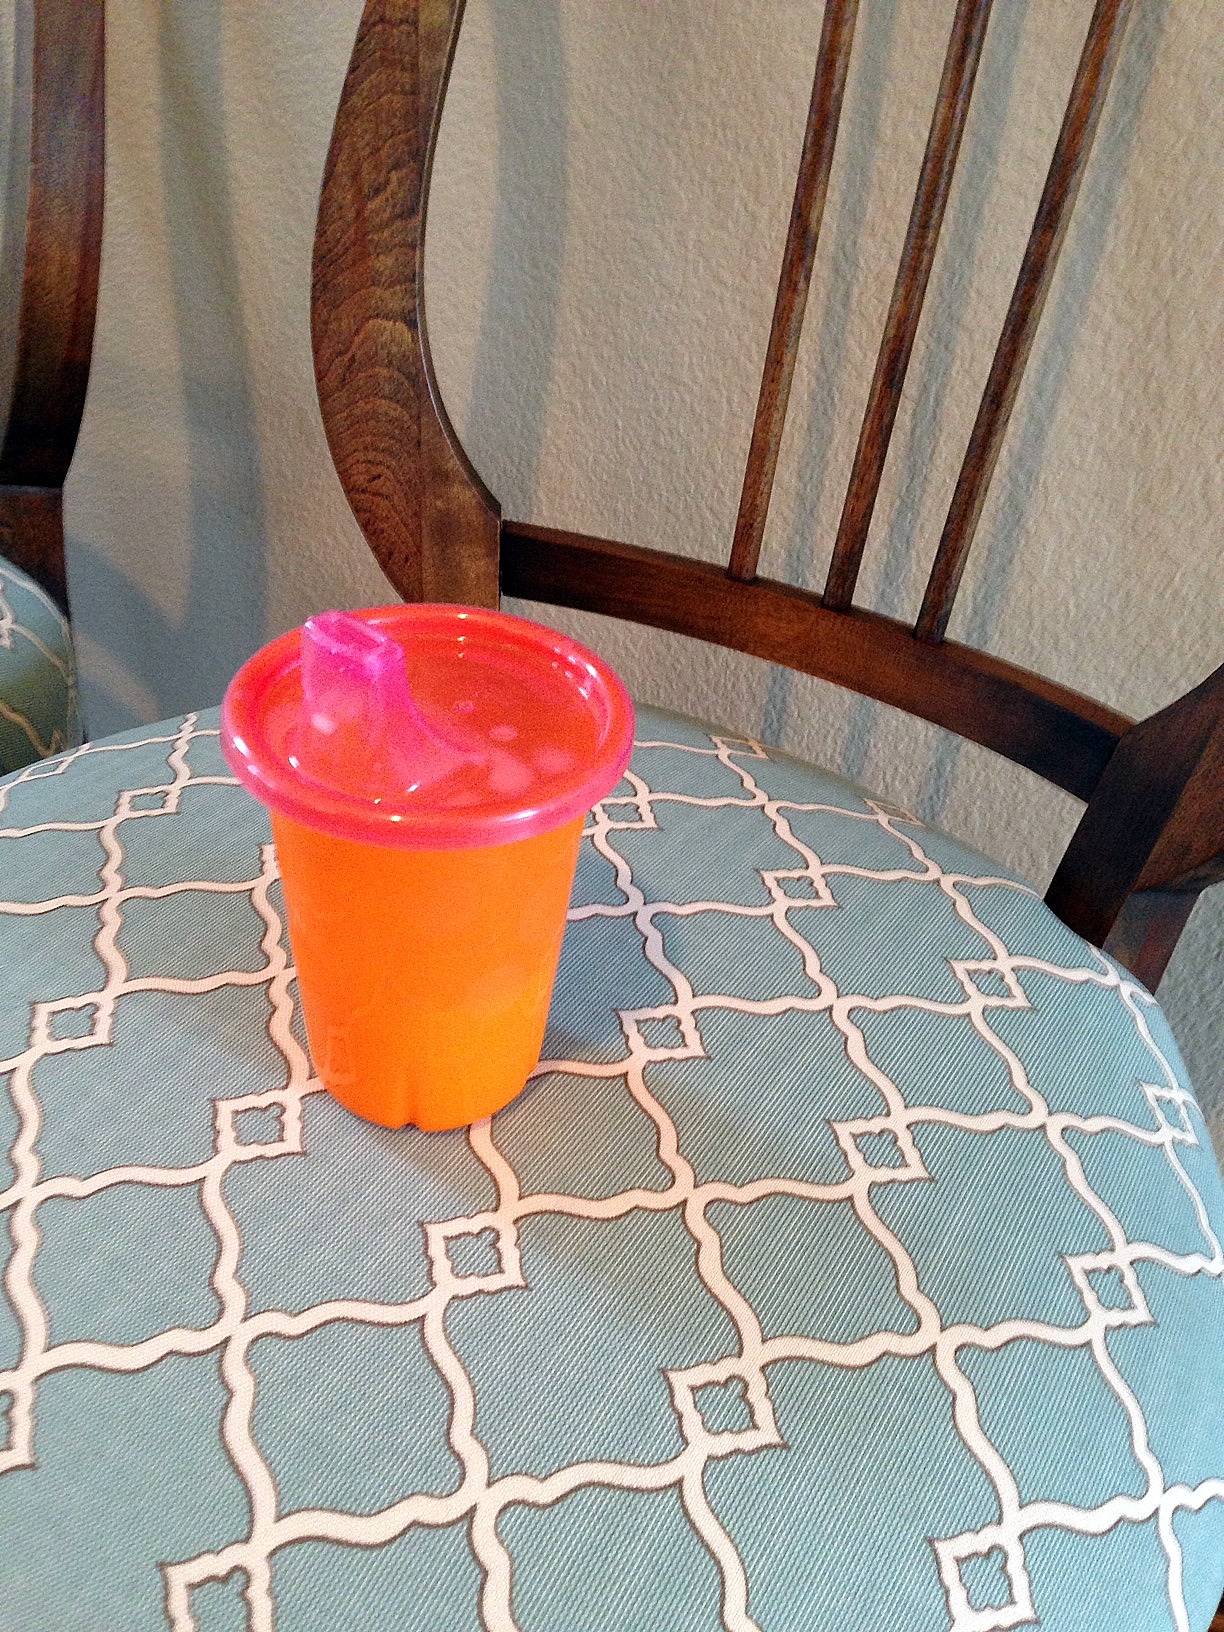
The chair on the left now lives in my landing and sits near my freshly painted armoire (you can read about that project here). The chair on the right now lives next to my bed (ignore the paint chip you spy on tucked in one of the frames – yes, that paint chip makes my husband very nervous). Also, if anyone is curious, the fabric is Waverly’s Chippendale Fretwork in Mineral. It’s an outdoor fabric that is made to withstand sun, mold, mildew and sippy cups.
Grandma would appreciate the durability of this fabric immensely. Oh, and just so I can say I didn’t completely cheat by having someone else do the reupholstering, I did freshen up the wood by giving it a much needed “drink” of Feed-N-Wax. It’s an excellent product that protects and brings out the natural beauty of wood. All you have to do is apply it with a clean cloth, leave it on for twenty minutes, then buff it with another clean cloth. Super easy…and fast (Note: This is my own opinion. I am definitely not getting paid for any endorsements).
Anyway, Grandma, thank you for your inspiration and for giving me my beloved chairs. They make me smile and I think of you each time I see them. I hope they will continue to have tales to tell as I one day pass them on to my girls. I love and miss you to pieces!
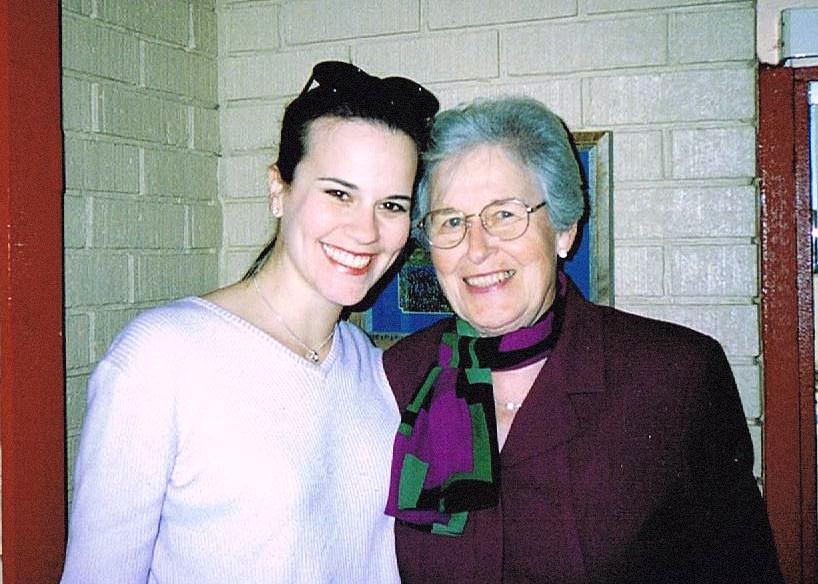
My grandmother and me circa 1998
fashion by sarah marcella
All Things Quilty
US History on a personal level
Re-Imagine Your Furniture
Remodeling, decorating and updating at home and in the garden
A WEST KNOXVILLE MARKET
one girl trying to paint herself out of a corner
