
I’ve lost count of how many projects I’ve worked on since we moved into our house two years ago. And each time I completed a project I thought to myself, “I should put pictures of this on a blog or something so I can keep track of what I have done.” Well, I’m finally getting around to doing just that.
So, where do I begin? Logically, you’d think I’d post details of my first project, right? Wrong. You will soon learn I’m an unorganized mess who is technologically impaired. So, instead of flipping though thousands of older photos on my phone (2,109 to be exact…yes, I know I have a problem), I’m going to show you the project I did last week (and yes, I know I also need to take photos with a “real” camera, but honestly, I’m a crummy photographer no matter what equipment I use).
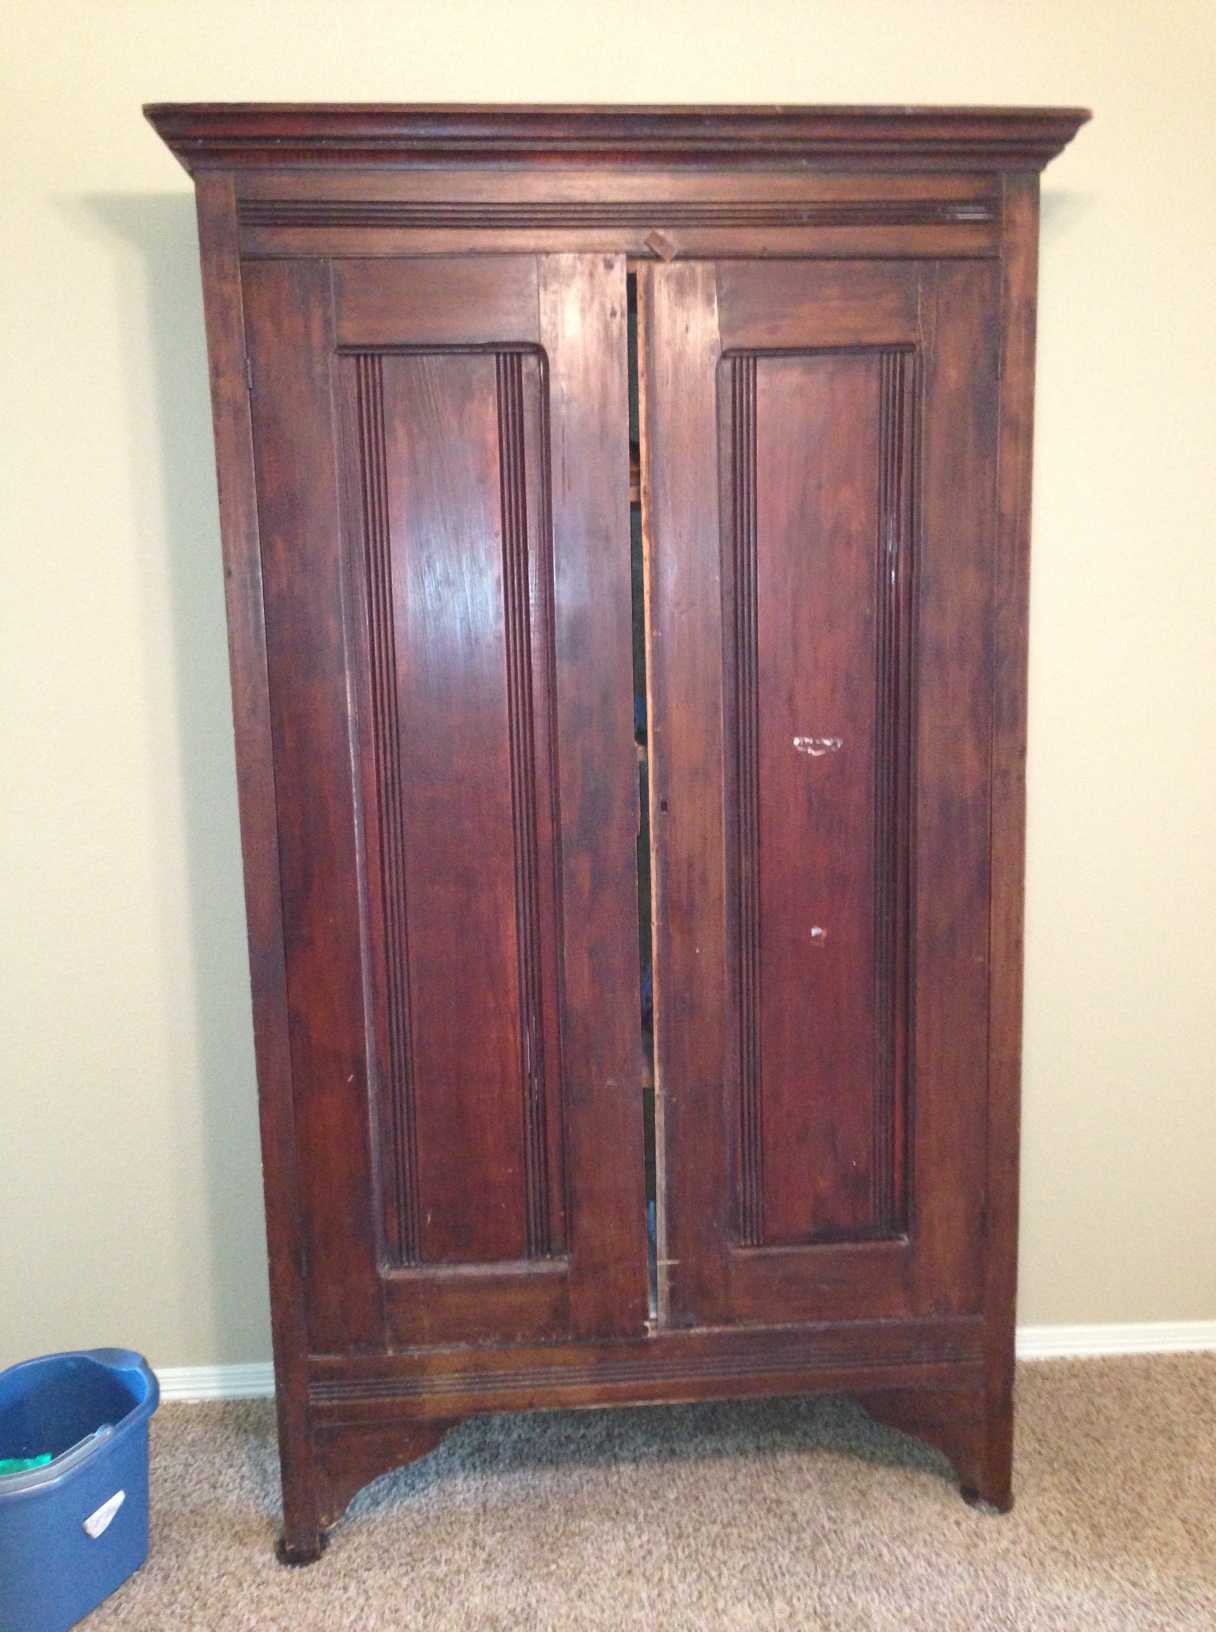
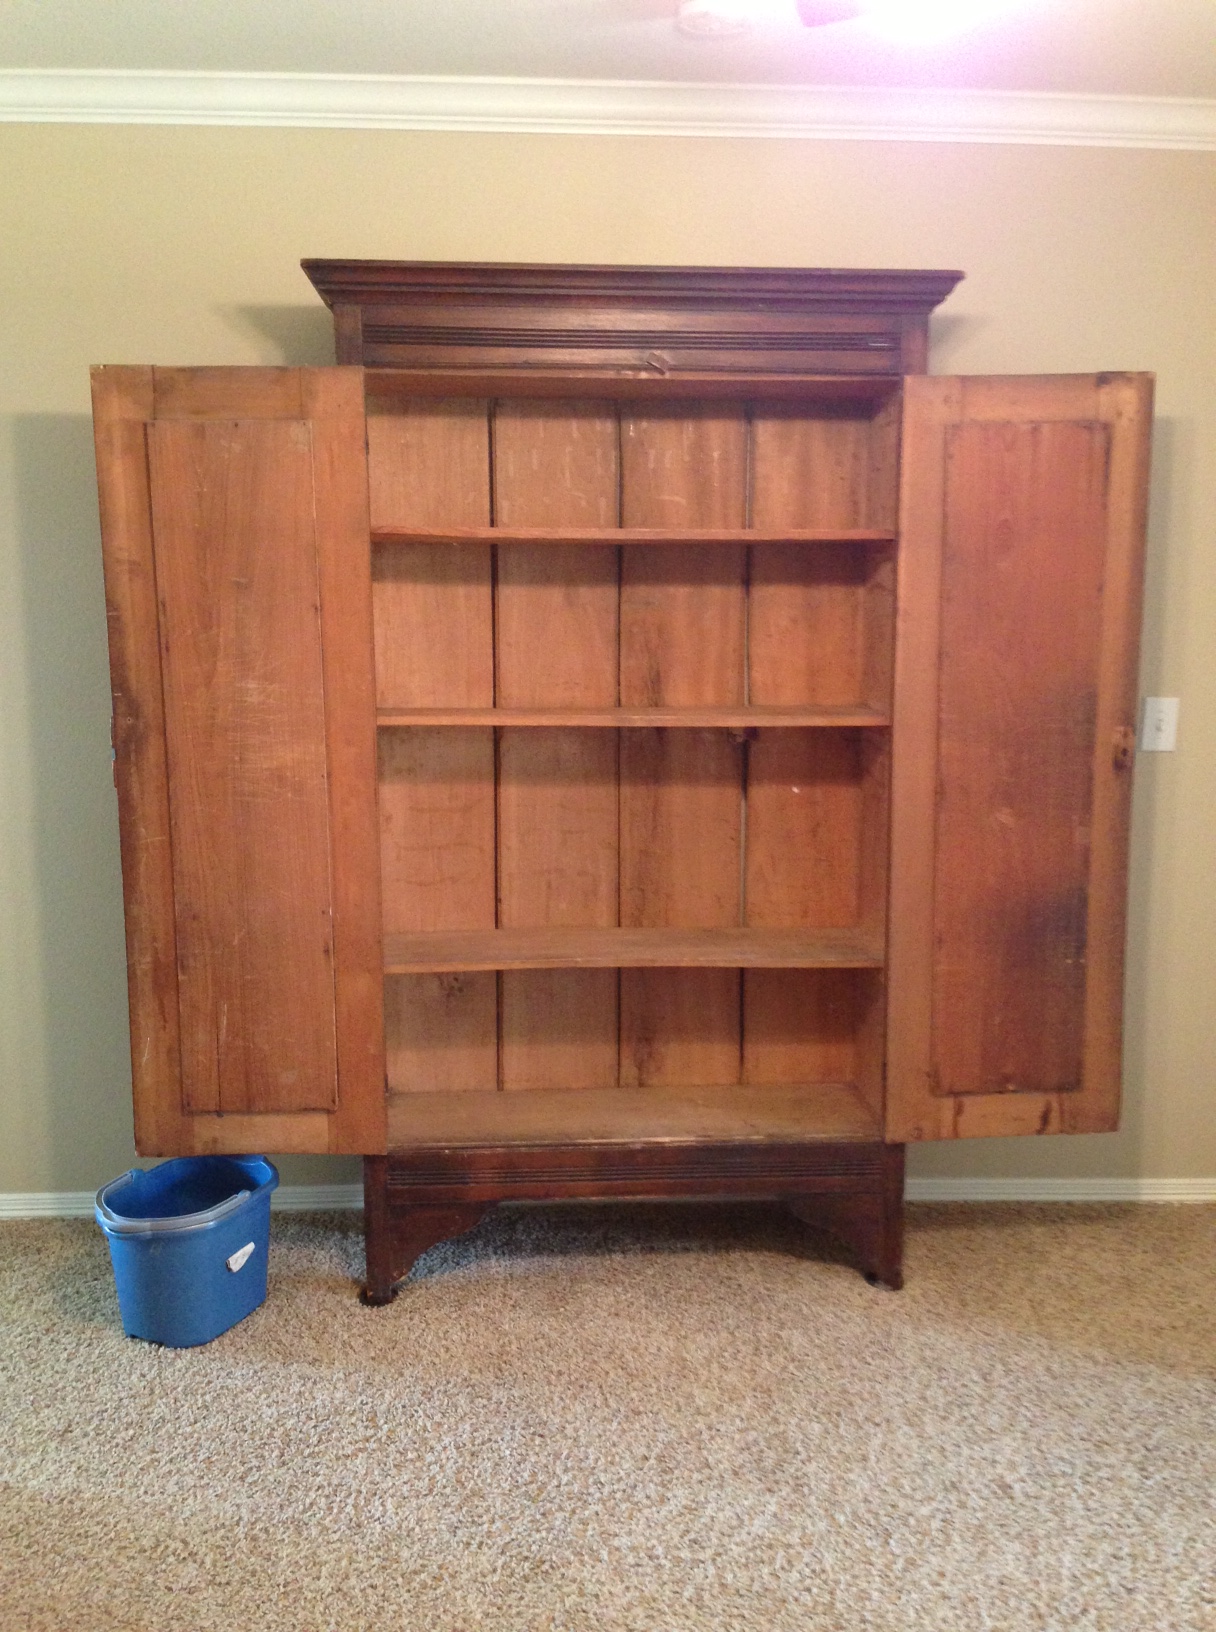
Anyway, meet the armoire my Aunt generously gave me. It’s huge, it’s heavy, it’s old, it’s missing pieces, it’s musty… I love it! I adore antique furniture. They have character and a story to tell. What’s not to love? Here is the old gal before I got my hands on her…


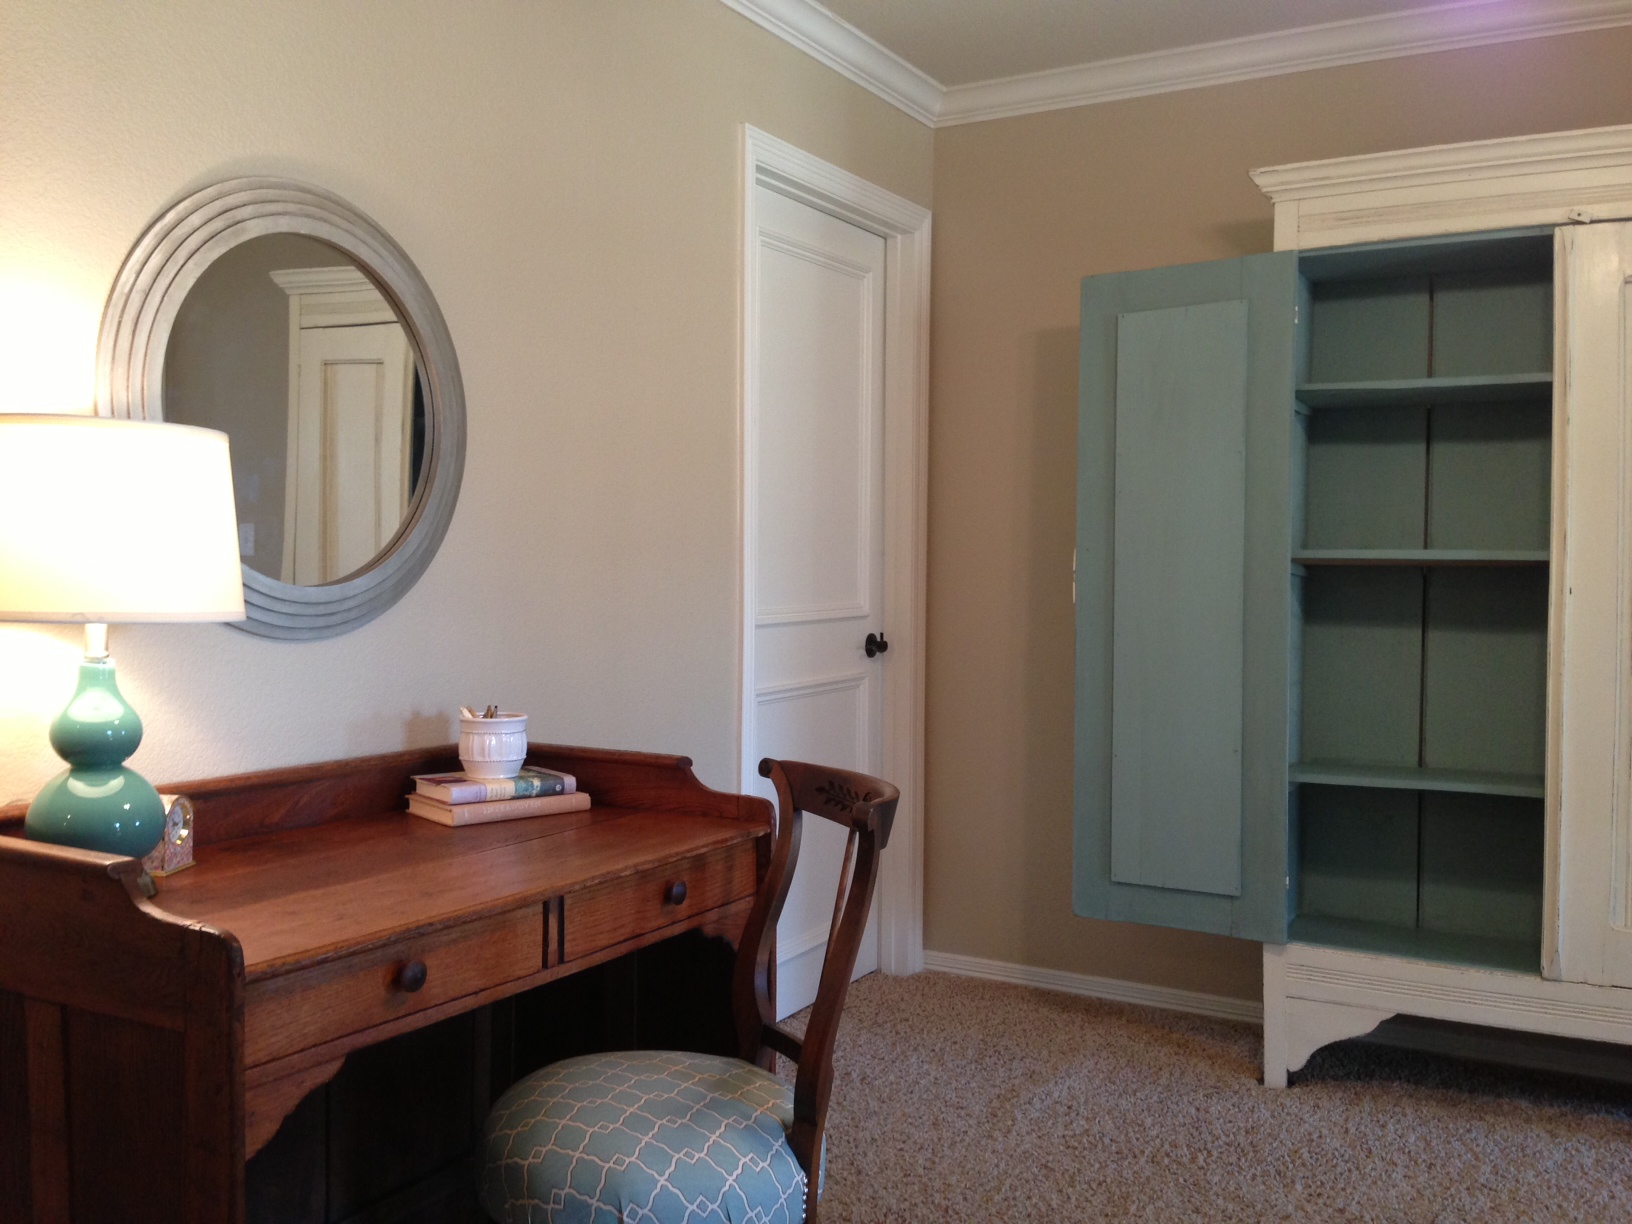
And after a few days of TLC…


Ta-Dah! She is now ready to hold games and puzzles for my two little ones. You might ask how I did this project without lugging this lovely little beast downstairs and into the garage? I used Annie Sloan Chalk Paint (http://www.anniesloan.com/).

It’s brilliant…Brilliant, I say! It’s a water based paint with no fumes and super easy clean up. The best part is that NO SANDING OR PRIMING IS NECESSARY (which is why I got to paint this little lady indoors)! Plus, a little goes a long way because you can thin it with water. Here are the steps I used:
- Cleaned the entire piece with odorless mineral spirits (I wore neoprene gloves and used shop towels to wipe it down).
- I filled a few old nail holes and chips with sandable wood filler.
- I admit, I did sand a few rough spots a little.
- Applied 2 coats of Annie Sloan Chalk Paint in Old White to the exterior and 2 coats of Annie Sloan Chalk Paint in Duck Egg to the interior (I applied the paint with an old chip brush). Note: The second coat goes on much smoother if you “kiss” the brush with a small amount of water before dipping it in paint. Also, I let each coat dry overnight. Now, this stuff dries crazy fast, but I honestly just didn’t have the time to do 2 coats in one day (keep in mind I have two small kiddos).
- After the paint dried, I added one thin coat of Annie Sloan Wax (again, I just used an old chip brush to apply the wax).
- Once the first coat of wax was dry, I took my trusty coarse sanding wedge and distressed the edges of the piece. Keep in mind distressing isn’t necessary, but this armoire is so primitive I thought it would look best with the distressed detailing.
- After distressing, I added a second thin coat of wax.
- Finally, I buffed the entire piece to a nice sheen with a soft cloth.
The whole project took me about 7 hours total over the course of 5 days. It wasn’t bad at all. And now my my armoire is bright and happy again, which makes me smile.

You go, girl! You are so talented, and I’m glad you are finally sharing that with the world (wide web)! Looking forward to reading about your future projects and being inspired!
I, too, have used Annie Sloan Chalk paint and love how it goes on over old furniture. Keep experimenting and I’ll keep watching!
Don’t you just love it, Claudia? I’ve painted with it several times and find it so easy to use. Stay on the lookout for future posts with chalk paint! And thanks for taking the time to read my blog! xoxo
Beautiful job on the armoir. Would this process work on kitchen cabinets?
Hi, Laura! Thank you for your kind comment on the armoire! I’m so glad you like it! Also, I am happy to report that Annie Sloan Chalk Paint can indeed be used on kitchen cabinets (Hooray!) The Purple Painted Lady has an excellent FAQ section on using chalk paint (you will find a section about using the paint in kitchens toward the end of the page). Please let me know if you give it a whirl. I would love to see the end result! – Jess
Wow! I’m impressed!
LOVE your projects Jessica!!! I’ve been thinking about trying the Annie Sloan chalk paint for awhile and think I’m actually going to dive in this week! Can’t wait to see what you post next 🙂 Adding yours to my morning blog roll 🙂
Becky, you should definitely give the chalk paint a try! Let me know about any future projects. And thank you for reading my ramblings. 🙂 Love to you and your sweet family!